
Explore interior trends, AI design insights, styling guides and real transformations
Pine Cone Christmas Decor: Eco-Friendly Ideas for European Homes
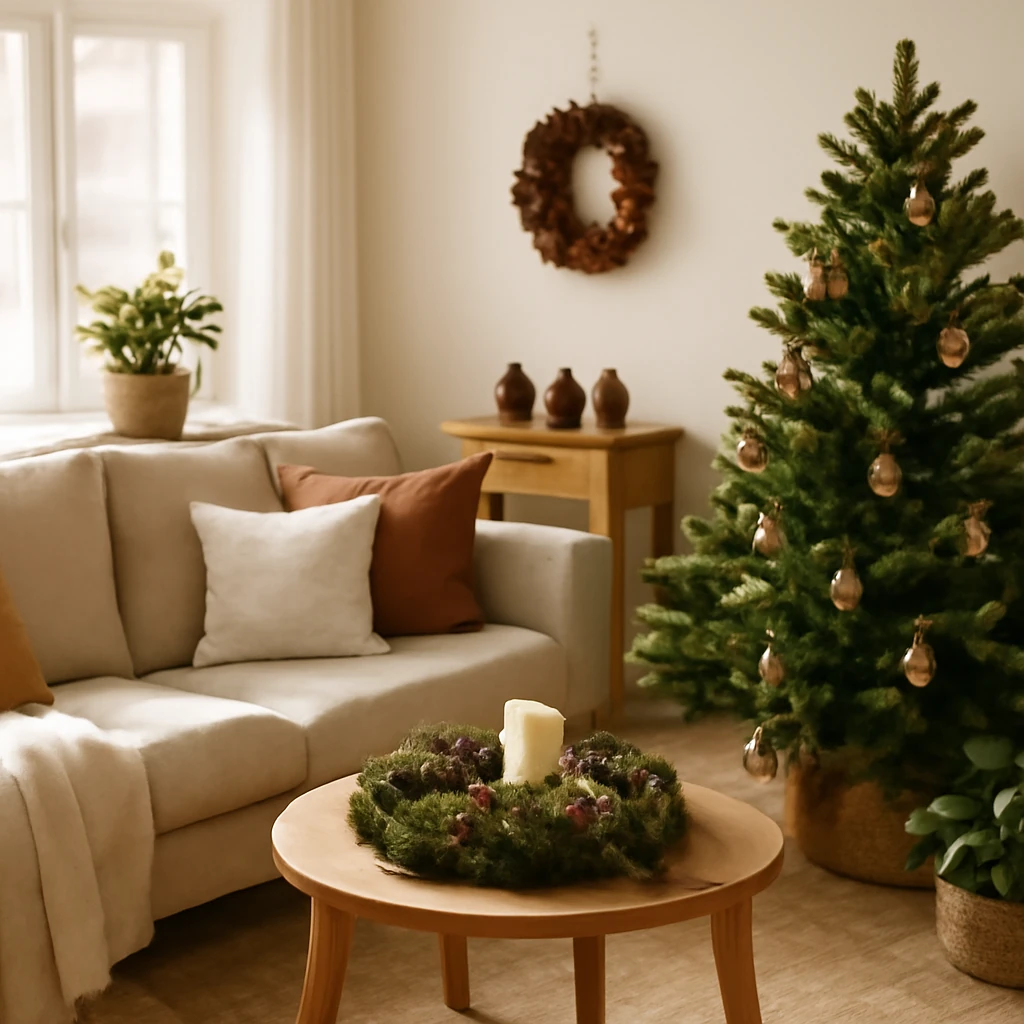
Introduction: pine cones as a low‑cost, sustainable festive resource
Across Europe, the Christmas season is a time for warmth, texture and craft that speaks to our shared appreciation for natural materials. Pine cones, lying quietly beneath evergreen forests, offer a practical and affordable starting point for festive decor. They are easy to gather in many parts of Europe, require minimal processing, and age gracefully when stored properly. This guide explores how to transform pine cones into enduring decorations that are stylish, child-friendly and kind to the environment. It also considers the broader European context of sustainable living, seasonal traditions and careful sourcing, so your decorations harmonise with both aesthetic taste and ecological responsibility.
Why pine cones work so well for Christmas decor
Pine cones have several qualities that make them a favourite for European homes during the colder months. They bring a natural texture that pairs well with timber, wool and metallic accents. Their organic form adds sculptural interest to shelves, mantels and dining tables, while their resinous scent can evoke the woods without overpowering a room. Most importantly, pine cones are a low‑cost, readily available material that can be used year after year, aligning with broader European goals of durability, waste reduction and reuse.
- Natural and non‑toxic: sourcing pine cones locally reduces transport emissions and avoids synthetic materials or finishes that may off‑gas or wear poorly over time.
- Longevity: when cleaned and dried correctly, pine cone decorations resist discolouration and crumble, allowing them to be part of festive displays for many seasons.
- Aromatics: the subtle resin scent adds a seasonal atmosphere without the need for heavy artificial perfumes.
- Affordability: pine cones are often free or inexpensive to collect, with only basic craft materials required for embellishment.
- Family-friendly: simple projects can engage children in creative making, developing fine motor skills and imagination while teaching practical sustainability.
Preparing the material: from forest floor to festive display
Before you transform pine cones, a few practical steps ensure the final pieces are durable and safe for homes with children or pets. The goal is to remove dirt, reduce the risk of mould and insects, and preserve the cones so they hold their shape during display.
What you need to do
- Carefully inspect the cones for signs of mould, insects or damaged scales. Use a brush to loosen debris and wipe clean with a damp cloth if needed. Let them dry completely before storage or use.
- If the material is dusty or damp, rinse them in lukewarm water and lay flat to dry. A drying period of 24–48 hours in a warm, well‑ventilated space helps ensure no moisture remains that could lead to mould later.
- To speed up the opening (or closing) of scales for specific designs, place the cones in a low‑temperature environment. A gentle warm oven setting (no more than 90–100°C) for a few minutes can encourage scales to separate slightly, but monitor closely to avoid scorching. If you prefer to avoid heat, allow natural conditioning to occur over several days with adequate air circulation.
- Disinfection can be achieved by soaking the harvested cones in mild soapy water or a diluted vinegar solution (about one part vinegar to one part water) for around 30 minutes, then rinse and air‑dry completely. This helps reduce surface bacteria and insects before use.
- Prevent mould and deters insects by storing finished pieces in a dry, breathable container such as a cardboard or wooden box. Avoid tight plastic bags or sealed containers that trap moisture.
Tip: if the shape or size of a cone isn’t suitable for a particular project, you can gently soak or rub the cone to soften the scales, then pin or tie sections to create the desired silhouette. Work slowly and allow pieces to dry fully before assembly.
Decorative ideas: how to use pine cones across European homes
With a little imagination, pine cones can become the backbone of a broad range of festive decorations, from understated centrepieces to elaborate tree ornaments. Below are ideas tailored for European interiors, balancing beauty, practicality and sustainability.
Ornaments for the Christmas tree
Pine cones can already resemble miniature trees, especially when left in their natural state or lightly highlighted with colour. To create a more refined ornament, you can:
- Attach a hanging loop using twine, ribbon or a small piece of wire, then finish with a light coat of paint on the tips of the scales to evoke frost or snow. Matte paints in white, ivory, pale gold or metallic tones work particularly well against dark green needles.
- Dip or spray the cones in colour - either full‑cone coverage for a bold look or selective brushing on the tips for a delicate shimmer. When spraying, work in a ventilated area and allow ample drying time between coats.
- Enhance with texture: apply glitter, tiny beads or white flocking to create a snow‑kissed effect. Use a clear adhesive or craft glue to fix embellishments securely.
- Seal the surface with a clear, non‑yellowing finish to preserve colour and prevent moisture uptake during storage.
Hanging tips: for a neat finish, thread a small eyelet or loop through the top of the cone before decoration, then tie to branches with a colour‑coordinated ribbon. Stagger sizes for a balanced tree display.
Tabletop or desk centrepieces
A large pine cone, either solitary or clustered with others, makes a striking focal point on a dining table or sideboard. Consider these approaches:
- Create a miniature forest by mounting several cones on a sturdy base such as a cork, wooden disc or ceramic tray. Vary the height with small stands or inverted, cut–out bases to add depth.
- Combine with natural elements: sprigs of evergreen, dried orange slices, nuts and cinnamon sticks to form a fragrant, layered display. Use a plain tray or a shallow bowl to keep the arrangement cohesive.
- Trade tradition for modernism by painting semi‑matte black, charcoal grey or champagne tones and pairing with metallic accents for a contemporary look.
Figurines and characters for festive storytelling
Creative families often enjoy turning pine cones into a cast of woodland creatures and fairy‑tale figures. With a few extra materials, a cone can become everything from a gnome to a snow owl. Practical guidance:
- Base and head: use a larger pine cone as the body and create a head from small clay, polymer or paper components attached with a safe adhesive.
- Details: craft hats, scarves or wings from fabric, felt, or paper. Use small craft accessories - beads, pom‑poms, or pipe cleaners - to complete features.
- Face and expression: draw simple eyes or a smile with a fine‑tip marker or paint, ensuring the ink or paint uses non‑toxic materials for family safety.
Wreaths and door adornments
Pine cones are excellent for wreaths, either as the main feature or as complementary accents to evergreen sprays. A durable approach is to assemble on a wire or cane ring, then bind with natural or coloured twine. Good design practices include:
- Limit the amount of fresh greenery to extend the life of the wreath, or build entirely from pine cones for a long‑lasting, weather‑resistant option that can be kept year after year.
- Incorporate cones of varying sizes to create texture and rhythm. Alternate matte and glossy finishes to achieve a balanced visual weight.
- Attach a simple, unobtrusive hanging ribbon or a discreet hook so the wreath can be displayed on doors, walls or windows without obstructing hinges or clearances.
Festive arrangements and natural sculptures
For additional festive ambience, arrange pine cones in a tray with candles, pine boughs, berries or dried citrus. This creates a warm, scented vignette for living rooms or entryways. When designing a larger display, consider the following:
- Place the arrangement on a tray or flat base to create a cohesive unit that can be moved easily.
- Use a non‑slip mat or a shallow dish of decorative stones to stabilise the display and reduce the risk of tipping.
- Experiment with height by adding small pedestals, candle holders or stacked blocks to lift certain cones above the base for a sense of depth.
European sourcing, sustainability and practical sourcing guidance
In many European regions, it is both practical and responsible to source pine cones locally or from well‑managed forests. When collecting cones, follow local guidelines to respect wildlife and seasonal cycles. If foraging from public space, ensure you do so with permission and consider the ecological impact - always pick responsibly and avoid disturbing nesting sites or delicate flora.
For those who prefer to purchase, look for supplies that are produced with sustainability in mind. Seek products from craft suppliers that emphasise responsibly sourced materials and reduced packaging. If you choose colour, coatings or glitters, select waterborne, non‑toxic paints and glitters designed for safe indoor use. Where possible, buy in small batches to minimise waste and keep your decorations manageable.
Durability should be a guiding principle. Avoid decorations that crumble or shed excessively, since this leads to repeated cleaning and replacement that defeats the purpose of a long‑term, eco‑friendly display. A simple rule is to use paint and finishes that resist chipping and moisture uptake. This ensures the pine cones can be stored and reused across multiple festive seasons with minimal maintenance.
Care and storage: extending the life of your pine cone decorations
To keep pine cone decorations looking fresh year after year, adopt a simple care routine that protects them from humidity, dust and temperature fluctuations. Consider these recommendations:
- Store decorations in a dry, temperature‑stable space with good air circulation. Avoid damp basements or unheated attics where wood and natural materials may warp or develop mould.
- Use protective tissue or cloth bags, or a sturdy box with dividers to prevent pieces from rubbing together and chipping. Label boxes by project or finish so you can locate items quickly the following year.
- A light dusting with a soft brush before storage helps maintain a clean appearance. If a gloss or metallic finish has been applied, plan a gentle wipe with a slightly damp cloth for maintenance, taking care not to remove decorative coatings.
- Refresh the look annually by adding new accents, re‑staining open tips or applying a fresh coat of colour to match evolving interior schemes. Small updates can significantly extend the appeal of a longstanding collection.
Safety, allergies and practical considerations for homes across Europe
Although pine cone decorations are generally safe for most homes, it is wise to consider a few cautions. Some individuals may be sensitive to resin scents or to dust and mould associated with natural materials. If household members have known allergies or asthma triggers, you may wish to limit direct contact with raw pine cones, or keep such decorations in well‑ventilated areas. Always ensure that finished pieces are completely dry before bringing them indoors and avoid placing heavy items where they might fall on children or pets.
Another consideration is fire safety. While decorative pine cones are typically non‑combustible when sealed and stored properly, avoid placing them in direct contact with open flames or heating sources. If you intend to use candles in close proximity, opt for flameless LED candles or consider placing the pine cones in a protected, non‑flammable display area.
Practical guidance for the European craftsperson: materials, tools and process flow
In regions with a strong DIY culture, a well‑equipped craft space makes pine cone projects enjoyable and efficient. Below is a practical checklist to help you plan a seasonal crafting session with family or friends:
- Base materials: pine cones of various sizes, natural twine or cotton ribbon, craft glue (not hot glue for all projects), small wires or hooks for hanging, and a selection of paints in matte and metallic finishes.
- Decorative options: glitter, small beads, dried fruit slices, cinnamon sticks, artificial berries, small fabric shapes, felt, paper cutouts, and mineral pigments for subtle toning.
- Tools: scissors, craft knife, pliers, paintbrushes of different sizes, a small spray bottle for finishing coats and a non‑abrasive cloth for polishing finishes.
- Workspace organisation: a clean, well‑lit area with a protective covering to catch glitter and paint, plus a ventilated space when using spray finishes.
Process overview for most decorative projects:
- Sort cones by size and condition, discard damaged pieces.
- Prepare cones as described above: clean, dry and disinfection if desired.
- Plan the finish and colours for the project, selecting tonal palettes that complement European interiors (soft whites, creams, warm ambers or metallics like brass, gold or copper).
- Assemble the piece using a combination of glue, small pins or loops, allow adequate drying time between steps.
- Apply decorative coatings and finishes, ensuring even coverage and thorough drying before storage.
- Package or store finished pieces with padding to prevent chipping over the festive season and beyond.
Inspiration and design notes: harmonising pine cones with European interiors
European homes encompass a broad range of architectural styles, from rustic chalets to minimalist urban lofts. Pine cone decorations can be tuned to suit diverse aesthetics by adjusting colour, finish and pairing with other materials.
- Rustic and traditional interiors benefit from natural finishes, warm whites and earthy browns. Emphasise texture by combining pine cones with rough linen, timber surfaces and simple greenery.
- Scandinavian and Nordic settings pair well with simple silhouettes, restrained colour palettes and subtle metallic highlights. A few well‑placed cones can anchor a restrained tablescape or mantelshelf without overpowering a room.
- Modern European interiors may call for a more graphic approach. Consider monochrome finishes, high‑contrast white or black accents, or a metallic trio to create a contemporary focal point.
Closing thoughts: memories, sustainability and the joy of making
Shaping pine cones into Christmas decorations is more than a decorative craft, it is an opportunity to slow down, involve family and friends, and connect with nature in a season that can sometimes feel hurried. By choosing natural materials, shaping them with care and storing them thoughtfully, you create keepsakes that can be enjoyed for years, reducing waste and celebrating a sustainable, home‑grown approach to festive decorating.
Whether you are a seasoned maker or new to DIY, pine cones offer a versatile canvas for creativity. Start with a plan, select a palette that harmonises with your space, and let the natural beauty of the cones guide your ideas. With patience and imagination, your European Christmas can be warm, stylish and environmentally conscious.
Author and project notes
This guide draws on a broad tradition of natural, affordable, and customisable holiday décor across Europe. It emphasises practical steps, safety and sustainability while encouraging creativity and family participation. The aim is to provide a timeless approach to festive decoration that can evolve with seasons and spaces, rather than becoming a one‑off trend.
You may also like these articles
 Interior Design
Mid-century modern interiors for European homes
Timeless mid-century modern design, tailored for European living
Colour & Materials
Colour strategy for European homes: palettes, proportions and practical tips
A practical guide to colour palettes for European interiors
Tips & How-To
Handmade Planters: Five Simple DIY Ideas for Stylish Pots
Craft chic planters from everyday favourites with five easy DIY ideas.