
Explore interior trends, AI design insights, styling guides and real transformations
The Smart Sequence: Renovating European Homes with Design-First Planning

Getting started: design, scope and budget
Renovating a European apartment demands more than a good eye for colour and fixtures. It requires a clearly defined design brief, a realistic budget and a pragmatic timetable that respects regulatory constraints across different countries and municipalities. In many markets, the journey begins with a comprehensive design project that translates your ideas into a practical, costed plan. A well-prepared design brief shapes every decision to come, from layout and materials to lighting scenes and ventilation routes. It also acts as the backbone for the budget, helping you forecast material orders, trade hours and potential contingencies before the first drill bit is turned.
The design project is not merely a pretty drawing. It is a concrete instruction set that reduces miscommunication with builders, accelerates procurement, and guards the project against costly midstream changes. In European practice, a robust design package commonly includes:
- layout and furniture footprint studies to optimise flow and storage;
- wall finishes, decorative treatments and colour schemes;
- flooring and skirting profiles, underfloor or radiant heating considerations as needed;
- ceiling design and lighting layers for atmosphere and function;
- sanitaryware and plumbing strategies, including venting and drainage layouts;
- ventilation and climate control planning, with energy-efficiency goals in mind;
- planning or feasibility assessments for any structural changes;
- a phased works programme that aligns with a realistic budget.
Commissioning a design project typically takes one to two months for a standard apartment. When major alterations or replanning are involved, municipal or regional approvals may extend the timeline to several months. A thoughtful designer can also suggest materials that align with your budget while delivering desired aesthetics and durability. The design phase is an investment that pays dividends later by keeping the build on track and the final result cohesive.
Once visualisations and documentation are approved, the next step is to prepare the space for works. This means removing existing furniture and fragile objects to create a safe workspace for the contractor, and organising storage for materials so they are not damaged during demolition and construction. In new-build projects or homes with pre-finished elements, this step may be less intensive, but planning remains essential to minimise disruption and protect finishes during the works.
In any European project, it is prudent to obtain any necessary authorisations before striking walls or moving services that could affect structural integrity. The design brief becomes the reference point for what is permissible within local building codes and housing regulations, and for securing the necessary permissions with the appropriate authorities.
Where a renovation begins: the starting point for a successful project
The starting point of any renovation is not the hammer, but a clear plan. The design project defines the direction and helps you budget accurately and avoid costly detours. It is essential to consider:
- the overall footprint and the scale of furniture;
- wall finishes and acoustic treatment for shared spaces;
- the selection of floor coverings that suit traffic, humidity and wear;
- the ceiling treatment and lighting strategy that create the desired ambience;
- the choice of sanitary fittings, plumbing routes and extraction;
- ventilation and energy performance targets, including insulation and air leakage considerations;
- required approvals for any structural or partition changes.
With a robust brief in place, you can forecast the sequence of works with confidence, align suppliers and trades, and manage the budget more effectively. The result is a smoother journey from the first measurement to the final finish, with fewer surprises and a higher likelihood of a well-coordinated handover to you, the owner.
It is common for design teams to support homeowners through the procurement and scheduling process, helping to select materials, confirm delivery windows and coordinate installation times. A professional lead helps to avoid clashes between the electrical, plumbing and mechanical trades, reducing the risk of rework and delays as the project unfolds.
Proper sequence: a detailed plan for your renovation
The sequence of works for a European apartment rests on a logical progression that minimises dust, damage and downtime. While every project is unique, a typical order of operations follows a consistent logic. The following plan is a practical framework to guide most refurbishments, from modest makeovers to comprehensive overhauls.
1. Rough construction and services preparation
Once demolition or stripping to bare surfaces is complete, the next priority is to re-route and install building services. This includes:
- renewing electrical circuits and fittings to accommodate modern device loads;
- installing plumbing lines, drainage paths and ventilation components;
- ensuring thermal and acoustic performance of walls where required.
During this phase there may be minor structural work, such as enforcing fire safety details or modifying non-load-bearing partitions. If load-bearing changes are contemplated, professional structural input and appropriate permissions are essential before proceeding.
2. Pre-finishing and surface preparation
With services in place, preparations focus on creating stable surfaces for finishing. Tasks typically include:
- stabilising and reinforcing walls and ceilings as needed;
- addressing dampness or thermal bridging concerns;
- leveling ceilings and walls where required to ensure a clean base for finishes;
- preparing floors for final coverings, including screeding or subfloor treatment if needed.
Work usually proceeds from top to bottom: ceilings first, then walls, and finally floors. This approach minimizes the risk of damage to newly finished surfaces during subsequent stages.
3. Finishing and final installations
This is the stage where the project begins to resemble a home. Typical tasks include:
- plastering, plasterboard finishing or other wall treatments;
- decorative painting, wallpapering or alternative wall coverings;
- laying floor coverings such as engineered timber, ceramic tiles or luxury vinyl;
- fitting doors, trims and skirting boards;
- final plumbing and sanitary fittings, including taps, showers and toilets;
- electric fixtures, light fittings and switch plates;
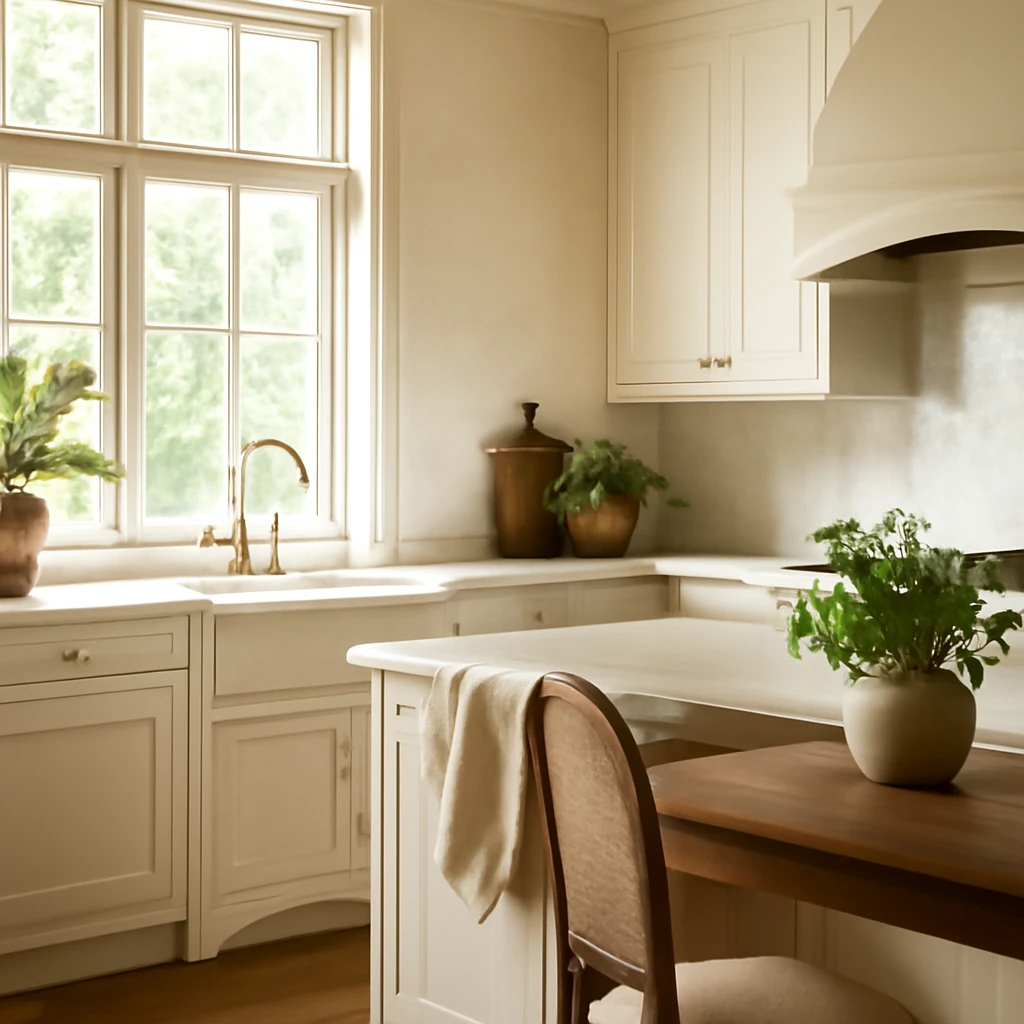
- installation of kitchen units, bathroom vanities and integrated storage solutions.
It is important to avoid performing earlier tasks that could damage fresh finishes, for example laying flooring before finishing walls or ceilings. The sequence preserves the integrity of materials and reduces the need for touch-ups later.
In practice, most European renovations are staged from the farthest room toward the entry, maintaining a logical progression that minimises disruption in high-traffic homes. For a typical two-bedroom apartment, the sequence may resemble the following order in the final plan: balcony or terrace, living room, bedrooms, kitchen, bathrooms, and finally the corridor or entrance hall. If a balcony is directly connected to the kitchen, the kitchen renovation may follow the balcony work to prevent damage to refinished surfaces.
Careful sequencing also helps with resource management - ensuring materials are ordered and delivered in the right windows to avoid storage constraints and potential material damage on site.
Special considerations for newly built homes
Renovating a newly constructed apartment differs in several ways from work on secondary housing. The steps below reflect practical European practice and the realities of building settlement, which can affect the durability and finish of interiors if not planned thoughtfully.
New-builds typically experience a settlement phase that can influence finishes. Depending on construction type and materials, settlement may span from one to six years. For this reason, many professionals advise delaying high-impact finishes and structural alterations until the building has stabilised. In Europe, settlement timelines are often described by construction type as follows:
- panel or precast concrete blocks: shorter settlement window, commonly two to three years;
- brick or stone masonry: longer settlement, often three to six years;
- monolithic or composite frames: settlement may be shorter, around one year, but depends on site conditions.
Even in the absence of nuanced regulatory barriers, architects and project managers recommend avoiding premium finishes initially. A safer approach is to select durable, cost-effective materials that withstand minor movements and are easy to refresh once the building has settled. This strategy reduces the risk of early cracking, loose finishes or untimely reworking, and it protects your investment over time.
In addition to settlement, many new-builds are delivered with a preliminary level of finish or a pre-cleaned shell. In such cases the renovation plan can incorporate a straightforward approach: use budget-friendly surface options for the initial phase and reserve more premium materials for later preservation or when the building is settled. If you purchase a home with a pre-finished shell, you can focus on layouts, storage and lighting scenes before applying top-tier finishes, maintaining a balance between economy and aesthetics.
For those planning major modifications in a newly built apartment, the process typically follows these steps:
1. Layout and planning
Confirm or revise the layout to match how you intend to live in the space. This includes door swing directions, circulation routes and the placement of major furniture elements.
2. Service installations
Install or re-route electrical, water and HVAC services as required by the new plan. Ensure compatibility with energy targets and future maintenance needs.
3. Subflooring and insulation
Address floor preparation and insulation, including screed layers if necessary. For sound insulation, especially in multifamily buildings, consider additional acoustic treatments on walls and ceilings.
4. Surface finishes
Finish walls and floors with finishes suitable for a living environment, such as ceramic or porcelain tile, engineered timber, or resilient vinyl. Choose wall coverings and paints that align with the design intent and lifecycle expectations.
5. Ceiling and lighting
Install ceilings, light coves or suspended systems, and ceiling finishes. In new-builds, LED lighting layers and dimming controls help optimise energy use and ambience.
In all new-build scenarios, a measured, staged approach helps avoid costly mistakes and allows you to adapt plans as the building settles and you refine lifestyle needs. It is prudent to engage professionals who understand the local regulatory environment and can guide you through permissions, inspections and compliance with energy and safety standards.
Renovating in the secondary market: what to expect
A renovation in an existing apartment - often called the secondary market - presents its own set of challenges and opportunities. While such projects can be more expensive due to structural limitations and the need to update old systems, they also offer the chance to maximise space and tailor layouts to modern living. The core stages typically mirror new-build projects but with critical differences in scope and risk management.
The planning phase for a secondary home should begin with a careful assessment of the property’s condition, including:
- the state of the electrical system, plumbing and heating radiators;
- the condition of walls, floors and ceilings, including any damp, mould or structural cracks;
- the potential for altering non-load-bearing partitions and the limits of reconfiguring spaces within the building’s existing envelope;
- any shared building restrictions or restrictions in the conjoined property agreement (co-ownership rules) that may affect alterations.
In many European cities the scope of permitted alterations is bounded by local planning laws and building regulations. Homeowners should expect to negotiate permissions for a renovation with the local municipal authority and, in some cases, the homeowners’ association. A professional project manager or architect can help navigate these processes, ensuring that the project complies with safety standards and does not infringe on neighbours’ rights or structural integrity.
Key considerations for secondary flats include:
- demolitions and repositioning of partitions – often restricted by load-bearing walls;
- replacement of ageing pipes, radiators and fixtures to meet modern efficiency standards;
- updated insulation and damp-proofing to improve energy performance;
- repositioning of electrical outlets and network points to support contemporary living patterns;
- co-ordination of trades to minimise disruption for residents in multi-unit buildings.
The process is typically more variable than new-build work. A detailed schedule with milestones helps manage expectations and ensures cost control. A professional advisor can tailor the plan to the property type, owner’s aspirations and budget, while ensuring compliance with the relevant rules and timelines.
When planning a renovation in a secondary flat, it is prudent to consider the following sequencing approach:
1. Define the scope and approvals
Clarify which walls can be altered, what services require updating and what permissions must be obtained before work begins.
2. Demolition and recycling strategy
Plan for safe removal of finishes and careful disposal of building waste, with attention to dust control and neighbour considerations.
3. Mechanical and electrical upgrades
Upgrade wiring, plumbing and heating, keeping future maintenance in mind and aiming for minimal disruption to adjacent units.
4. Surface preparation and finishes
Proceed to level and repair surfaces, followed by finishing layers such as paints, wallpapers, tiling and flooring.
Even with a well-defined plan, the actual sequence can vary due to the specific state of the property and the authorisation processes involved. A flexible schedule combined with clear communication among homeowners, trades and authorities is crucial to avoid delays and ensure a high-quality result.
Why hire professionals: the benefits of a guided renovation
Numerous attempts to tackle a renovation without professional help can quickly become costly and frustrating. Detailed digital tutorials and online tips are valuable, but they rarely substitute for a coordinated, on-site plan tailored to your building, country and neighbourhood. The reasons to work with experienced professionals are clear:
- expert coordination across trades, ensuring that electrical, plumbing and structural work align with the design intent and building regulations;
- accurate budgeting with itemised quotations and risk allowances that reflect realistic labour and material costs;
- regulatory compliance with planning permissions, health and safety requirements, energy standards and certification processes;
- quality and durability through tried-and-tested materials, installation methods and detailing that withstand wear and environmental conditions;
- timely delivery with phased schedules and communication channels that keep the project moving and predictable for homeowners.
To find the right professionals, seek firms with demonstrated experience in European renovations, a strong portfolio of similar projects, and an approach that aligns with your design goals and budget. A reputable contractor or design-and-build team can guide you from the initial measurement through to the final snag list, ensuring there are no hidden costs or last-minute surprises.
Practical tips for planning, procurement and management
To keep a renovation on track, consider the following practical actions. They help reduce waste, protect finishes and ensure a smoother workflow across both new-build and secondary-market projects.
- Work with a single point of contact or a small, coordinated team to streamline decisions and prevent miscommunication.
- Establish a clear design brief with a detailed materials schedule, delivery timelines and installation sequences.
- Agree on a realistic budget with contingency allowances (typically 10–20 per cent) for unforeseen issues.
- Choose durable, maintenance-friendly finishes suitable for European climates and lifestyles.
- Plan for storage and space optimisation early in the design to maximise daily efficiency and long-term comfort.
- Consider energy efficiency upgrades, such as better insulation, intelligent lighting and efficient mechanical systems, to reduce running costs over time.
With disciplined planning and professional guidance, a European renovation can evolve from a concept into a beautiful, functional home that reflects your personality while meeting contemporary standards for comfort, safety and sustainability.
Frequently asked questions
When can you start a renovation in a new-build?
After you receive the keys, it is common to allow a settlement period for the building before commencing major renovations. In many European markets a practical window is six to twelve months, depending on the construction type and climate. This pause helps reduce future cracking and imperfections caused by movement. Always consult a project manager or a specialist in construction to assess the building’s condition and determine the optimal start time for your project.
How many stages does the renovation process have?
In essence, the renovation process comprises two overarching stages: the rough stage and the finish stage. The rough stage includes demolition, erection or removal of partitions, floor screeds, plastering and the initial routing of electrical and plumbing services. The finish stage covers wall coverings, painting or wallpapering, floor laying, door and window installations, and the final fitting of fixtures, lighting and sanitaryware. For a well-run project, it is best to entrust the work to experienced professionals who know the nuances of each phase and can deliver a high-quality outcome.
What should you do first when renovating a secondary-market flat?
Begin with a detailed condition survey and a clear plan for any required replanning. Assess the existing systems and identify what needs upgrading or reconfiguration. Securing permissions for alterations and coordinating with neighbours or building management is essential before work starts. A staged schedule that reflects the property’s constraints will help manage costs and ensure a successful finish.
Ultimately, a thoughtful, design-led approach - supported by qualified professionals - will help you realise a living space that meets modern standards of comfort, efficiency and aesthetics, whether you are updating a compact city apartment or renovating a larger European home.
You may also like these articles

Designing modular, cat-friendly interiors: a European DIY guide to feline furniture
A stylish, space-saving DIY guide to cat furniture for European homes.

Tiles for the Bathroom in 2025: Trends Shaping European Interiors
Discover the 2025 bathroom tile trends that blend texture, tone and sustainability.
Classic Kitchen Design: A European Guide to Timeless Luxury
Timeless European elegance for the modern kitchen, from layout to textiles.