
Explore interior trends, AI design insights, styling guides and real transformations
From old flats to modern builds: ten bathroom layouts and design tips
Introduction
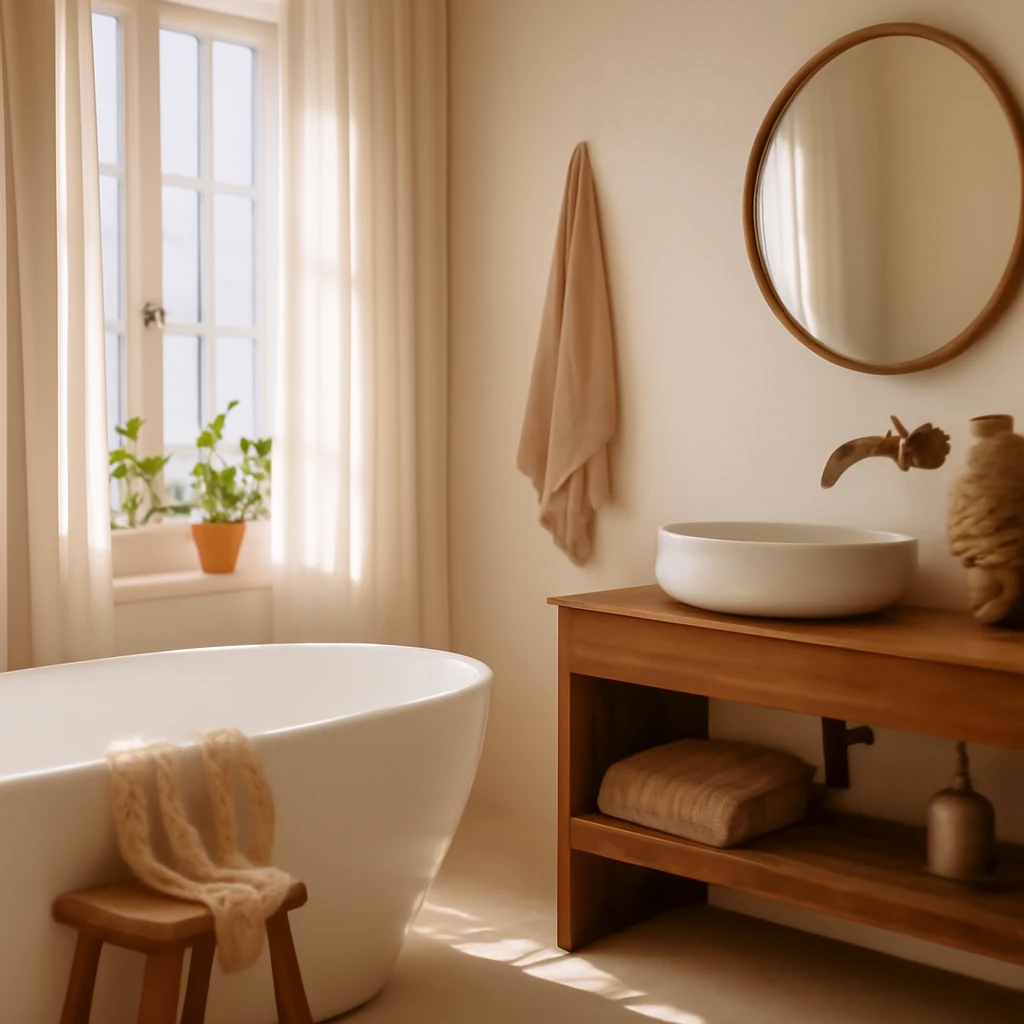
The bathroom is one of the most space‑sensitive rooms in European homes. Across the continent, you will encounter a spectrum of stock - from historic townhouses and mid‑century blocks to contemporary apartment complexes. The challenge is universal: how to engineer a layout that feels calm, is easy to maintain, and accommodates daily rituals without compromising on storage or movement. Whether you live in a compact city apartment with a tiny footprint or in a larger home with room to breathe, a thoughtful bathroom plan can transform daily routines into a more pleasant, efficient experience.
Two common configurations recur in European flats: a combined bathroom (where the bath/shower and toilet share a single room) and a separate bathroom and toilet (a two‑room arrangement). Both have benefits and drawbacks that vary with the building type, historical period, and available plumbing routes. In many historic buildings, reconfiguring space requires consultation and permits, but modern designs often offer more flexibility. The following ten layouts present practical solutions for a range of stock, with neutral, timeless strategies that work across borders and budgets.
Ten practical layouts for European homes
Layout 1: Integrated wet room for micro-bathrooms (2.0–2.5 m²)
In the smallest bathroom volumes, a wet room approach makes the most of every square centimetre. A level-access shower, a compact wall‑hung toilet, and a slim vanity line up along a single wall, creating a seamless, easy‑to‑clean space. Glass partitions or a clear panel visually opens the room while containing moisture.
- Fixture alignment: keep the shower, toilet, and sink on one wall for a simple circulation loop.
- Materials: large format tiles minimise joints, use non‑slip flooring for safety.
- Storage: a recessed niche in the shower wall and a slim medicine cabinet maximise vertical space.
Layout 2: Separate WC and bathroom (two-room plan)
Common in many pre‑war and early post‑war flats across Europe. The WC is in its own small room, while the main bathroom houses the bath or shower and basin. This separation improves hygiene and reduces moisture transfer between spaces, while allowing more flexible finishes in each room.
- Typical sizes: WC about 1.5–1.8 m², bathroom 3–4 m².
- Layout tip: position the WC near the entrance for convenience and to reduce traffic through the living spaces.
- Finishes: moisture‑resistant paint or tile in the WC, warmer textures in the bathroom to soften the utility feel.
Layout 3: Bath with a separate shower in a single room (4–6 m²)
For flats with a larger plan, a full bathroom that accommodates both a bath and a separate shower remains a timeless compromise. A rectangular footprint allows a long vanity and a generous tub, while a glazed shower enclosure keeps the space feeling open.
- Configuration: two distinct zones - wet zone with shower and tub, dry zone with vanity and storage.
- Storage: tall linen cupboard or shallow wall cabinet adjacent to the vanity.
- Material strategy: unify with a cohesive colour palette and matching finishes to avoid visual clutter.
Layout 4: Corner shower and compact bath in a shallow footprint (2.5–3.5 m²)
When bathroom width is limited, placing the shower in a corner and the bath along the opposite wall creates an efficient, easy‑to‑clean layout. A curved or polygonal shower tray can save space, and a narrow vanity keeps sightlines open.
- Shower enclosure: fixed glass panel or a sliding door to maximise opening width.
- Toilet placement: ensure a minimum window of 60 cm in front of the toilet for comfort.
- Inspiration: pale palettes with a touch of natural wood in the vanity for warmth.
Layout 5: Walk‑in shower with glass partition in a mid‑sized bathroom (3.5–4.5 m²)
A walk‑in shower with a clear glass partition creates visual depth and makes the bathroom feel larger. Pair with a shallow vanity and a wall‑hung toilet to keep the floor area open.
- Partition: lightweight glass or magnetic door to avoid crowded corners.
- Drain: linear drain along the shower edge for a flat and modern finish.
- Storage: integrated niches in the showerwall and a compact wall cabinet above the sink.
Layout 6: Two bathrooms in a larger flat (en‑suite master + guest bath)
In comfortable family homes and larger city apartments, a master en‑suite improves privacy while a second bathroom serves guests. A typical plan features an en‑suite of 3–4 m² with a shower or bath, plus a family bathroom of 3–4 m² nearby.
- Layout: consider a direct access from the master bedroom to the en‑suite, with the main corridor leading to the second bathroom.
- Ventilation: ensure both bathrooms have reliable extraction to prevent moisture buildup.
- Finishes: durable wall tiles in wet zones and warmer wall coverings around vanity areas for comfort.
Layout 7: Pocket doors and sliding walls to maximise width
In historic flats where corridor width is fixed, sliding doors or pocket doors liberate precious centimetres, allowing a wider doorway into the bathroom or a larger vanity area. This approach is particularly effective in two‑room layouts where circulation is tight.
- Door species: choose solid core for sound and durability, with soft close mechanisms.
- Hardware: slim, recessed handles minimise protrusions in tight spaces.
- Privacy: consider frosted glazing for situational windows to maintain light while preserving privacy.
Layout 8: Wet room with restrained tiling and a warm palette
A modern European bathroom can feel generous by using a restrained palette, large format tiles, and a continuous material narrative from floor to shower wall. A damp‑area wallpaper or moisture‑resistant paint can be used sparingly on the non‑wet zones to soften the look.
- Colour strategy: light, cool neutrals with a single accent colour to avoid visual heaviness.
- Fixtures: wall‑hung sanitaryware to maintain a clean, open floor line.
- Ventilation: ensure robust extraction and use a humidity‑controlled exhaust fan for comfort.
Layout 9: Vertical storage and vertical lines to amplify height
In small rooms, drawing the eye upward is a proven tactic. Tall, slim storage towers, mirror cabinets with integrated lighting, and wall shelves mounted high on the wall create generous storage without encroaching on floor space.
- Storage hierarchy: reserve floor‑level space for essential fixtures, place drawers and cabinets up high.
- Lighting: incorporate layered lighting (ambient, task, and mirror lighting) to improve depth and functionality.
- Finishes: glossy tiles reflect light, while matte textures on cabinetry reduce glare.
Layout 10: Light, reflective surfaces and long sightlines
For medium to large bathrooms, maintaining a light, cohesive palette with reflective surfaces - polished tile, mirrored panels, and metallic accents - creates generous sightlines and a calm ambience. Use recessed niches and built‑in seating where possible to avoid visible clutter.
- Plan view: line fixtures along a single plane to keep circulation direct and comfortable.
- Materials: choose durable, water‑resistant boards for cabinetry, seal all joints properly in wet zones.
- Colour: cool neutrals with natural textures (stone, timber) to add warmth without overpowering the space.
Planning considerations across European stock
European housing comprises a broad spectrum of stock - from pre‑war townhouses with generous room proportions to post‑war and late‑20th‑century panel blocks, through to contemporary apartments with engineered layouts. The following guiding principles apply across this spectrum:
- Oriented layouts: wherever possible, place the shower or bath along the longer wall to improve flow and enable a more comfortable door swing.
- Moisture control: in older buildings with thicker walls, allow moisture management via robust ventilation and moisture‑resistant finishes to prevent mould growth.
- Structural realities: some walls are load‑bearing, if you’re considering consolidation or moving fixtures, consult a structural engineer and obtain the necessary permissions where required.
- Water supply and drainage: ensure the proximity of the bathroom to the main riser or service zone, this reduces costly plumbing runs and limits disruption.
Common planning tips for European bathrooms
Santitary fixtures and space planning
For compact rooms, wall‑hung sanitaryware helps create the illusion of space, while ensuring cleaning access beneath. Position the toilet as close to the service wall as possible to maximise floor area for the vanity and storage. If a bath is essential, consider a compact bath with a shower screen to retain flexibility. When space is scarce, a corner shower or a wet room configuration often yields the most usable footprint.
- Door clearance: maintain at least 60–70 cm of free space in front of the toilet and sink for comfortable movement.
- Showers: glass enclosures visually expand the room, consider a doorless or sliding option to conserve width.
- Washing machine: in smaller spaces, build a compact washer into a tall cabinet or under the sink using a shallow base unit.
Storage strategies and furniture placement
Smart storage makes a small bathroom function like a larger one. Think vertical storage, recessed niches, and mirrored cabinets that add depth. Plan furniture after plumbing so you can accommodate the essential fixtures first and then layer in storage as space permits.
- Floating vanity: keeps the floor visually open while providing essential storage.
- Recessed shelving: use wall cavities for towels and toiletries to avoid external bulk.
- Hanging rails and hooks: maximise vertical access without crowding the floor.
Materials, finishes and colour schemes
Choose moisture‑resistant materials and finishes that withstand frequent cleaning. Light, reflective surfaces create an airy feel, while long‑lasting tiling reduces maintenance. In historical buildings, you may encounter thicker walls and variable floor levels, plan levels carefully and use threshold ramps where required to maintain a level floor across zones.
- Tiling: large format tiles with minimal grout lines read as a single plane and extend the sense of space.
- Flooring: non‑slip, durable options are essential in wet zones, consider subtle textures to balance practicality with comfort.
- Colour: light neutrals with natural textures (stone, timber) promote serenity and a clean backdrop for stored items.
Step‑by‑step approach to planning your bathroom
Whether you are renovating a historic flat or decorating a contemporary apartment, a methodical approach helps ensure the best outcome. Use the following sequence as a practical guide:
- Assess the stock: determine whether you have a combined or separate bathroom arrangement, and identify any load‑bearing walls or service corridors that constrain changes.
- Measure accurately: record the dimensions of the room, door widths, and any awkward nooks. Sketch a simple plan to guide fixture placement.
- Prioritise zones: decide where water and wet zones will go, and plan the dry zones for vanity, storage, and seating or towel storage.
- Choose fixtures: pick compact, wall‑hung fixtures first, then select storage and mirrors that maximise usable space without creating clutter.
- Plan ventilation: modern extraction is essential, particularly in smaller rooms and in buildings with limited natural ventilation.
- Design for moving water and waste: ensure gravity drains and hot/cold water lines run efficiently with minimal cross‑over.
- Finish decisions: select finishes that tolerate humidity and are easy to maintain, consider a coherent material palette to unify the space.
- Consider lighting: layer ambient, task, and mood lighting to add depth and usability in all zones.
- Consult professionals: for structural changes, plumbing moves, or building permissions, engage qualified engineers and local authorities as required.
European stock realities: a short glossary
To navigate design choices with clarity, it helps to contextualise common European housing types:
- Pre‑war townhouses: often feature higher ceilings and larger rooms, but smaller bathrooms, plan for moving the service wall where feasible and respectful of historic fabric.
- Post‑war blocks: frequently present compact bathrooms with fixed layouts, smart fixes include wall‑hung fixtures and sliding doors to save space.
- Panel blocks (mid‑century to late 20th century): frequently have smaller bathrooms and fewer wall cavities, solutions emphasise compact, integrated storage and efficient heat management.
- New builds: typically offer flexible layouts and better plumbing infrastructure, design for future accessibility and easy maintenance.
Conclusion
A well‑designed bathroom across Europe succeeds by balancing space, function, and lasting materials. Whether you opt for a compact integrated wet room or a two‑room configuration with an en‑suite, the goal remains the same: create a calm, efficient space that supports daily life and retains a timeless elegance. With careful planning, even the most compact European flats can boast bathrooms that feel generous, comfortable, and beautifully considered for years to come.
You may also like these articles
 Interior Design
Baroque Interiors for Modern Europe: Luxury, Restraint and Statement Details
A refined guide to infusing Baroque drama into contemporary European homes.
Small Spaces
A compact 21m² studio: functional design and cosy comfort for a student home
A compact 21m² studio reimagined with smart zoning and green accents.
Small Spaces
Kitchen-Living in 20 Square Metres: Design, Zoning and European Projects
Smart layouts for a 20m² kitchen-living space across Europe.