
Explore interior trends, AI design insights, styling guides and real transformations
Breathing new life into an old dresser: a European DIY guide
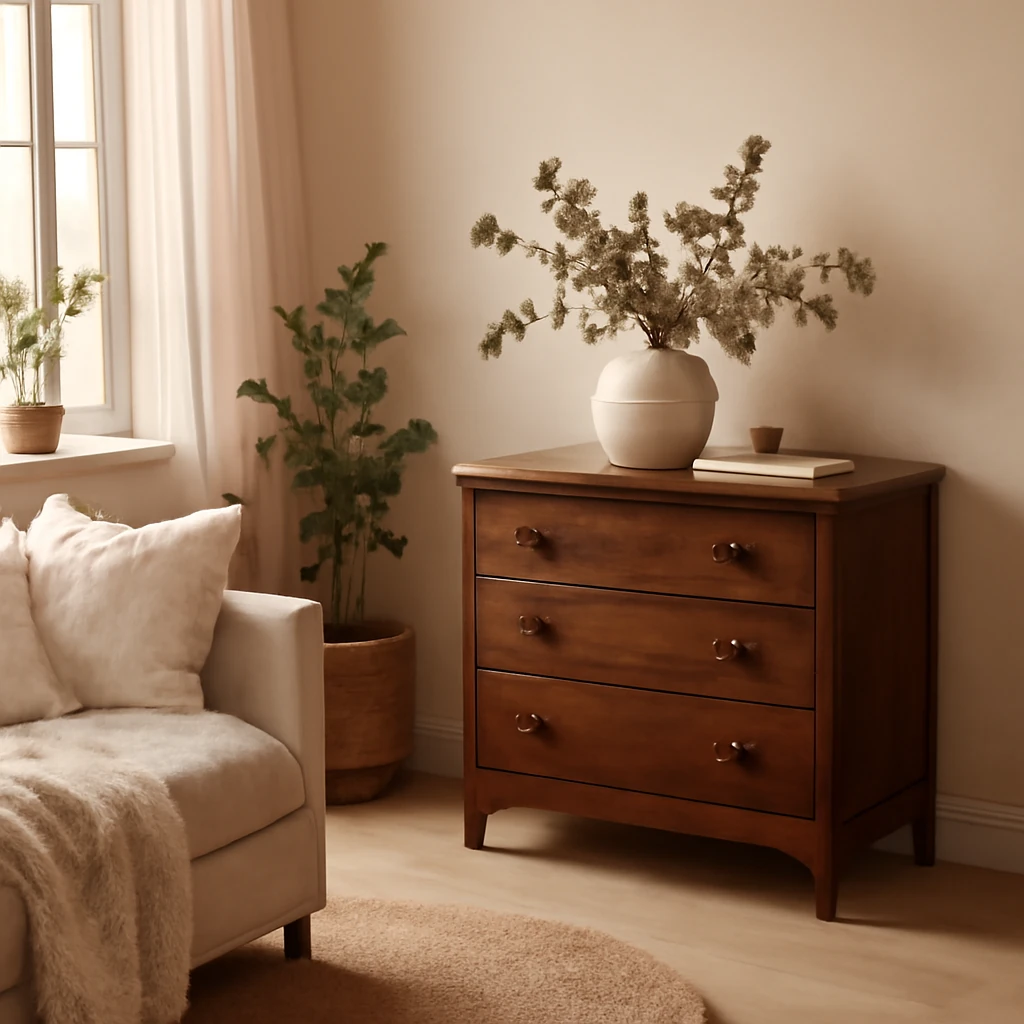
Breathing new life into an old dresser: a European DIY guide
Across Europe, furniture upcycling is a practical, stylish response to rising shopping costs and a desire for personality in living spaces. A well‑restored dresser can function as a handsome storage solution in a living area, bedroom, or hallway, blending with traditional plasterwork, mid‑century lines, or contemporary minimalism. This comprehensive guide walks you through a tested five‑step process to revive a tired chest of drawers, followed by ten creative ideas to tailor the piece to your colour scheme, hardware preferences, and lighting conditions. With attention to finishes, durability, and safety, you can transform a tired unit into a centrepiece that feels brand new without breaking the bank.
Five essential steps to restore an old dresser
1. Remove the existing finish
Preparing the surface is the foundation of a lasting finish. Start by deciding which method best suits the piece and your workshop conditions. In Europe, many homeowners favour water‑based strippers or safe chalk paints because they offer lower odour and gentler disposal than solvent‑based products. If you’re dealing with older finishes, test a small area first to determine how the surface reacts.
Manual stripping: Use a putty knife to lift the finish and a non‑abrasive pad to scrub away residue. You can supplement with a paint‑removal gel or solvent, applying with a disposable cloth to soften the layer before scraping. For very smooth surfaces, a heat gun wrapped with a cloth may help to lift layers without soaking the wood in chemicals. If you use heat, work in a well‑ventilated space, wear eye protection and heat‑resistant gloves, and keep a cool‑down plan ready for overheating risks.
Machine sanding: An orbital sander with a dust‑extraction system is fastest for larger surfaces. Start with a coarse grit (around P80) to remove varnish, then progressively refine to P120 or P180 to prepare for primer. Always sand with the grain, wipe away dust frequently, and wear a suitable respirator. After sanding, vacuum the pieces and wipe with a tack cloth to pick up fine dust before priming.
Plastic wrap or film: In some cases, you may encounter a vinyl wrap or faux‑wood veneer. The safest approach is to soften it with a heat gun and gradually peel away from the substrate. If there is any residue, remove with a mild solvent on a cloth, then lightly sand the surface again to re‑open the pores of the wood for the next step.
2. Fill cracks, dents and repairs
Even a battered piece can be revived with careful filling. Use a wood filler designed for furniture, these products expand slightly and sand easily, leaving a seamless finish. Choose a filler that matches the wood type - softwoods often require a slightly different filler than oaks or maples. Apply with a plastic knife, working in layers if the cracks are deep. Allow the filler to dry completely according to the manufacturer’s instructions, then sand smooth with a fine‑grit paper (around P180 or P220). If you discover larger voids, consider a patch or a reinforcing insert to ensure long‑term stability.
3. Sand the whole surface
Even after repairs, a uniform surface is essential for a flawless finish. Use a sanding block or an orbital sander with fine‑grit paper (P180 to P220). Lightly sand along the grain to retain texture and avoid leaving swirl marks. Always finish with a dust‑free wipe - the smoother the surface, the crisper your resulting finish will be. For intricate corners, use a finishing sander or a sanding sponge to reach into crevices. The aim is to create a slight tooth on the surface so primer can grip firmly, not to remove all wood texture entirely.
4. Apply primer
Primer acts as a bond between the wood and your finishing coats. For wooden furniture, a high‑quality wood‑primer designed for interiors will enhance adhesion and reduce the risk of blotching, particularly with softer woods. If you are painting a light colour over a darker base, you may need a stain‑blocking primer to prevent bleed‑through and to achieve a uniform tone. Apply evenly with a brush or a small roller, then allow sufficient drying time per the product instructions. Lightly re‑sand between coats to maintain a smooth surface, removing any dust before the next layer.
5. Paint and finish
Choosing the right paint is crucial for durability and appearance. In European interiors, many homeowners favour water‑based acrylic or waterborne alkyd enamels because they offer lower odour, easier clean‑up, and good resistance to scuffs. For a traditional look that respects the wood grain, you can use a clear wax or a specialised furniture glaze to enhance depth and protect the finish. When selecting colour, consider the room’s lighting. A colour that reads as crisp white in daylight can become stark in artificial light, while warm whites and soft greys tend to soften contrasts and blend with most European palettes.
Painting technique: apply with a brush for edges and a small roller for flat surfaces. Use light, even strokes and avoid overloading the brush to prevent drips. For a seamless result, apply two to three thin coats rather than one thick coat, allowing full drying time between layers. If you want a vintage or distressed look, lightly sand the edges after the final coat and apply a softwax finish to seal the surface while emphasising the aged character.
Finishes and durability: Consider a topcoat for high‑use areas. A water‑based polyurethane or a wax‑based finish can protect against knocks and spills. If the piece will be in a kitchen or bathroom, a polyurethane with higher abrasion resistance is worth considering, or a penetrating oil for a more natural look that enhances the wood’s natural grain. Always follow the manufacturer’s directions for curing times, ventilation, and compatibility with the paint.
Creative ideas to personalise your dresser
Restoration does not require a uniform, monochrome outcome. The following ideas help you tailor the dresser to your space, whether you favour mid‑century modern lines, rustic warmth, or contemporary minimalism. Each idea can be adapted to different scales and budgets, from upcycling a compact bedroom dresser to reviving a longer storage piece for a hallway or living room.
-
Stencil and pattern – Once the base coat is dry, consider adding geometric patterns, organic motifs, or a classic chevron along the drawer fronts or the sides. Use painter’s tape to ensure crisp lines. For a restrained look, limit the motif to a single panel, for a playful mood, repeat the pattern across every drawer with complementary but slightly varied colours.
-
Elevate the base on legs – Raising the dresser on slim legs can transform its silhouette and give it a lighter, airier presence. Choose tapered wood legs in a finish that echoes the room’s other furniture. You can also use a contrasting wood tone for the legs to emphasise a mid‑century aesthetic, or add slim metal legs for a contemporary edge. Ensure the leg height matches practical storage needs and the piece sits level on the floor.
-
Move towards a noble colour – If your dresser has been refreshed with a neutral tone, consider deepening the colour to revive depth and sophistication. You can apply a slightly richer shade of the base colour and finish with a clear wax to accentuate wood grain or add a glaze in the recesses to create soft shadows. A restrained tone such as charcoal, sage green, or navy can anchor a room without overpowering it.
-
Rosettes and period details – Modernising a piece with decorative mouldings or modest rosettes on the drawer fronts can evoke a vintage character while remaining suitable for contemporary interiors. Select low‑relief motifs and keep them proportional to the size of the chest to maintain balance.
-
Mix hardware for personality – The knobs and pulls can dramatically alter the look. For every drawer, choose a different handle style or finish (polished brass, aged bronze, matte black) to create a curated, gallery‑like effect. If you prefer a cohesive look, pick one finish and vary the size or shape slightly.
-
Decorative surface with fabric or wallpaper – Apply removable coverings to select panels, either on the door fronts or drawer faces. For a subtle approach, choose a wallpaper with a soft texture and secure it with a clear sealant or varnish. This method is ideal for experimenting with colour and pattern while keeping the wood underneath protected.
-
Two‑tone colour blocking – Paint the outer frame in one colour and the drawer fronts in another. This helps to define the structure and emphasise storage organisation within a room. A brighter interior shade can add a playful touch, while a muted exterior keeps things calm and cohesive.
-
Old‑world distressing – A light distressing around edges can evoke the patina of age without looking tired. Use a fine‑grit sandpaper or a dedicated distressing tool to create subtle chips on the corners and edges. Seal with wax to preserve the effect and provide a durable finish.
-
Upholstery integration – If a drawer front or panel is large enough, you can attach a fabric‑covered panel or a soft felt overlay to reduce noise and create a tactile, warm finish. This approach is especially effective in bedrooms or living spaces with plush textiles.
-
Reclaimed material accents – For a rustic or industrial vibe, incorporate a strip of reclaimed wood, metal, or cord detailing to one edge or handle area. This adds texture and a subtle narrative about the piece’s journey.
How to adapt the dresser to European spaces
European homes range from compact city flats to generous family houses, but the core principles of furniture renovation remain universal. When designing within smaller interiors, consider the piece’s footprint, weight, and ease of movement. If the space is narrow, choose a tall, shaker‑style chest and place it near the wall to avoid blocking traffic flow. For a room with natural light, lighter base colours can keep the area feeling open, while dark frames and contrast tops can anchor a darker corner. In open‑plan spaces, matching hardware and finishes to the surrounding cabinetry and shelving can create a cohesive look without appearing heavy.
Durability and caring: once finished, perform light maintenance every few months. Wipe with a damp cloth and mild detergent, avoiding harsh chemicals that may degrade waxes or paints. If you battle high humidity or heat exposure - for example, near a kitchen range or in a sunlit alcove - revisit the topcoat, and consider a water‑based polyurethane for better moisture resistance. For antique‑looking pieces, document the finish so you know how best to refresh it in the future without losing character.
Planning your project: budget, space, and timing
Before you pick up a brush, take stock of the practicalities. Measure the dresser carefully, noting the height, width, depth and the space it will occupy in your room. Consider whether you want to place it against a wall, near a window, or in front of a radiator where temperature fluctuations could affect the finish. Establish a realistic budget that includes materials, tools you may need to rent or buy, and the potential cost of professional help if you decide to consult a carpenter or painter for the finishing stages. Schedule the project for a period of dry weather if you will be painting indoors, and ensure adequate ventilation. It helps to plan a weekend or two of work, with buffer time for curing between coats and any touch‑ups after evaluating the initial results.
Choosing finishes for different woods and spaces
Wood species respond differently to finishes, so tailor your approach to the material. Softwoods such as pine or spruce take paints and clear coats differently than oaks or beech. If the dresser is beech or maple, a slightly longer drying time between coats may be wise to prevent blotching. For darker woods, a stain plus glaze can help preserve the wood’s character while achieving uniform colour. If you plan to use a wax finish, remember that wax enriches colour and texture but requires periodic maintenance. In kitchens or bathrooms, opt for moisture‑resistant topcoats and maintain a consistent routine of cleaning and re‑waxing as appropriate. By anticipating wood behaviour and room conditions, you can select a finish that will age gracefully and stay beautiful for years.
Materials, tools, and safety considerations
Before you begin, assemble the essential tools and materials to ensure a smooth project. A typical European workshop may include a dust‑extraction sander, assorted grit papers (P80–P320), quality brushes, a small roller, a drop cloth, PPE (safety glasses, disposable gloves, and a respirator), a suitable primer for wood, a durable topcoat, and a selection of hardware and finishes. Use low‑VOC paints where possible to minimise odour and environmental impact, particularly if you are painting indoors with limited ventilation.
Safety notes: always work in a well‑ventilated space, especially when solvents or paints are involved. Wear protective gear during stripping and sanding to avoid skin and eye irritation. If you are working with old finishes, consider testing for lead‑based paint before continuing, and follow local regulations for safe disposal of residues and used materials. Keep flammable materials away from heat sources and store chemicals in their original containers with clear labelling. When in doubt, seek advice from a professional or a reputable hardware or paint supplier about the best products for furniture restoration.
Maintaining your finished dresser
Once the piece is finished, a light maintenance routine will extend its life. Start with a gentle cleaning routine - wipe with a soft cloth and a mild soap solution or simply water. Avoid abrasive cleaners and scouring pads that can scratch the surface. If you notice tiny scratches or wear marks, a light buff with a soft cloth and a matching wax can restore the luster. For high‑use areas such as drawer fronts or handles, consider a protective topcoat refresh every few years as needed. Remember to maintain the piece in a stable climate, sudden changes in temperature or humidity can cause wood to expand and contract, risking cracks or warping over time.
Final reflections: why this approach works for European homes
Restoring furniture with a thoughtful, well‑chosen finish honours European design values: longevity, tactility, and a sense of heritage that aligns with sustainable living. A well‑executed dresser can anchor a bedroom ensemble, provide practical storage in a living room, or offer a refined occasional table solution in an entryway. The five‑step approach emphasises control, safety and durability, ensuring the piece will withstand daily use while adapting to evolving interiors. By combining time‑tested techniques with contemporary colour trends, you can achieve a modern, timeless aesthetic that complements both period interiors and modern apartments across the continent.
You may also like these articles
 Kitchen Design
Open Kitchens: Designing without Upper Cabinets Across Europe
Bright, uncluttered European kitchens through upper-cabinet-free layouts.
Tips & How-To
Handmade Planters: Five Simple DIY Ideas for Stylish Pots
Craft chic planters from everyday favourites with five easy DIY ideas.
Outdoor & Terrace
Gates and Entryways for European Homes: Modern Solutions for Style, Security and Practicality
A designer guide to gates, fences and entryways for modern European homes.