
Explore interior trends, AI design insights, styling guides and real transformations
Handmade Planters: Five Simple DIY Ideas for Stylish Pots
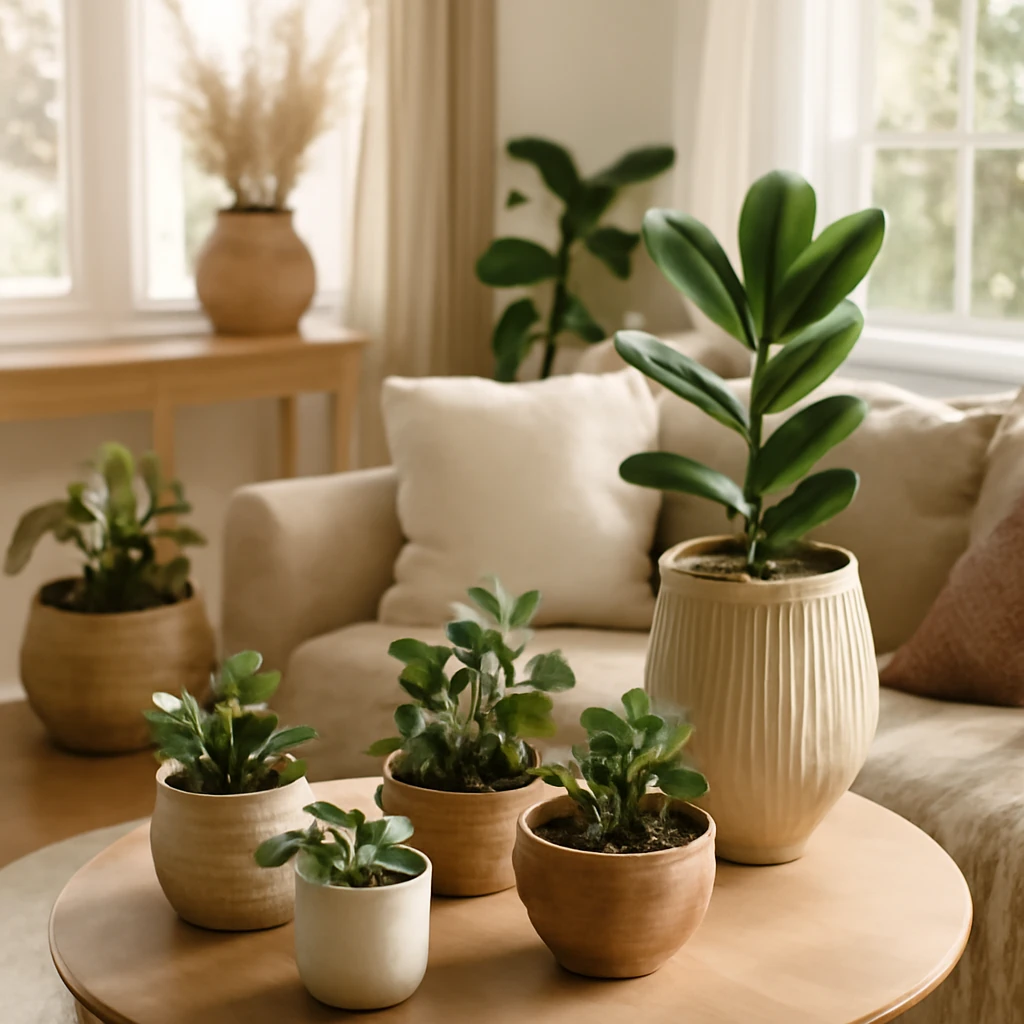
Introduction: handmade planters as design statements
Planters have moved beyond their utilitarian role. In contemporary European homes and on compact city balconies, they serve as versatile design elements that unite interiors with the outdoors. The appeal is twofold: personalisation and sustainability. Creating your own planters lets you choose materials, finishes and sizes that suit your space, while upcycling discarded containers or offcuts reduces waste and adds texture to your scheme. In this guide you will find five practical, approachable ideas to craft stylish planters from everyday materials or simple components. Whether you live in a terraced house with a sunny courtyard or in a sheltered apartment with a north‑facing balcony, handmade pots can transform a corner, a doorway, or a windowsill into a recognised design statement.
All you need to know to make your own planters
Planter design is as much about function as it is about aesthetics. Consider the plant’s needs (sun, moisture, drainage) and the surface on which the pot will rest. In European homes, where space is often precious and interiors are layered with texture, planters should complement key materials such as timber, stone, ceramic and textile palettes. When choosing your approach, keep these guiding questions in mind:
- How heavy should the pot be? Heavier pots look substantial but require sturdy supports and safer placements.
- Will the planter be used indoors or outdoors, or in a transitional space such as a balcony or conservatory?
- What level of moisture resistance is required? If the planter contains a plant pot inside, drainage must be managed, and the outer container should withstand humidity.
- What is the intended finish – raw, painted, stained, or technically coated for water resistance?
- Are you upcycling existing items or starting from scratch with timber, concrete or metal?
In Europe, many urban dwellers favour planters that are lightweight for rearranging, yet robust enough to withstand a damp climate and seasonal temperature changes. Materials such as cement (with stabilisers where necessary), treated timber, galvanised steel, fibre cement boards, and weatherproof plastics are common. If you choose to upcycle, ensure containers are clean, free of chemical residues, and do not become waterlogged. A practical approach combines a durable inner liner with a visually compelling outer shell to achieve both longevity and style.
From everyday materials: cement, wood and more
Two classic routes dominate DIY planter projects in Europe: concrete (cement) planters and timber planters. Both can be customised to suit modern, minimal, rustic or coastal aesthetics. Concrete brings a bold, architectural presence, timber offers warmth and versatility. Whichever path you choose, remember that large cement pieces can be heavy and may require assistance when lifting. Timber needs protection against moisture to resist rot and deformation. For outdoor use, consider treatments or linings that minimise water ingress while preserving the natural look.
When working with timber, plan for drainage and moisture barriers. For concrete or cement planters, plan for internal drainage or separate inner pots to avoid water damage to floors or balconies. In all cases, prepare a suitable workspace, wear protective gear, and allow adequate curing time for any mixtures or finishes.
From everyday materials
The most popular materials for making planters are either concrete or timber. Concrete planters are created by mixing cement, sand and water, then casting into a mould. In many European studios and workshops, a straightforward mix of cement to sand in a 1:3 ratio by volume is used. The result is a robust vessel with a raw, tactile texture that can be finished or left natural. If you choose to decorate, subtle surface textures or restrained painterly touches help soften the industrial look. A tip: larger concrete pots will be heavy, so place them on sturdy floors or defined outdoor surfaces rather than lightweight shelves or window ledges.
Timber planters can be crafted as simple boxes or more elaborate casings. A square or rectangular format works well for urban balconies where space is precious. When constructing timber planters, select treated timber or apply a water‑repellent coating to prolong life. Inside the wooden box, line with non‑biodegradable, water‑resistant sheeting and, if possible, a thin liner to separate soil from wood. This approach helps prevent dampness from seeping into the timber and encourages ease of maintenance.
For outdoor spaces, you may combine timber with metal or stone detailing to achieve a contemporary or industrial edge. Alternatively, you can integrate timber and cement by using a timber outer shell with a cement inner liner for a modern, textural contrast. The key is to balance aesthetics with durability and practicality, particularly on balcony railings or near doorways where weather exposure varies.
From other objects
If you want to extend your upcycling, consider converting household items into planters. The possibilities are wide and wonderfully quirky, and they suit a variety of interiors, from minimalist to coastal. When repurposing containers, ensure they are clean, perhaps sanded for a smoother finish, and treated to resist moisture. The following are common, practical options you might repurpose into planters:
- Plastic containers of various sizes
- Plastic buckets or troughs used for home improvement projects
- Metal tins and small metal buckets
- Plastic bottles or jerrycans
- Glass jars with wide mouths
- Small metal cans for miniature plants
- Wooden and plastic crates without lids
- Woven baskets
- Vases, teapots, carafes or jugs
- Ladles and watering cans
- Old trolley wheels or pallets
Clean and dry the containers, modify any narrow openings if needed, and decorate to taste. Painting is the simplest approach, découpé patterns, distressing, handwritten labels, or mosaic accents can add a personalised touch. The critical considerations remain: the planter must be robust, water‑resistant (or properly lined), and large enough to accommodate plant roots while remaining visually balanced within the space.
Simple and beautiful ideas: step-by-step instructions
Below are practical, easy-to-follow methods to build attractive planters using common materials. Each method is designed to be approachable for beginners while still producing durable, stylish results suitable for contemporary European interiors and urban exteriors.
From a bottle and a sock
This approach uses cement to create a compact, contemporary pot with a refined silhouette. It is ideal for modern interiors: minimalist, boho, Japandi, Scandi, or industrial settings.
Materials you will need:
- Cement
- Sand
- Water
- Forms: a plastic bottle as the outer shell and a cotton sock as an inner form
- Mixing container and spatula or mixer
- Sandpaper for finishing
Steps:
- Combine sand and cement in a 3:1 ratio by volume in a mixing container.
- Gradually add water, stirring until the mixture becomes thick yet pourable.
- Fill the bottle about halfway with the cement mixture to form the outer shape.
- Insert the sock inside the bottle to create a hollow core, then centre it carefully.
- Top up the space between the bottle and sock with cement mix, smoothing the outer surface as you go.
- Gently tap the form on a table to release air pockets and encourage even setting. Allow to cure for 24–48 hours.
- Carefully remove the forms and, if required, trim edges with sandpaper.
- Leave the planter to dry completely for a further 48 hours before use.
Tip: finish with a light sealant or paint for an even, refined look. Ensure drainage by either including a drainage hole or using a liner inside the pot for a well‑drained root environment.
From a bucket and parchment paper for a textured finish
If you have an unused plastic bucket, you can transform it into a stylish planter using parchment paper. The resulting surface has a natural, tactile texture that works well in relaxed, tactile schemes.
What you’ll need:
- Plastic bucket in your preferred size
- Parchement paper (for baking)
- PVA glue
- Clear acrylic varnish or sealant
- Hot glue gun
Process:
- Wash and dry the bucket thoroughly, ensuring no glue residues or stickers remain.
- Cut parchment into small square pieces and tear the edges for a feathered edge.
- Adhere parchment squares to the bottom and sides of the bucket in a random, staggered pattern using PVA glue, allow to dry.
- Cut parchment into narrow vertical strips (slightly longer than the bucket’s diameter) and twist into rope-like strands.
- Glue the parchment rolls around the bucket’s perimeter, top and bottom, to form a decorative banding. Allow to dry completely.
- Optionally apply a thin layer of PVA across the surface for added durability.
Notes: this method yields a light, decorative container suitable for light‑weight plants or for use as a decorative outer vessel. Ensure the inner pot is well sealed to prevent moisture reaching the parchment layer.
From tin cans
Metal cans make compact, stylish planters with an industrial edge. They are ideal for small herb pots or compact succulents and can be finished in a range of colours.
Required items:
- Metal tin can
- Aerosol spray paint (appropriate for metal)
- Jute twine or rope for decoration
- Hot glue
- Work gloves
Steps:
- Clean, dry and degrease the can. Remove any sharp edges to prevent injury.
- Spray‑paint the can in your chosen colour. Allow to dry completely.
- Decorate with jute twine by applying hot glue to the perimeter and pressing the rope into place. You can create a single wrap around the top or bottom or a more elaborate pattern.
- Secure the base edge with an additional bead of hot glue. Allow to cure fully before use.
Tip: consider adding a liner or a small inner pot to improve moisture control and protect the decorative outer finish.
From ice‑cream sticks
Wooden craft sticks offer a playful route to build a light, air‑movable hanging planter. This approach is perfect for adding a sculptural element to a corner balcony or a bright, child-friendly space.
What you’ll need:
- Thick cardboard
- Cardboard tubes
- Ice‑cream sticks (40–50 pieces)
- Hot glue
- Scissors or craft knife
- Double‑sided tape
Construction steps:
- Cut a sturdy square from thick cardboard, at each corner attach small pieces of double‑sided tape.
- Arrange four sticks along the edges of the cardboard square to form a frame, glue them together where they meet.
- Fill the frame with 4–6 additional sticks laid parallel to one another, leaving small gaps between the sticks to create a lath-like structure.
- Remove the cardboard backing, you will be left with four square frames with a grid of sticks.
- Wrap each frame with cardboard tubes, halved lengthwise, trim to the desired height if needed.
- Assemble four frame bases into a cross, glue a half‑tube to each quadrant, adorning with the stick grids for a decorative hanging planter.
Tip: this design is especially suited to light, airy plants and can be expanded into a family of modular hanging pots for balconies, loggias, or interior corners.
Wooden planter for outdoor plants
Wood remains a versatile choice for robust outdoor planters. A well‑sealed wooden container with drainage and a moisture barrier can provide a classic, tactile appeal to terraces, courtyards and garden edges.
What you need:
- Weather‑resistant tongue‑and‑groove boards or baton slats
- Timber screws
- Router or saw for precise cuts
- Drill with appropriate bits
- Primer, wood stain or paint (water‑based or outdoor varnish)
- Construction liner or waterproof membrane
- Plastic liner or pond liner (optional)
- Drill or punch for drainage holes
Steps:
- Measure and cut timber to create the side walls and the base of the planter. Assemble the box using screws, ensuring joints are square.
- Drill several drainage holes across the base to prevent waterlogging.
- Seal the interior with a moisture‑resistant coating or apply a protective liner against direct earth contact.
- Fit the box with a flexible interior membrane to prevent wood from contacting wet soil. Create drainage holes through the membrane to allow water to escape.
- Attach the exterior finish - this could be natural stain that emphasises the timber grain, or a weather‑resistant painted finish in a colour that harmonises with your space.
- Reinforce edges and apply a final protective coat for longevity. Consider adding feet or a subtle plinth to raise the planter off damp surfaces.
Outdoor timber planters bring warmth and a tactile presence to exteriors. When used on balconies, ensure the structure is securely fixed and capable of withstanding wind loads, especially on higher floors. For coastal or damp climates, select timber types with superior rot resistance and apply maintenance coatings on a regular cycle.
Versatile add‑ons: decorative and practical details
Beyond the structural planters themselves, consider accessories and finishes that enhance longevity and aesthetics. Epoxy resin can be used to create clear, durable seals on wooden or concrete pots, giving a glossy protective layer while accentuating natural colours. Metal trims, rope cordons, ceramic inserts, or a mosaic of broken tile fragments can provide a customised edge that proudly reflects your interior or exterior palette. When using adhesives and coatings, follow manufacturer instructions, ensure good ventilation, and select products suitable for the planter’s location (indoor, outdoor, or damp environments).
Practical considerations for European spaces
Designing planters for European homes involves balancing form, function and climate. Consider the following practical guidance to ensure your planters look as good as they perform:
- Drainage: Always provide drainage or use a liner for pots placed on non‑porous surfaces. Use saucers or drip trays to protect floors and furniture.
- inner pot or liner: If you are unsure about moisture tolerance of your outer container, insert a plastic inner pot with a drainage hole. This makes repotting easier and protects the outer material.
- Weight distribution: Large or heavy planters may stress balcony rails and floorings. Place heavier pots on flat, solid surfaces and consider wall anchoring where appropriate.
- Maintenance: Choose finishes and materials that are easy to clean and maintain. Sealed or oiled timber requires periodic re‑application of protective coatings, cement may be scrubbed and re‑sealed as needed.
- Colour and texture: Use planters to anchor a colour scheme or to provide contrast. A cohesive palette across pots can unify a space, while varied textures add visual interest.
Care and maintenance: keeping your handmade planters looking their best
To prolong the life of handmade planters, regular upkeep is essential. Start with a simple routine:
- Inspect for cracks or loose joints, especially after winter and early spring when freeze‑thaw cycles can affect materials.
- Re‑seal timber surfaces every few years or as the finish wears, particularly in outdoor environments exposed to rain and sun.
- Clean cement planters with a soft brush and mild soap, avoid harsh chemicals that may degrade the surface finish.
- Replace liners when worn or damaged to maintain moisture control and prevent wood or metal degradation.
- Gradually acclimatise planters brought indoors after winter outdoors to prevent cracking due to rapid temperature changes.
Putting it all together: ideas for styling and placement
Finally, think about how your handmade planters integrate with the architectural or interior fabric of your space. On a living room terrace or a conservatory, create a tiered arrangement by combining vertical and horizontal planters at varying heights. This not only maximises growing space but also creates a layered visual narrative. In a compact urban balcony, group a few small pots in complementary colours or textures, a single, bold, heavy pot can act as a focal point while lighter pots fill surrounding spaces.
For interiors, planters can delineate zones - a row of low, rectangular cement pots along a windowsill can frame a seating area, while a tall, linear timber planter can act as a room divider without obstructing light. Match the palette of your planters to the dominant materials in the room - a concrete planter with a linen upholstery and oak flooring, for example, can reinforce a modern, restrained aesthetic while keeping the space warm and inviting. If you live in a climate with strong seasonal changes, choose materials that respond well to humidity and temperature, and place planters in sheltered spots when possible.
Conclusion: creating a personal greenscape
Crafting your own planters is more than a weekend project, it is a way to infuse personality into your home and outdoor spaces. By selecting materials with care, considering drainage and durability, and embracing upcycling where suitable, you can build a cohesive greenscape that strengthens your interior design language. Whether you opt for the industrial chic of tin cans, the sculptural elegance of concrete, or the warm glow of timber, handmade planters offer endless opportunities to express taste, sustainability, and creativity across European living spaces.
Author note
This guide draws on practical, unconstrained techniques suitable for a broad audience across Europe. Always prioritise safety, especially when mixing cement or applying sprays and resins. Enjoy experimenting with textures, forms and finishes to create planters that are uniquely yours.
You may also like these articles
 Tips & How-To
Epoxy Resin in European Interiors: Ideas, Techniques and Projects
Versatile epoxy resin ideas for stylish European homes.
Tips & How-To
A Practical Yearly Deep Clean: The Essential European Guide
Plan a seasonal, thorough annual clean to refresh every corner of your European home.
Living room
Mastering a 20 m² Living Room: European Design Lessons
Compact living room mastery: clever zoning, light, and style.