
Explore interior trends, AI design insights, styling guides and real transformations
European steam room design: materials, layout and finishes for modern baths
Designing a steam room: essential considerations
In traditional European spa culture, the steam room or sauna sits at the heart of daily rituals. A well conceived space combines comfort, safety and longevity, evolving from a pragmatic enclosure into a sanctuary of heat, humidity and calm. This guide outlines the planning essentials, material choices and detailing that make a steam room durable and beautiful in a European home or wellness project.
When planning a steam room, begin at the planning stage of the structure itself. The questions below help establish a sound footprint before any finishes are chosen:
- Think about the number of users. For four to five people, allocate a floor area of at least 6 m² to ensure comfortable seating and unobstructed movement.
- Set the ceiling height with care. Allow for the height of the tallest user and add a minimum of 30 cm. Do not make the ceiling excessively high, as heat loss increases. A practical target is a ceiling height of about 2.3–2.4 m.
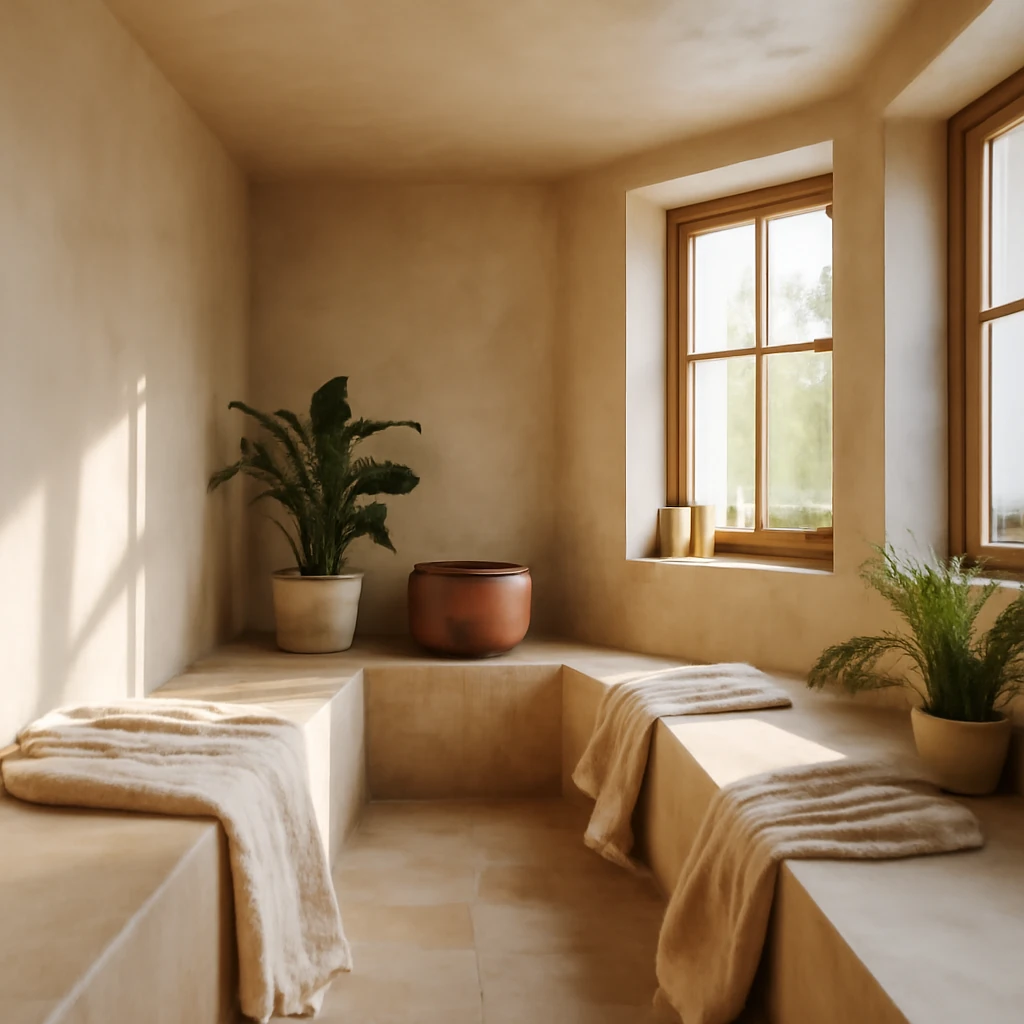
- Plan the seating layout. Benches can run along the room perimeter or be positioned along the longer wall to optimise heat distribution and ease of cleaning.
- Define bench dimensions. In a spacious room, incorporate lounging surfaces. In compact saunas, use multi‑level, narrow benches to maximise seating without crowding the room.
- Determine heater placement. Building codes typically require the heater to be at least 40 cm from wooden walls. If space is tight, specify a fire‑retardant finish on adjacent surfaces and, in extreme cases, reduce the required distance to 30 cm with appropriate protection.
- Choose the heating system. Electric heaters are the safest and quickest to heat, while masonry stoves retain heat longer and suit larger rooms with higher ceilings and more generous footprints.
Finishing the interior can begin only after these planning details are settled. The next stage focuses on selecting floor, wall and ceiling coverings that perform reliably in thermal and humid conditions.
What materials are suitable for the steam room
Inside finishes are typically moisture‑resistant timber. The most common options include logs, boards or interlocking cladding. Here is a concise guide to timber species and their characteristics:
- Cedar. A robust, moisture‑resistant timber that is easy to work with and highly durable under temperature fluctuations. It emits a pleasant aroma when warm and tolerates humidity without warping. The main drawback is cost.
- Aspen. Widely regarded as optimal for steam room interior lining. It remains stable under repeated heating and cooling, though it can exude resin in some conditions, requiring proper sealing and ventilation.
- Larch. Dense and moisture‑resistant with distinctive grain patterns. It withstands high humidity and heat well, but is harder to work with and usually yields rectangular boards rather than curved mouldings.
- Linden. Excellent for wall and bench cladding where ongoing heating is involved. Linden heats slowly, which can be advantageous for steam rooms, but it is prone to rot if not properly protected from moisture and treated with a non‑toxic finish.
Beyond interior walls, it is essential to select barrier and insulation systems designed for wet environments. Typical combinations include mineral wool or basalt wool for insulation, with a foil‑faced vapour barrier for walls and ceilings. Insulation should be complemented by a dedicated moisture barrier membrane to prevent dampness from migrating into structural elements.
European practice recognises that finishes must resist heat, moisture and cleaning agents without releasing toxins when heated. When specifying finishes, consult with a qualified timber specialist or contractor who can verify compatibility with local humidity levels and the building envelope.
Flooring, wall and ceiling finishes must harmonise with heating regimes and maintenance routines. Timber finishes require routine maintenance to keep surfaces sanitary and aesthetically cohesive.
Flooring for the steam room
Flooring in the steam room should be laid after the structural frame is in place. The floor must be configured so water can drain away quickly and safely. In most European projects, the floor is built to be slightly higher than adjoining rooms to prevent moisture transfer between spaces.
There are two principal options for the substrate: timber or concrete. Each has pros and cons, depending on budget, climate and intended use:
- Concrete floor. A durable, long‑lasting choice that can be laid with a fall to the drainage point. The typical process involves creating a drainage channel under the seating area, applying a waterproof membrane, then finishing with a non‑slip surface such as stone or ceramic tile. Steps include: creating a screed, sealing, installing drainage, and finally laying the decorative surface. Expect a higher upfront cost but extended service life.
- Timber floor. A more traditionally authentic option that can be lighter on the budget and visually cohesive with timber walls. Constructed with battened boards to allow airflow underneath, it requires careful spacing (often 6–8 mm gaps) to prevent moisture entrapment. Finish with a moisture‑resistant decking or planking that is easy to clean and maintain. Install ventilation outlets to ensure air movement beneath the floor.
In either case, the floor should be slip‑resistant, chemically stable when exposed to heat and cleaning agents, and free from surfaces that could shed toxins at high temperature. A well‑designed floor system also supports efficient drainage and thermal comfort.
For a simple and economical approach, a timber deck can be laid over a moisture‑resistant base with regular gaps for ventilation. Regardless of method, ensure the finished surface is easy to wipe down and capable of withstanding frequent cleaning and thermal cycling.
Important! If tiling the steam room floor, select slip‑resistant ceramic or porcelain tiles and avoid glossy finishes that can become dangerously slick when wet.
Ceiling protection and finishing in the steam room
The ceiling bears a significant thermal and moisture load. Hot air rises and condenses on the ceiling, so the choice of materials and finishing must withstand prolonged exposure to humidity and heat. Poor material selection fosters mould and timber degradation.
To safeguard the ceiling, implement robust moisture and vapour barriers and consider continuous or semi‑continuous ventilation. Ventilation should be planned to supply fresh air while exhausting humid air effectively. A practical solution is to install controlled intake and exhaust with ducting that traverses the ceiling for optimal air distribution.
Consider ceiling constructions in three common formats:
- Cladded ceiling. A traditional option where the ceiling is finished with timber boards fixed to ceiling joists. Leave ventilation gaps and ensure adequate clearances around the heater. This is the most common choice among steam room owners.
- Sloped or lean‑to ceiling. Suitable for narrow spaces up to about 2.5 m wide. It uses exposed boards with layers of vapour and acoustic insulation beneath and a moisture‑resistant finish on top.
- Panel or hybrid ceiling. Combines a structural base with preassembled panels. The system is efficient to install and can be adapted to fit bespoke architectural forms. Panels are typically made from moisture‑resistant timber or composite materials and finished with a protective sealant.
Tip! When selecting timber for the ceiling, prefer cedar, aspen or larch. Avoid resin‑rich softwoods such as certain pines, which can release resin in high humidity and heat.
Insulation, humidity control and wall finishes
Understanding how walls perform in a humid, heated space is crucial. Walls may be built from brick, natural stone, aerated concrete or timber, and each requires different interior finishes and protection strategies.
Wall finishes
For timber‑built rooms, interior cladding is typically timber boards or tongue‑and‑groove panels. When walls are brick or aerated concrete, it is common to apply timber cladding or ceramic/stone finishes to the interior surface, ensuring compatibility with moisture levels and heat. Species such as cedar or linden are popular for lining walls adjacent to benches and heaters due to their low resin output and stable performance in moist environments. When walls are clad with stone or ceramic tiles, use temperate finishes on adjacent timber surfaces to maintain a warm, coherent atmosphere.
Natural or stone accents are often used to create focal points within the steam room. A brick‑work feature around a heater or a stone shelf can provide tactile contrast and reduce visual monotony without compromising safety.
Insulation and moisture control
Thoughtful insulation and moisture management are essential in steam rooms. Materials fall into two broad categories:
- Natural insulation: sheep’s wool, hemp, cork or moss can offer excellent breathability and environmental credentials for European projects. These materials are typically used in combination with a moisture barrier and a robust vapour barrier to prevent dampness from penetrating structural members.
- Artificial insulation: mineral wool or basalt wool, extruded polystyrene, or foam boards. Among these, mineral and basalt wool provide superior fire resistance and heat stability for steam room environments.
Professionals recommend a moisture barrier membrane for walls and ceilings, particularly in areas where condensation is heavy. For ceilings, a vapour barrier is often mandatory to protect insulation and framing from moisture ingress. In addition, consider a breathable interior finish that dries quickly after use and is easy to clean.
Doors for steam rooms and saunas
Access to the steam room is essential to contain heat and control humidity. Doors come in several configurations, with safety and airtightness as primary considerations. The following options are common in European steam spaces:
- Timber doors. The most traditional and widely used choice. Suitable woods include ash, linden and aspen, all of which perform well in high humidity environments. Timber doors should be well sealed and provided with proper gaps or thresholds to manage air flow and heat retention.
- Glass doors. Tempered or laminated glass doors are increasingly popular in contemporary saunas. They offer a modern aesthetic and keep the space feeling open. Glass doors must be rated for high temperatures and humidity and should be fitted with robust hardware and seals.
Important! Designers strongly discourage plastic doors for steam rooms. Plastic can outgas and degrade under heat, and it is not considered durable or eco‑friendly in high‑humidity environments.
Door design varies by sauna type. For a traditional European steam room (often similar to a Finnish‑style sauna), maintain a small gap between the door and the threshold to allow fresh air inflow. In slightly different European configurations, such as more humid steam baths, the main objective is airtightness to avoid heat loss while permitting controlled ventilation to manage humidity and comfort levels.
Benches in the steam room: layout, materials and practicality
Benches are the core of the steam room experience, providing spaces for sitting and lying down during procedures. They influence heat distribution, user comfort and ease of cleaning. The following sections detail bench materials and configurations.
Materials for steam room benches
Timber remains the standard material for benches due to its warmth, resilience and pleasant tactile quality. Common species include oak, Linden, ash, aspen, alder and cedar. These woods release minimal resin, hold their shape in fluctuating humidity, and are comfortable on skin after heating. Each species has a distinct appearance and price point, so choose in harmony with the overall design language of the space.
Bench configurations and layouts
Benches for steam spaces fall into several practical configurations, each with its own benefits. Here are four main typologies, with notes on where they work best:
- G‑shaped benches: single level along two perpendicular walls, creating a compact, efficient seating zone that keeps the central area free for movement.
- Coupe benches: two levels with one bench directly above the other, offering warm upper seating and cooler lower seating and enabling a high density of seating without crowding the room.
- Standard benches: single or double level benches placed along a wall, simple and versatile, easy to clean and maintain.
- Step benches: multiple tiers arranged on a vertical axis, ideal for rooms with more generous footprints and for varied seating heights to suit different users.
Other bench configurations include folding or sliding variants for compact spaces or occasional use by larger groups. Removable benches can offer flexible layouts but require time for setup before each session. The key is to balance seating capacity with ease of cleaning and maintenance, and to ensure the benches are robust enough to withstand frequent heat cycles.
Steam room interior design ideas: styles and atmosphere
Within the steam room, emphasis is typically on function and comfort. Design language can range from traditional to contemporary, depending on the broader spa or home aesthetic. Below are three commonly explored European directions, with practical considerations for each.
Traditional Russian‑style steam bath
In a traditional Russian bath or banyas, the interior tends to be light timber with straightforward, sturdy benching and a prominent stove or heater as a focal point. Decor is modest, with functional accents such as bundles of birch whiskes, wooden buckets and ladles lending a rustic charm. The stove or heater, typically a masonry unit or electric equivalent, becomes a design feature as much as a heat source. The lighting is warm and indirect, enhancing the sense of enclosure and comfort. In these spaces the priority is tactile warmth, honest materials and a sense of homely permanence.
To contribute to a cohesive look, consider warm timber tones, natural textures and simple accessories that celebrate craft while staying practical in humid conditions.
Finnish sauna style
Finnish saunas are renowned for dry heat, light timber walls and a minimalistic, serene palette. The walls are often clad with pale, straight‑grained timber for a bright, clean backdrop. Floors may feature ceramic tiles or stone that tolerate dampness and offer a cool counterpoint to the wooden surfaces. Benches are typically built along the walls in multiple heights to allow seating at different temperatures. The overall mood is restrained, with quiet lighting, clean lines and a strong sense of order. The design ethic is to let heat and light do the work, with a focus on craftsmanship and longevity.
Turkish hammam style
Turkish hammams bring a different mood, blending warmth with luxurious stone textures, ornate mosaics and sculptural lighting. The walls and floors frequently incorporate natural stone or mosaic tiles, with contrasts of warm and cool tones. Benches in hammams can be arranged to create a sequence of spaces, often with tiered stone seating and alcoves for steam and relaxation. The atmosphere emphasises sensorial richness and a spa experience that feels curated and indulgent. When incorporating hammam elements in a European project, balance opulence with practicality by selecting durable materials and ensuring easy maintenance in a high‑traffic, humid environment.
Tip! For design cohesion across a bath complex, align material palettes and hardware finishes with the rest of the home or spa, while allowing the steam room to express its own character through subtle contrasts in texture and lighting.
Designing other spaces within the bath complex
Beyond the steam room, a complete bath environment typically includes a relaxation or lounge area, a changing room and a washing or rinsing room. The design approach to these spaces should complement the steam room while remaining practical for use in a European context.
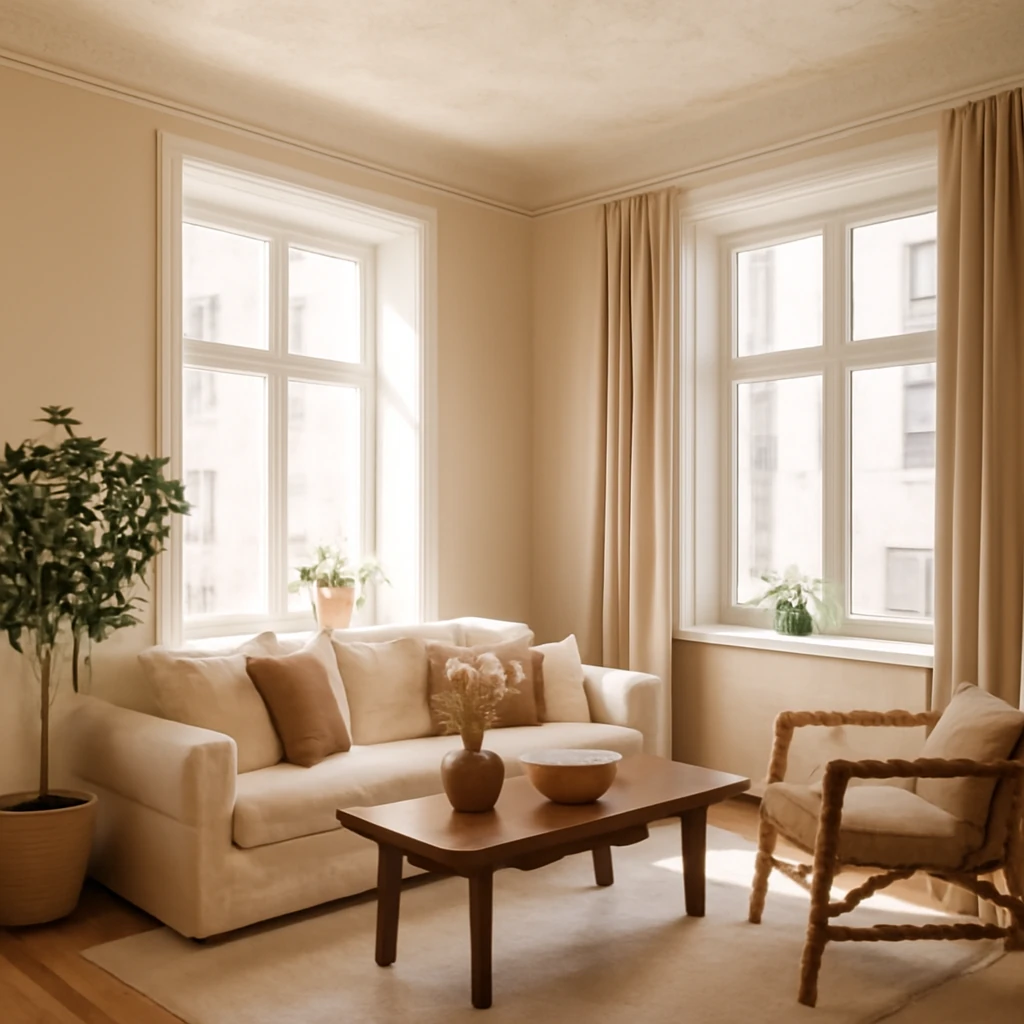
Relaxation or lounge area: Choose styles such as chalet, rustic countryside, coastal, eco, Provencal or contemporary Nordic. Furniture should be comfortable and easy to move or rearrange. A small dining or coffee area can be integrated with a bench or freestanding table and seating. Consider a low‑maintenance palette with natural textures, soft fabrics and warm lighting to create a calm, inviting atmosphere.
Washing or rinse room: This space should be functional and straightforward, with storage for towels, robes and toiletries. Styles such as eco, loft, rustic or minimal can work well here. Install robust shelving, wet‑area cabinets and a durable floor finish that tolerates moisture. Lighting should be bright enough for practical tasks but can be softened by warm white tones to maintain a spa feel.
Anteroom or changing area: This transitional space should offer storage for clothing and accessories, plus seating and convenient access to the steam room. Choose durable materials and finishes that resist wear and tear, and use soft textiles to create a welcoming vibe as you move between spaces.
In short, an original and practical steam room interior is entirely achievable with careful planning, appropriate materials and thoughtful detailing. If you encounter difficulties, seek professional design support to tailor the project to the specific climate, building envelope and client needs.
You may also like these articles

The Sofa Buyer's Blueprint: 8 Essentials for a Durably Stylish Couch
A practical guide to choosing a durable, comfortable sofa for European homes.

Wallpapers for the Living Room in 2025: Nine Trends, Materials and Practical Ideas
Nine wallpaper trends shaping European living rooms in 2025
Choosing the Best Ceiling for Your European Home
A European guide to ceilings that transform space and light.