
Explore interior trends, AI design insights, styling guides and real transformations
Illuminating the European Kitchen: Practical Lighting for Every Zone
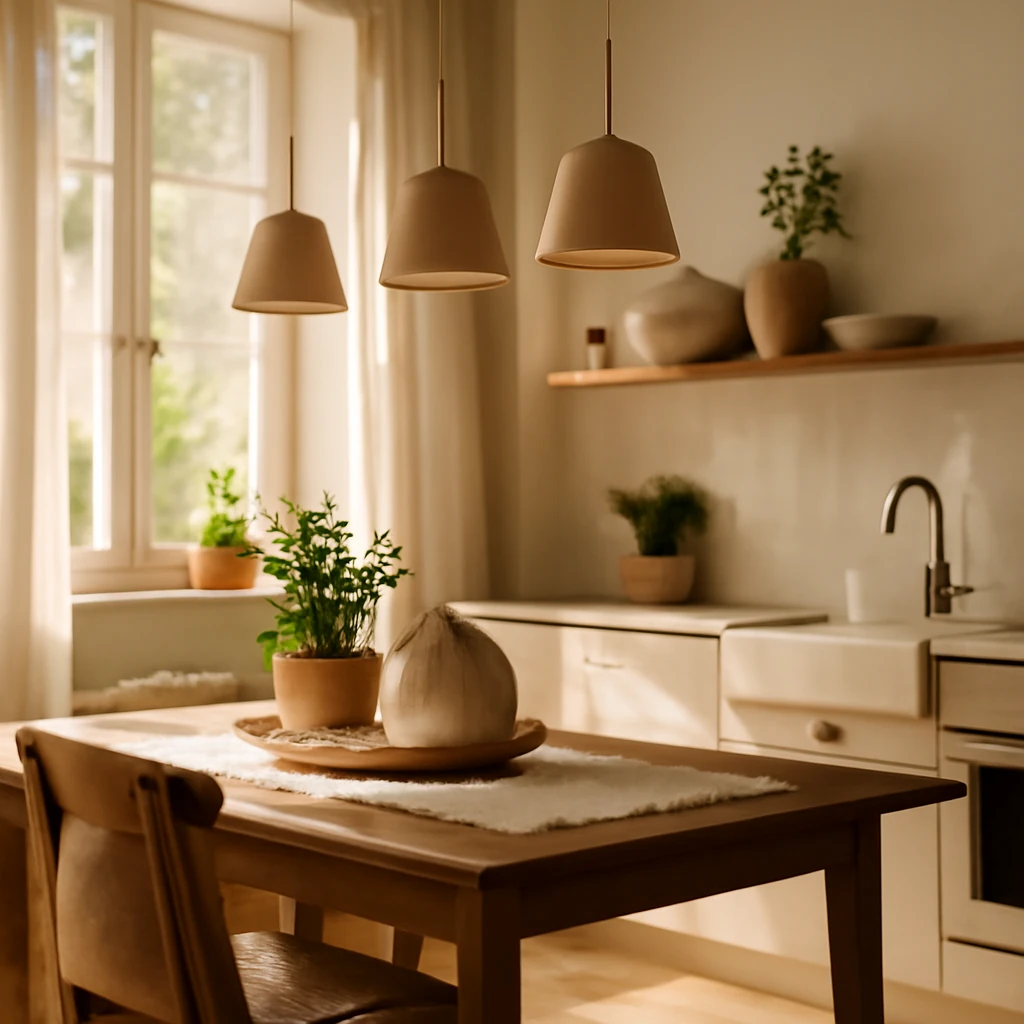
Introduction: the right light for every European kitchen
Lighting is often treated as the finishing touch in kitchen design, yet it shapes how the space is used, feels and performs. The single ceiling light approach is a common mistake that leaves work zones dim, dining areas harsh and mood opportunities untapped. For European homes that blend cooking, dining and living in open plans, a layered lighting strategy is essential. The aim is to combine task light for preparation, ambient light for comfort, and decorative light to highlight texture, colour and architectural detail. In this guide we translate practical lessons into a European context, with measurements you can apply to most kitchens, whether in a compact city flat or a generous family home.
General lighting design: six practical rules to follow
-
1. Plan lighting early. During a renovation or even a refurbishment, it is not wise to decide the number and placement of luminaires on the fly. The most sensible approach is to determine the main functional zones first - food preparation, cooking, washing, dining and any seating area - then design a layered lighting scheme around them. A well-considered plan saves rearrangements later and ensures there are no dark pockets when you least want them.
-
2. Place electrical fittings with care. Sockets, switches, light fittings and wiring should be set well away from wet areas. A practical guideline: keep a minimum distance of 60 cm from sinks and water connections. This spacing reduces the risk of splashes affecting switches and allows safe access for maintenance or replacement of fittings.
-
3. Use more than one light source. A single ceiling fixture creates glare and uneven illumination. Always provide a layer of task lighting to illuminate work surfaces, and if there is a dining area, install a pendant above the table or wall sconces for softer ambience. Decorative lighting and cabinet or shelf illumination can add depth and character without creating harsh shadows.
-
4. Use lighting to modify the space. If the kitchen has architectural limitations, lighting can help correct or enhance geometry. For a narrow kitchen, place lighting along one wall to visually balance the room. Lights aligned along the central ceiling line opposite the wall tend to elongate a space visually. Wall sconces that direct light upward can visually raise a low ceiling, while a substantial chandelier is often well suited to tall spaces.
-
5. Vary colour temperature to suit tasks and mood. Modern LEDs come with a range of colour temperatures. For work zones, a cooler white (around 4,000–5,000 kelvin) provides good contrast for chopping and measuring. For dining and relaxation, warmer light (around 2,700–3,000 kelvin) creates a welcoming atmosphere. A nuanced combination of temperatures can be achieved with layered lighting and dimming controls.
-
6. Prioritise energy efficiency. LED luminaires deliver substantial energy savings and have longer lifespans, reducing maintenance. Where possible, include dimmers and smart controls to adapt light levels to time of day and activity, which can further cut running costs.
Kitchen lighting layout: essential fittings and spacing rules
To achieve functional and aesthetically pleasing illumination, consider these core fittings and practical spacing guidelines. Plan a schematic before purchasing fixtures, marking distances and alignment opportunities. The following recommendations are framed for European kitchens, where standard dimensions and drywall or modular cabinetry are common.
1. Recessed ceiling spots
Recessed ceiling spots (downlights) provide a clean, unobtrusive base layer. Place them 30–40 cm apart to create even coverage without dark gaps. From the wall corner to the nearest light, maintain a clearance of at least 20 cm. A common rule of thumb is to aim for roughly 20 W per square metre of ceiling. Before installation, draw a plan showing the layout and wall distances so the final result aligns with the room’s geometry. In a typical European kitchen, a grid of 6–12 spots may be appropriate, depending on room size and ceiling height.
2. Under-cabinet lighting and upper cabinet illumination
Under-cabinet strips or linear fittings have become essential for culinary work. They illuminate the worktop precisely where you need it and reduce the shadow cast by your body when facing the counter. If your kitchen features open shelving or glass-front cabinets, consider interior shelf lighting to create a gentle glow and highlight contents. The recommended distance between the bottom edge of the fixtures and the work surface ranges from 70–87 cm, with the aim of a comfortable, glare-free wash of light across the counter. Where upper cabinets project light outward, ensure the output is sufficient but not overpowering, a soft, colour-balanced glow helps eyes adjust as you move from prep to dining areas.
3. Pendant lights and fixtures with long cords
Pendant lights with long cords are a flexible design tool, but they should not intrude on movement or head height. When positioned above a round dining table, keep the bottom of the shade 70–90 cm above the tabletop. The pendant diameter should be roughly half the width of the table for harmonious scale. For longer tables, install multiple pendants, starting about 30 cm from each end of the table and spacing them evenly across the length. In open-plan kitchens where a dining zone blends with a living area, consider pendants that offer both functional light over the table and ambience when the room is in use for other activities.
4. A group of pendant lights for an island or peninsular work surface
Hang a cluster of pendants above a kitchen island or cooking peninsula to create a strong focal point and task layer. The bottom edge of each pendant should be at least 65–70 cm above the island work surface to prevent glare and obstruction of views. Keep the distance between individual lamps within the cluster to avoid visual clutter and ensure a balanced glow across the island. Remember: the spacing between fixtures above a kitchen table or island should not be less than 30–40 cm, otherwise, the light can feel pressurising or too concentrated.
5. Spacing and coherence across the ceiling
When you install a row of ceiling spots or a pendant trio, the alignment and spacing create rhythm across the room. The general guideline is to maintain uniform intervals and to keep lamps in line with architectural features such as cabinet edges or wall lines. This coherence helps the eye travel smoothly through the space and prevents the lighting from appearing random or mismatched.
In an open-plan kitchen–dining–living space: four rules to guide lighting decisions
-
1. Functional zoning matters. Lighting should enable you to switch on different zones independently. A central ceiling fixture in the living area paired with targeted under-wall lighting or spot lighting for the kitchen creates a flexible rhythm. In a reading chair or a cosy corner, a floor or table lamp with a directional head serves both function and atmosphere without overpowering the room.
-
2. Pendant lighting over the bar or counter helps define the boundary between kitchen and living spaces. When the kitchen light is off, these fixtures can provide a more intimate ambience for the lounge area and reduce glare from the main kitchen lighting.
-
3. A statement chandelier above the dining table creates a deliberate mood - whether festive or intimate. Choose a design with adjustable height to adapt to different occasions and seating arrangements. A well-balanced fixture that scales with the table and seating is essential in European open-plan layouts where dining and lounging share a single zone.
-
4. Decorative lighting to accent decor include table lamps, wall sconces and floor lamps that contribute to a relaxed atmosphere and highlight vases, glassware or artwork. Use directional lighting to draw attention to textures and objects, while keeping the overall brightness comfortable for conversation and evening relaxation.
Trends in kitchen lighting: expert insights for European interiors
In contemporary European kitchens, designers are moving beyond conventional ceiling lights to create layered, adaptable environments. A senior lighting designer offers three practical trends that feel fresh yet remain highly functional:
-
Trend 1 - Flexible focal points. Instead of relying solely on a single pendant above the dining table, designers pair ambient lighting with alternative focal sources. A floor lamp on a curved stand, a diffused table lamp, or a wall-mounted projector can be deployed to softly enliven spaces without overpowering the central light source. This approach supports transitions from active cooking to relaxed dining and reduces glare during evenings.
-
Trend 2 - Contour lighting with LED tape. A subtle outline around a glass-top dining table or inside glass-front cabinets creates a self-contained glow, akin to a built-in window. LED tape installed discreetly inside cabinets or along shelves provides luminous accents that feel architectural rather than decorative. The result is a luminous panel effect that adds depth and a sense of airiness to the room.
-
Trend 3 - Invisible but effective strips. LED strips placed inside shelves, beneath cabinets, or along wall recesses offer continuous, glare-free illumination with minimal construction. This method is particularly appealing in European homes where kitchen layouts favour clean lines and streamlined surfaces. It can be installed with modest disruption and no heavy electrical works, making it an attractive update option for both new builds and renovations.
These ideas come from seasoned professionals who work across city apartments and family homes in Europe. The key takeaway is adaptability: lighting should be able to respond to daily tasks, seasonal events, and changing furniture arrangements without requiring a complete overhaul of the electrical system.
Design principles to guide your kitchen lighting plan
To create a coherent and enduring lighting strategy, consider the following principles. They help you translate the concepts above into a practical, buildable plan suitable for European homes with varied layouts and materials.
- Assess daylight and orientation. Natural light changes with the seasons and the angle of the sun. In kitchens with strong daylight, you may prioritise task lighting for late afternoons or evenings when daylight fades. In darker northern climates, a denser layer of light may be necessary for comfortable work and dining spaces.
- Define the colour palette and its impact on brightness. The light you choose should render food colours accurately. A CRI (colour rendering index) of 90 or higher is ideal for kitchens. Be mindful that warmer LEDs can make food look yellowish, while cooler temperatures can be harsh on skin tones. A blend of fixtures with adjustable colour temperatures can offer flexibility for different tasks and moods.
- Dial in brightness with dimmers. Dimming controls allow you to transition from bright, energetic prep lighting to soft, intimate dining illumination. Dimmed general lighting also reduces glare on glossy worktops, reflects less on glass surfaces and helps maintain a comfortable ambience during evening hours.
- Prioritise safe and practical installation. In all European homes, electrical work should comply with local regulations and standards. If you are upgrading an older kitchen, work with a licensed electrician to ensure that circuits, outlets and switches are placed in logical positions, with consideration given to future renovations or reconfigurations.
- Think about maintenance and accessibility. Choose fixtures that are easy to clean in a kitchen environment and have readily replaceable LED modules or lamps. In urban settings, spare parts and service are easier to source when fixtures are modular and widely available.
- Plan for future flexibility. If you anticipate changes in layout or use - such as converting a dining area into a study or play zone - design with modular lighting that can be adapted without a complete rewire. A smart lighting system or simple zonal controls can accommodate mid-term changes with minimal disruption.
Practical tips for European kitchens: a concise checklist
Use this checklist to ground your project in practical realities while keeping aesthetics at the forefront:
- Estimate activities per zone: prep, cooking, cleaning, dining, socialising. Map a light plan to each task cluster.
- Choose a layered palette: base ambient, task-focused, and decorative lighting that can be mixed and matched with dimming.
- Plan lighting around furniture dimensions and room proportions rather than forcing standard fittings onto the space.
- In open-plan rooms, ensure each zone can be illuminated independently to accommodate different activities.
- Incorporate both under-cabinet lighting and shelf lighting for texture and depth.
- Include energy-efficient options and dimmers to maintain flexibility and reduce running costs.
Concluding thoughts: translating theory into a real kitchen plan
A well-lit kitchen is not merely a matter of choosing a few fixtures. It is a strategic design decision that affects usability, comfort and even the perceived size of the space. By embracing a layered approach - ambient, task, and decorative lighting - you enable a kitchen to transition seamlessly from a functional workspace to a warm social hub. Whether you are renovating a compact city apartment or a generous family kitchen, the principles outlined here provide a practical framework that respects European design sensibilities, ensuring that every luminaire earns its keep.
Glossary of practical guidelines used in this guide
- Ceiling spots spacing: 30–40 cm apart, 20 cm from wall corner.
- Workbench clearance: bottom edge of under-cabinet lighting 70–87 cm above work surface.
- Dining table lighting height: 70–90 cm above the table surface for round tables.
- Island lighting height and spacing: bottom of pendants 65–70 cm above island, keep 30–40 cm minimum spacing between pendants.
Final reflection: designing with light, not just for light
In European homes, kitchen lighting is best conceived as a choreography. It should translate daily routines into a coherent atmosphere, capable of shifting from practical to poetic with the press of a dimmer. By combining the recommended layouts, fittings and smart control options, you create a kitchen that is not only efficient and easy to use but also a place of welcome and expression. The best lighting schemes prove their value every day, when a cook has the perfect glare-free surface for chopping, when the family gathers for a quiet dinner under a warm glow, and when the room reveals its layers of texture and colour as day turns to night.
You may also like these articles
 Colour & Materials
Colour in interiors: a definitive guide to palettes and schemes
A sophisticated guide to palettes, tones and room-ready colour schemes.
Small Spaces
Designing a Small Bathroom: Practical Ideas for Compact European Homes
Smart layouts, light-filled rooms and clever storage for tiny baths.
Tips & How-To
DIY Wooden Decor: Crafting Warm, European-Style Interiors
Create bespoke wooden accents with easy techniques for European interiors.