
Explore interior trends, AI design insights, styling guides and real transformations
DIY Wooden Decor: Crafting Warm, European-Style Interiors
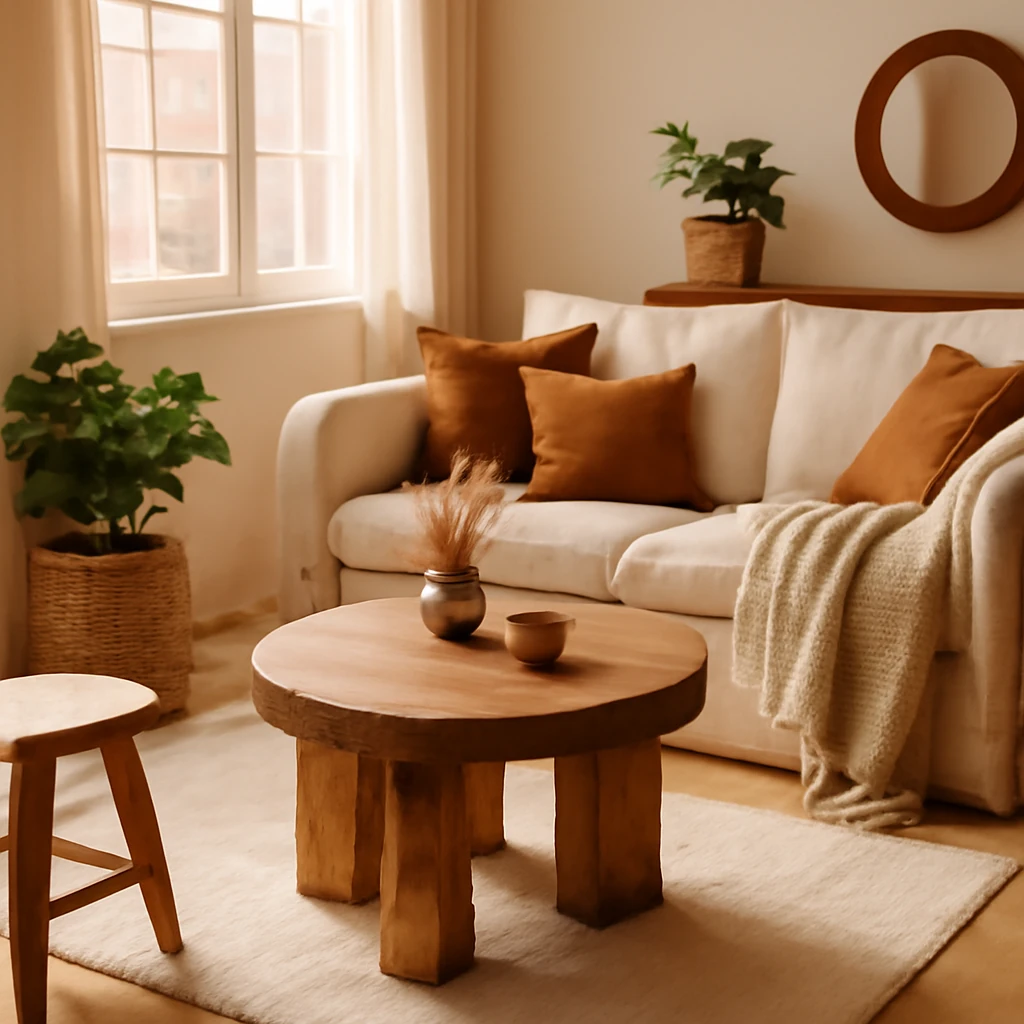
Wooden decor for the home: timeless charm, modern practicality
Across Europe, wooden decorative pieces bring an inviting warmth, texture and a sense of thoughtful craftsmanship to living spaces. The beauty of timber lies not only in its natural grain but in the potential to be shaped, finished and personalised with modest tools and a little imagination. You don’t need a fully equipped workshop or a large budget to create distinctive features that elevate a room from functional to exceptional.
Whether you favour classic interiors, contemporary minimalism or a cosy, cottage-inspired aesthetic, wooden decor adapts gracefully. From pared-back wall panels that emphasise texture to sculptural candle holders and bespoke frames, small, well-executed items can anchor a scheme and tell a personal story. This guide offers practical ideas, sourcing tips and clear steps to start crafting your own timber accents in a European context.
Planning your wooden decor project
Before you pick up any tools, set a clear plan. Consider the room, scale and purpose of the piece, and how it will harmonise with existing finishes and furniture. Timber works well when it respects the space: scale your design to the room size, choose a wood with a grain that complements the surroundings, and select a finish that suits the light and climate of your home.
- Style and scale: a large wall panel should relate to wall area, a candle holder or small frame works best as an accent, not a dominant feature.
- Wood choice: European species such as beech, oak, ash, walnut and pine offer a wide range of colours and grain patterns. Be mindful of humidity and maintenance demands in bathrooms, kitchens and utility spaces.
- Moisture and stability: aim for well-seasoned timber, consider pre-drying timber to appropriate moisture content to minimise warping after finishing.
- Finish and protection: select a finish that suits the environment - oil for a natural look, varnish or polyurethane for resilience, and wax or balm for a tactile feel.
What you can make: a catalogue of ideas
Wood offers an almost endless range of decorative possibilities. Below is a representative list of items that can be adapted to different European home styles:
- Subtle wall panels that emphasise texture rather than form
- Elegant candle holders and small sculptural pieces for tabletops
- Custom clocks with timber faces and minimal mechanisms
- Unique key racks and wall-mounted organisers
- Artful frames and wall art using sliced timber or branches
- Themed decorations for holidays and family milestones
Where to source wood in Europe
Access to timber in Europe is diverse, from responsibly managed forests and timber yards to salvage and reclaimed materials. Practical sourcing strategies include:
- Salvage and reclaimed timber: look for offcuts from local joineries, sawmills and construction sites where timber is surplus or discarded. Reclaimed boards bring character and history to a piece.
- Beaches and riversides: driftwood and weathered branches can inspire coastal or rustic schemes. Ensure pieces are clean and free from salt damage or pests before use.
- Timber yards and DIY stores: standard softwoods (pine, spruce) and hardwoods (beech, oak, ash) are widely available. Ask for offcuts and optimised sheets for small projects.
- Salvage doors, crates and pallets: repurposed sections can yield frame components, panels or decorative slats with authentic patina.
When purchasing timber, consider moisture content, planing needs and the intended environment. In damp spaces, choose timber with good dimensional stability and seal joints effectively to prevent movement over time.
Techniques for a refined timber look
Many decorative timber pieces benefit from a combination of techniques. Start with a simple shape, then add texture and character through paint, surface treatment or engraving. The following techniques are especially versatile across European homes.
Painting
Painting timber is a straightforward route to personalise a piece while protecting it. Practical tips:
- Sand the surface to a smooth, even finish, begin with a medium-grit (80–120) and finish with fine-grit (180–220).
- Use a primer to seal the timber and minimise tannin bleed, this helps the final colour stay vibrant and even.
- Choose a water-based acrylic for ease of maintenance and low odour. For a classic timber look, a translucent stain can preserve grain while adding colour.
Decoupage
Decoupage is a versatile method to introduce pattern or imagery onto timber surfaces. Simple steps:
- Prepare the surface with light sanding and a thin coat of clear primer or sealer.
- Cut images from napkins or decoupage papers to fit your design, remember to work from the centre outward to avoid tearing.
- Adhere using a decoupage glue or thinned PVA, then seal with a clear protective layer for durability.
- Finish with a soft wax or a polyurethane varnish depending on the desired gloss level.
Pyrography
Pyrography (wood burning) adds a tactile, artisanal feel. Beginners should experiment on practice boards before applying to a final piece. Tips:
- Sketch your design lightly with pencil as a guide, then burn slowly with varying pressure to achieve shading.
- Use a stabiliser for the timber to prevent scorching and ensure clean lines.
- Finish with a clear protective coat to guard against wear and moisture.
Sawing and carving
For more sculptural pieces, hand tools or small power tools can shape timber into silhouettes, reliefs or playful forms. Practical guidance:
- Plan your cut and mark the outline on the timber. Use a sharp blade to ensure clean cuts and safer work.
- Work slowly, especially near curves or delicate sections. Sand edges to remove burrs and create a refined finish.
- Finish with oil or wax to emphasise the natural warmth of the timber and protect the surface.
Project ideas: step-by-step outlines
Below are several approachable projects, suitable for beginners and veterans alike. Each can be scaled up or down to fit your space.
Candle holders
A charming way to bring warmth to a dining table or console is a handcrafted wooden candle holder. A simple design uses a branch segment or a flat wooden disk with a recessed socket for a tealight or small candle.
- Choose a branch or thick disk with a stable base, ideally about 2 cm larger than the candle diameter.
- Cut to height using a circular saw for a clean surface, or hand-saw for a rustic edge.
- Drill a shallow, circular recess slightly larger than the candle, plant a soft wax finish and sand smooth.
- Finish with beeswax or Danish oil to protect the timber and highlight the grain.
- Place away from flammable materials and ensure the holder sits solidly on the table.
Wall panels
Wall panels bring texture and subtle architecture to a room. Use a collection of matched boards or sliced branches arranged in a grid or a flowing pattern.
- Prepare a backing board (plywood or MDF) and cut timber strips or branches to a uniform width.
- Lay out the design first, photograph it and then glue pieces in place with a wood adhesive, aligning edges carefully.
- Fill gaps with colour-matched caulk or filler, smooth and sand once dry.
- Seal with a protective varnish or penetrating oil to enhance durability and ease of cleaning.
Clocks
Timber-faced clocks marry form and function. A single solid slab or a crafted frame around a clock mechanism creates a focal point in living areas or kitchens.
- Select a timber slat or slab with an interesting grain pattern.
- Mark numerals by engraving, burning or applying contrasting inlays, alternatively use numerals painted in a minimalist style.
- Mount the clock mechanism in the centre and finish with oil or varnish to protect the face from wear.
Key racks
Key racks are practical, decorative items that can be customised to reflect the home’s character. Consider rustic driftwood or a small branch with multiple natural nooks for hooks.
- Cut a backing board and attach a row of small hooks with screws or nails.
- Sand edges and apply a clear finish to preserve the timber.
- Consider slight curvature or a gentle slope to help keys slide naturally onto the hooks.
Frames and media surrounds
Frames and surrounds built from natural timber add warmth to family photographs or mirrors. Options include using whole branches as rustic frames or gluing thin slices into a mosaic.
- For simple frames, join corners with robust wood glue and reinforce with small nails.
- Finish with a protective wax or matte varnish to keep the surface tactile and easy to clean.
- Mix different timber tones for a contemporary take on a classic display.
Themed decorations for celebrations
Timber decorations tied to holidays or family milestones make lasting memories. Ideas include painted wooden discs for Christmas ornaments or carved plaques to celebrate anniversaries.
- Explore small, repeatable shapes to build a cohesive display.
- Finish with a clear sealant so decorations last through annual use and storage periods.
Finishing and protecting timber
The finish you choose defines the look, feel and longevity of your piece. In European homes, a balanced approach often works best: emphasise the timber’s natural beauty while ensuring resilience against wear and moisture.
- Oil finishes: natural oils (such as linseed or tung) penetrate the timber, enhancing colour and grain while preserving a soft, tactile feel. Regular maintenance rehydrates the wood and refreshes the finish.
- Wax and balm: wax provides a satin or matte finish with a pleasant tactile quality, it is easy to refresh but offers less protection against spills.
- Varnish or polyurethane: for high-traffic areas or pieces near kitchens and bathrooms, a protective film offers durability and moisture resistance, choose water-based formulations for lower odour and easier cleanup.
- Combining finishes: a common approach is to oil timber first to highlight grain, then apply a light varnish to protect the surface without masking texture.
Always prepare the timber surface before finishing: sand progressively, remove dust, and test a small area before applying in full. For food-safe surfaces (trays, coasters), use finishes that are specifically rated for food contact and follow manufacturer guidelines.
Care and maintenance
Timber decor, when properly finished, requires minimal upkeep. Dust regularly with a soft cloth and reapply oil or wax as the finish dulls or looks worn. Wipe spills promptly and avoid prolonged exposure to direct heat or sunlight to minimise drying and cracking. In damp rooms, maintain ventilation and consider additional sealing or choosing timber species known for stability in such environments.
Practical considerations for small spaces and multi-use rooms
In compact homes, timber accents can define zones without overpowering the space. Use lighter woods or whitewashed finishes to keep rooms feeling airy. Wall-mounted panels and shelves provide storage and display surfaces while preserving floor space. Fold-out or modular timber pieces can transform a corner into a workspace or reading nook without permanently dedicating space.
Sustainable approach and European context
Timber is among the most renewable materials when sourced responsibly. In Europe, responsible forestry practices, certified timber and local mills reduce transport miles and support local economies. When possible, choose sustainably harvested timber, reclaimed boards and offcuts from local suppliers. Such choices align with contemporary design ethics that prioritise longevity, repairability and timeless aesthetics over disposable trends.
Getting started: a simple 2-week plan
To turn intention into a tangible piece, follow a short, structured plan. This sample timeline can be adapted to your pace and the complexity of your project.
- Week 1: concept and sourcing – decide on the item, sketch a simple design and source timber. If using reclaimed timber, inspect for cracks or pest damage and plan how to stabilise it.
- Week 2: fabrication and finishing – cut the timber, assemble, sand, and apply the chosen finish. Allow sufficient drying time between coats if relevant.
Inspiration and guidance for European homes
Timber decor carries regional charm - whether nautical-inspired driftwood collected from northern coastlines, warm oak grained pieces suitable for a traditional townhouse, or sculptural forms that complement modern, Danish-influenced interiors. The beauty lies in personal interpretation: combine natural materials with contemporary forms, experiment with textures, and celebrate the skill of hands-on making. By focusing on simple techniques, correct sourcing and careful finishing, you can create bespoke pieces that harmonise with varied European aesthetics.
Final thoughts: craft, character, and responsible ownership
Timber does more than fill a space, it carries a narrative - of forests, craftsmanship, and the people who shape it. Through thoughtful selection, careful planning and a willingness to learn, DIY wooden decor becomes more than decoration: it becomes a sustainable, personal language of home. Start with small, attainable projects, build your toolkit gradually, and let timber reveal its warmth in different rooms and seasons.
References for further exploration
When expanding your timber repertoire, consult local joinery guides, timber suppliers and DIY communities that share European-focused tutorials. Seek advice on grain direction, moisture content, joinery options and finishing products suitable for your climate and living environment. Always prioritise safety: wear protective eyewear, follow tool manufacturer instructions, and work in a well-ventilated space.
You may also like these articles
 Interior Design
American Style in European Interiors: A Practical Guide
European take on American design: open plans, islands, and layered textures.
Small Spaces
Smart planning for one-bedroom flats: six ready-made European layouts
Six adaptable layouts for compact living across Europe.
Small Spaces
Six Smart Plans for a 10 m² European Bedroom
Small in size, big on style: six 10 m² bedroom ideas.