
Explore interior trends, AI design insights, styling guides and real transformations
How to join kitchen worktops beautifully and correctly
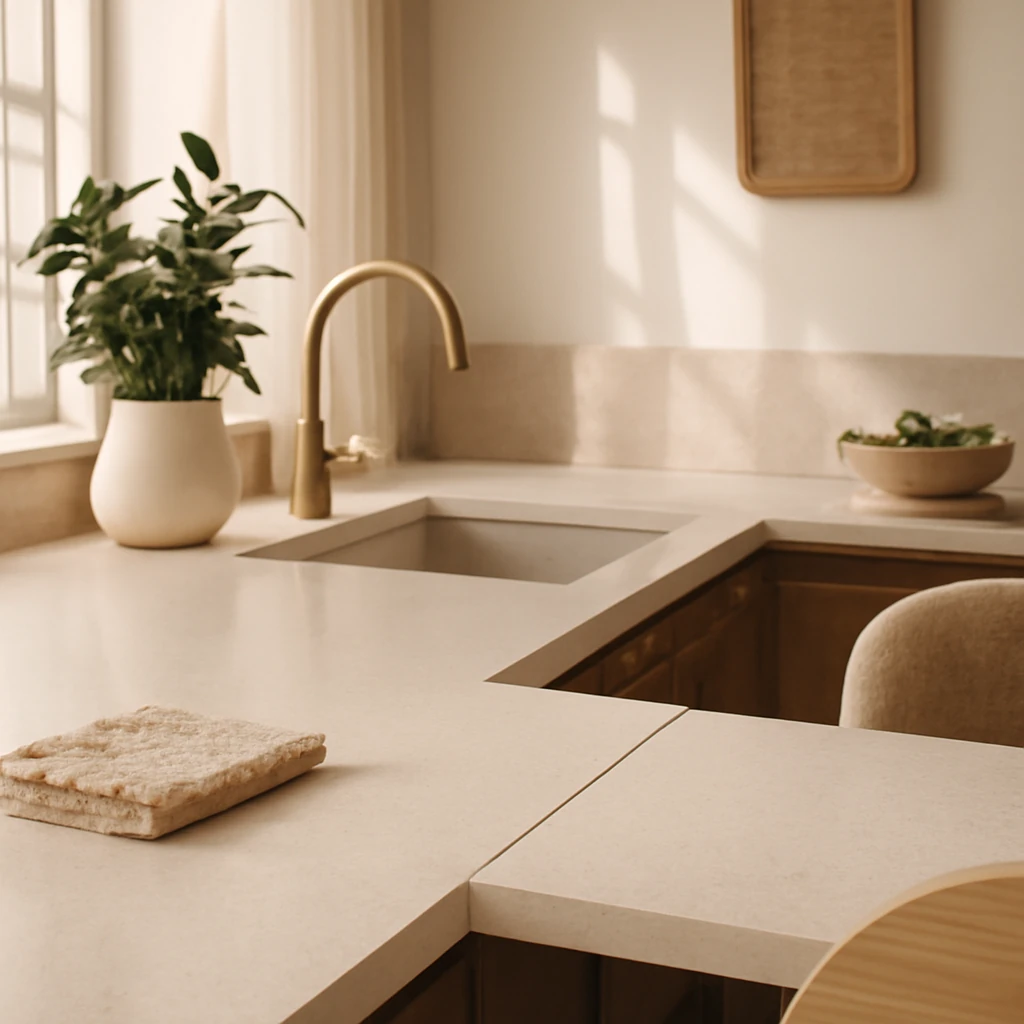
Introduction: the art of a seamless kitchen worktop joint
In contemporary European kitchens, the join between worktop sections is more than a practical detail - it is a design statement. A well-executed seam can read as a deliberate feature, or vanish into the surface, depending on material choice, cutting accuracy, and finishing. Whether you are planning a straight run along a wall, or an L- or U-shaped arrangement that wraps around appliances and sinks, the goal remains the same: a joint that is strong, watertight, and visually discreet, able to withstand daily use without warping or staining.
Today’s worktops span a wide range of materials - from natural stone and engineered quartz to solid timber and high-pressure laminates. Each material presents its own challenges for joining. In Europe, common practice revolves around three principal solutions: a simple butt joint, a precision-cut euro-spline, and a joiner profile (often an aluminium or steel edge trim) that locks the adjacent pieces together. The choice depends on the kitchen layout, the filing tolerances of the cabinet carcasses, the expected load on the seam, and the level of DIY competence. The following guide explains these methods in practical, step-by-step terms, emphasising durability, water resistance, and achievable results for discerning homeowners and professional tilers alike.
All the main approaches to joining worktops
In practice, you can achieve a near-seamless appearance using any of these approaches, provided the edges are machined accurately and the joints are properly sealed. The reasons for preferring one method over another include edge exposure, expected water contact near sinks or dishwashers, curvature of the run, and whether you require the ability to disassemble the units for maintenance or replacement.
Below are the three most typical European techniques, along with their advantages, limitations, and suitability for various scenarios.
1. Simple butt joint
A straightforward transition where two worktop sections are cut to meet and are sealed with a silicone [neutral cure] sealant. The seam is generally visible and relies on accuracy of the cut and the quality of the sealant for waterproofing. This method is quick and inexpensive, but it has notable drawbacks in a kitchen environment.
- Pros
- Fast to implement and cost-effective.
- Does not require special tools beyond standard saws and sealants.
- Gives a clean, uninterrupted top surface when cuts are perfect.
- Cons
- The joint is prone to moisture ingress over time, which can lead to swelling or distortion of the edge and the neighbouring panels.
- Heavy domestic loads (such as placing a mixer, mixer blades, or heavy pans directly on the seam) can stress the joint and cause failure.
- Even minor deviations in the faces or uneven cabinet tops can create gaps or misalignment as the boards expand and contract with humidity and temperature.
Because kitchens are high-use environments with regular exposure to water and heat, many professionals in Europe reserve the butt joint for dry zones or for non-load-bearing elements. It is particularly less suitable for long, high-use run periods or where a strong, long-lasting seam is required.
2. Euro-spline (euro joint)
The euro-spline is a precision-engineered joint that relies on a milled profile and a locking mechanism to create a tight, nearly invisible seam. The edges are prepared with controlled bevels and the components interlock like a tongue-and-groove, but with a concealed seam that tends to be less than 1 mm in width. In Europe, this method is widely used by manufacturers and serious installers due to its durability and aesthetic advantages.
- Pros
- Very narrow, visually discreet seam when finished correctly.
- Excellent moisture resistance when sealed properly, typically uses a high-quality silicone or polymer sealant.
- Suitable for stone, composite, and laminate surfaces that can be machined with precision equipment.
- Cons
- Requires precise machining and controlled tolerances, usually best achieved in a factory setting rather than DIY at home.
- Not ideal for areas with significant wall irregularities or very uneven cabinet tops, as misalignment can be noticeable.
- Edge colour and finish must be coordinated with the top, dark or contrasting edges can reveal the seam.
Euro-spline joints excel in modern, straight-forward layouts where walls are plumb and floors are level. For corner units or spaces around sinks where there is more movement or moisture, you may need additional sealing or alternative joining methods.
3. Stitched through with a joiner profile (T-profile or edge trim)
This method uses an aluminium or stainless steel joiner profile (often in a T-shape) that sits between the two worktop sections. The surfaces are prepared with sealant at the contact points, and the profile covers the seam, providing a robust, water-resistant finish. It is a favoured solution for commercial kitchens and high-end residential projects across Europe for its reliability and ease of maintenance.
- Pros
- Highly durable, excellent water resistance, especially when installed around sinks and wet zones.
- Effective at concealing minor misalignments or wall irregularities thanks to the profile edge.
- Technically straightforward to install, and the profile can be adjusted for tolerances on site.
- Cons
- The top edge of the profile may protrude, making the seam visible unless carefully matched in finish.
- Colour and finish options for profiles can be limited, finding a close match to the worktop may be challenging in some cases.
Despite the visibility of the edge in some cases, joiner profiles are widely considered the most versatile, offering strong mechanical performance and dependable waterproofing across diverse European climates and kitchen layouts.
Joining worktops with a joiner profile: a practical, step-by-step approach
The following method outlines the typical on-site process for creating a robust seam using an aluminium or stainless steel joiner profile. It is suitable for modular kitchens where lower edge details and cabinet tolerances need to be accommodated with a reliable solution. As with any significant kitchen modification, plan the work carefully, and where in doubt, consult a professional installer who can accurately assess wall plumb and cabinet alignment.
1. Preparatory work
Start by securing the base units in their final positions. The upper edges of the cabinets must be perfectly horizontal to ensure a level worktop surface. Use a reliable carpenter’s level laid along the top edges to verify horizontality. If any tilt is detected, adjust with the cabinet legs or feet. Precision here prevents a cascading misalignment across the entire length of the run.
Next, plan the attachment points for the joiner profile and any screws or fasteners. You must ensure that fasteners do not interfere with plumbing or electrical fittings from appliances and sinks. Because a joined panel is inherently less rigid than a single continuous slab, consider adding intermediate stiffening walls or brackets to provide extra support along the seam, especially in long runs or where the top is unsupported at mid-span.
When marking the positions of attachments, take into account the diameter and length of the clamps or self-tapping screws you intend to use. Typical European cabinet hardware ranges from 6 mm to 8 mm in diameter, with lengths varying according to the thickness of the worktop, commonly around 28–40 mm for edge screws. Mark lines for the joint line and for the screw locations to avoid clashes with cutouts for sinks or integrated appliances. Ensure a margin of at least several centimetres from the edge of the countertop to the first screw to reduce the risk of cracking or edge chipping.
Corner areas around sinks and cooktops require additional reinforcement. The distance from the outside edge of the worktop to the seam area should generally sit within a range of 70–150 mm to ensure load distribution and to reduce the potential for deformation near the sink opening.
2. Preparing the mounting pockets for fasteners
Begin by creating the recesses or pockets for the joiner screws and spacers. This involves careful sawing along markings, then removing the central wood or composite core to form vertical slots for the fasteners. Use a fine blade to prevent chipping along the edge and avoid tear-out of the laminate or stone veneer.
Hold the worktop sections in their final positions and dry-fit the joiner profile to confirm fit. Mark the screw holes on the profile mounting plate and drill pilot holes in the particleboard or stone core. For wood-based tops, a Forstner bit can help create clean countersinks, while for stone or composite surfaces, ensure the core can accept fasteners without enlarging the surrounding material.
When using a profile, you will typically need to provide shallow channels or grooves for the screws to sit flush. For precise alignment, drill pilot holes first and then enlarge as necessary. It is advisable to pre-cut any recesses for clamps or studs before the final assembly to reduce risk of misalignment during tightening.
3. Joining the elements
-
Apply a generous bead of neutral-cure silicone along the end surfaces of one worktop piece and onto the corresponding face of the T-profile. Align the pieces carefully and bring them together. Secure with screws, driving them through the profile’s mounting holes so that the head sits slightly below the surface to prevent interference with the top appearance.
-
Seal the exposed end of the second worktop with silicone before joining. Also apply silicone into the prepared channels on the profile to reduce the risk of moisture intrusion and to ensure a uniform seal across the seam.
With the two pieces mated, clamp them using the designed clamps or stoppers as necessary to keep the seam tight while the silicone cures. Insert nuts and star washers or hermetic inserts as required by the specific profile system. Tighten bolts gradually in a criss-cross pattern to pull the pieces together evenly and to avoid warping the edge surfaces. Wipe away excess sealant before it cures to leave a neat edge. The goal is to achieve a flush seam with the profile sitting slightly proud or aligned with the top plane, depending on the manufacturer's recommendation.
-
Finish the seam by checking for any gaps or depressions. If the profile has a cap or cover strip, fit it as directed by the manufacturer. The cover should sit flat and align with adjacent surfaces, without rocking or wobbly edges.
-
Allow the silicone to cure fully as per the product instructions before subjecting the top to heat or wet use. Clean any residual sealant and ensure the surface finish remains consistent along the seam.
In some configurations, you may opt to omit the T-profile and rely solely on a robust silicone seal between the two sections. This approach can work in dry areas or where the adjacent surfaces are perfectly aligned and stable. However, it provides less protection against moisture and thermal movement and is generally not recommended for areas near sinks or dishwashers.
Practical considerations for European homes
While the technical steps above are universal, some European realities influence how you approach worktop joints:
- Wall and cabinet tolerances: Older European homes often have walls that are not perfectly plumb. In such cases, profiles or euro-spline solutions that accommodate minor deviations are advantageous.
- Material behaviour: Natural stone and engineered quartz respond to temperature changes and humidity. Ensure the chosen joint method provides an adequate seal and that sealants are rated for kitchen environments and food-contact zones where applicable.
- Water exposure: In wet zones near sinks and cookers, a robust seal and a protective edge profile help guard against water ingress and edge spalling.
- Maintenance and accessibility: In some cases, joint access may be required for appliance maintenance. A joiner with a removable cap or the possibility to re-seal without complete dismantling can be valuable.
- Professional guidance: For complex floor plans, heavy stone tops, or unusual wall geometries, engaging a certified installer can save time and avoid costly mistakes. They can also advise on local building codes and warranty considerations.
Choosing the right solution for your kitchen layout
To determine the most suitable method, assess the layout, top material, and anticipated load on the seam. Here are quick decision guidelines:
- For long, straight runs with square walls, a euro-spline offers a near-invisible seam and excellent durability, provided precise machining is achieved in a controlled workshop.
- For irregular walls or where wall plumb is inconsistent, a joiner profile can accommodate misalignment and provide a robust, waterproof seam with visible edge detail that complements contemporary finishes.
- If budget is tight and the area is not heavily used, a carefully executed butt joint with high-quality silicone can be acceptable in a dry zone away from the sink, but expect reduced longevity and water resistance.
Maintaining your worktop joints over time
Regardless of the joining method, regular inspection and maintenance are essential. Here are practical steps to extend the life of your seam:
- Inspect silicone seals annually for cracks or shrinkage and re-seal as needed with a compatible, food-safe sealant.
- Avoid placing very hot pots directly on the seam, use trivets or heat mats to protect the join area.
- Avoid aggressive cleaning regimes at the seam. Use mild detergents and a soft cloth to prevent edge wear or sealant degradation.
- If you plan to resurface the worktop or replace sections, document the joint type and profile details so the new pieces can be matched to the existing system.
Costs, time, and planning tips
The overall cost and time for joining worktops depend on the chosen method, the material type, and whether professional installation is involved. In Europe, expect the following considerations:
- Material machining: Euro-spline joints require accurate cutting and finishing, typically best performed in a controlled workshop setting. DIY attempts may save money but increase risk of misalignment and failure.
- Joiner profiles: Aluminium or stainless steel profiles add slightly to material costs but provide long-term reliability and easier maintenance.
- Sealants and adhesives: Use high-quality, neutral-cure silicone or polymer-based sealants approved for kitchen use to ensure durable waterproofing and food-safety compliance where applicable.
- Future replacement: If you foresee replacing the top in the medium term, a butt joint may be simplest to disassemble, whereas euro-spline and profiles are more durable but harder to modify on-site.
Conclusion: achieving a seamless, durable kitchen joint
Joining kitchen worktops across Europe requires careful planning, precise cutting, and a suitable sealing strategy. Whether you choose a simple butt joint, a euro-spline, or a robust joiner profile, the objective remains the same: a seamless, water-tight seam that complements the design of the kitchen and stands up to daily use. With the right approach, you can achieve a finish that looks crafted and professional, even in a busy family kitchen. If in doubt, consult a skilled installer who can assess wall tolerances, cabinet alignment, and the best jointing system for your specific layout and material selection.
You may also like these articles
 Lighting
Lighting the Threshold: Modern Hallway Design for European Homes
Smart, layered hallway lighting ideas tailored for European homes.
Colour & Materials
Colour in interiors: a definitive guide to palettes and schemes
A sophisticated guide to palettes, tones and room-ready colour schemes.
Tips & How-To
The Sofa Buyer's Blueprint: 8 Essentials for a Durably Stylish Couch
A practical guide to choosing a durable, comfortable sofa for European homes.