
Explore interior trends, AI design insights, styling guides and real transformations
Designing a Shower for Small European Bathrooms: Tiles or Trays?
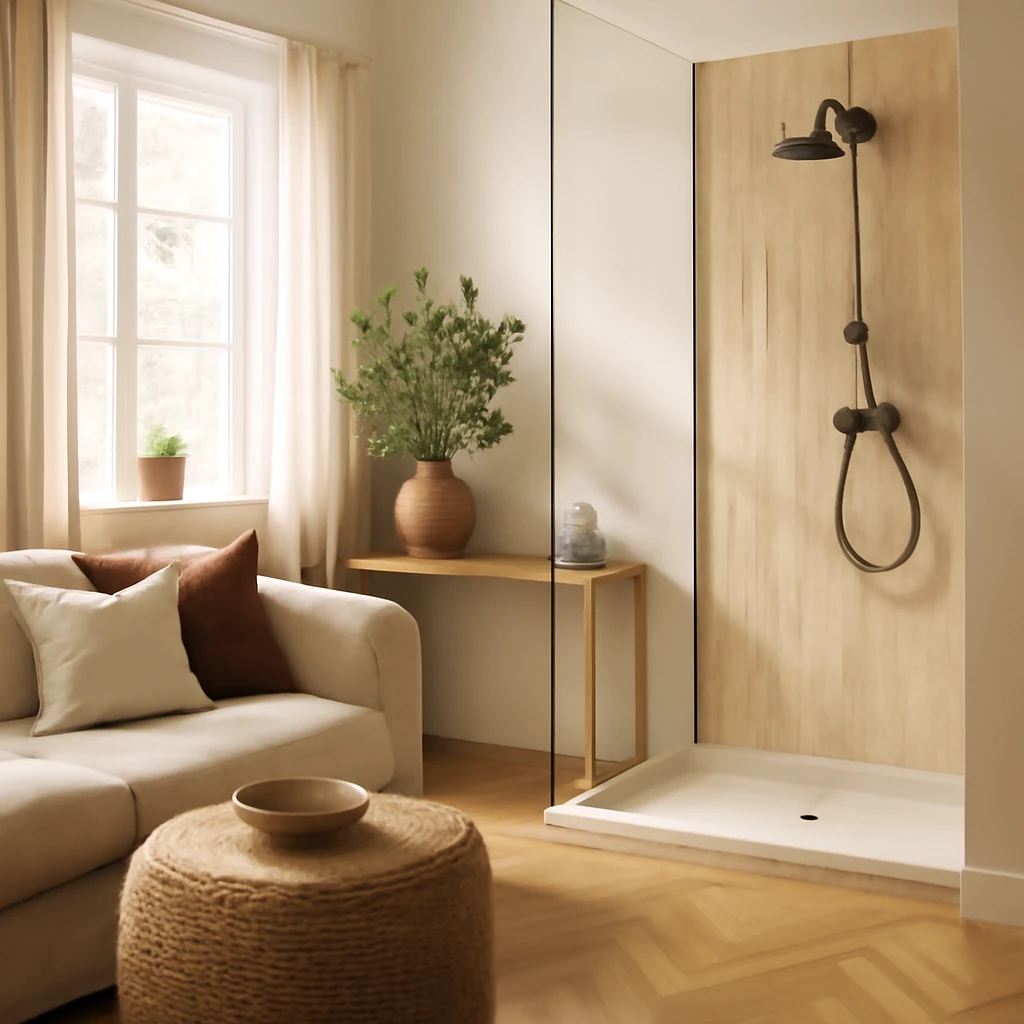
Introduction: designing a shower for compact European bathrooms
Across Europe, many homes feature compact bathrooms that must perform several functions. When space is at a premium, the decision between a traditional bath and a dedicated shower becomes a design constraint as well as a lifestyle choice. A thoughtfully conceived shower can free valuable floor area for storage, a larger basin, or a towel warmer, while still delivering comfort and a polished aesthetic. This guide offers practical, real-world guidance on selecting shower types, sizing, tiling, drainage, and enclosures, with a European context that emphasises durability, ease of maintenance, and timeless style.
Why a shower often wins in small spaces
The central argument for a shower in a compact bathroom is simple: it saves space. A standard shower tray measuring 800 × 800 mm occupies far less footprint than a full-sized bath, typically around 1700 × 700 mm or larger. By reclaiming that footprint, you gain room for a second essential element - be it a toilet, a compact bidet, or a more generous vanity with storage. If the shower enclosure features a curvilinear corner or a square geometry, usable space increases further and the room reads as more expansive.
Beyond footprint, a well-planned shower promotes easier cleaning and better moisture management. Fewer corners and a coherent, continuous surface are inherently less prone to mould growth and grime in a humid environment. In many European apartments, where renovations must be mindful of building management and shared walls, a compact shower can be a cleaner, more efficient long-term solution than a larger bath.
Size and shape: matching form to the plan
Four shapes dominate shower base design: square, rectangular, quarter-circle and multi-faceted polygons. The choice affects not only the look but also the tiling workflow, drainage layout and the way you use the space day to day.
Square
Square trays or bases from around 1100 × 1100 mm are common in small bathrooms where every millimetre matters. If space is tight, the square can be finished with a custom tile edge and a linear drain concealed beneath the threshold. The standard modular steps for most trays are spaced roughly 50 mm apart, a factor that designers take into account when planning tile runs and shower doors.
Quarter-circle or polygon
Quarter-circle or polygonal bases present a softer edge and can visually expand the room if the surrounding walls are aligned with the curve. A larger quarter-circle can feel expansive, but it requires a well-considered plumbing and tiling plan to avoid dead space between the curve and walls.
Rectangular
Rectangular trays offer a broad palette of sizes and are often the easiest to source across Europe. They are practical for shared family bathrooms, providing room for a bath seat or a small child tub within the same footprint. However, for baths over 1100 mm in length, many projects require bespoke fabrication or on-site tiling to achieve a perfectly level surface and consistent drainage alignment. In a compact plan, a longer edge can also help with glass enclosure options and door configurations. A common consideration is the drain’s position along the long edge, which influences tile layout and slope direction.
In all cases, the drain location has a meaningful impact on the final tile pattern and the function of the space. A central drain is common in tiled floors, but long-edge or corner drains can simplify the tiling and reduce the amount of grout to maintain along the shower perimeter.
Tray height and drainage: getting the fall right
Before selecting a tray height, verify the height of the waste pipe at the riser. If the pipe is positioned above the finished floor level, the tray height will be dictated by the actual slope required to connect to the drain. A practical rule of thumb is a slope of about 2 cm per metre of run. This ensures efficient drainage without creating an abrupt edge that can trip or impede movement. When planning a tiled shower, you may offset the height by adjusting tile thickness to keep the overall floor flush with the adjacent rooms, but this requires precise calculation and a skilled trades team.
For a cohesive aesthetic, many European projects choose a screw-free, seamless transition between the shower floor and the rest of the bathroom by using a low-profile tray or a fully tiled floor with a compact, invisible drain system. This approach is particularly valued in interiors that emphasise a minimal, continuous surface with no perceptible threshold.
How to achieve a level-floor shower
If the goal is a shower tray flush with the main bathroom floor, be prepared for more extensive plumbing and floor work. Lowering the waste line and harmonising floor materials across rooms can require access to the building’s services risers and may disrupt neighbours during construction. In multi-storey buildings, obtaining permission and scheduling work with respect to noise and odours is essential. A plan that reduces the impact on residents and uses a staged approach is often the most practical path. For many projects, a level-floor design is pursued only after a thorough assessment of the building’s structure, waste routing, and load-bearing constraints.
Shower trays: ceramic tile versus acrylic
Historically, acrylic trays offered a quick, affordable route to a functional shower. A growing number of European projects, however, opt for a shower tray formed by tiling the base with ceramic or porcelain tiles. This approach can be perceived as more economical in the long term and offers greater freedom in shape, tile choice and surface texture. A tiled tray integrates harmoniously with the rest of the bathroom and can support underfloor heating or radiant flooring beneath the tile. Here are the essential considerations to help you decide which path to take.
Advantages of a tiled shower tray
- Any shape can be created, from precise squares to dramatic, custom forms that align with the room’s geometry.
- Under-tile heating can be installed, providing warmth underfoot in colder months.
- The shower zone can extend to edge-to-edge tiling, creating a cohesive, easy-to-clean surface with no visible edge.
- A wide selection of drainage configurations is possible, including linear drains or perimeter drains, which can be concealed within the tile work for a seamless look.
- The finished height of the threshold can be matched to the thickness of the chosen tile and any underlayment.
- It is possible to incorporate a small seating ledge or niche within the shower area for practicality and comfort.
- The tile surface offers a broad choice of finishes for the shower floor, including vinyl-look options, decorative concrete, resin, timber-look boards suitable for humid zones, mosaic patterns, marble, or river pebbles.
- A tiled base allows precise control over the tiling pitch to the drain, ensuring excellent water flow and aesthetics.
Disadvantages of a tiled shower tray
- Grout lines require regular maintenance as mineral deposits and cleaning products can lead to staining or discolouration over time.
- Waterproofing must be executed meticulously, with professional installation to prevent leaks and mould growth.
- Without underfloor heating, the surface can feel cool underfoot, particularly in cooler climates.
- Tile and adhesive costs may be higher than standard acrylic trays, and the project duration can be longer due to the complexity of waterproofing and tiling work.
Sealing and insulating the shower: practical options ranked by budget
If you settle on a tiled tray or a fully tiled shower, robust waterproofing and insulation are essential to long-term performance. A practical, budget-conscious ladder of solutions from most economical to premium might look like this:
- Shower curtain or fabric screen for a quick, flexible solution with minimal disruption.
- Ready-made glass doors or panels cut to standard sizes for a clean, contemporary look.
- Partial partitions built from masonry blocks faced with tile, mosaic, or waterproof paint to create a defined shower zone.
- Custom glass doors designed to fit perfectly for a seamless, high-end appearance and superior water containment.
- In some configurations, an open shower with no door can work if the shower run is long and the room is well ventilated, though this requires careful moisture management and zoning.
Real-world example: transforming a compact city bathroom
Consider a city flat with a bathroom measuring approximately 3.5 square metres. The objective was to reconfigure the space to accommodate a shower, wash basin, toilet, heated towel rail, and compact storage for laundry products, without changing the overall footprint. An L-shaped niche within the bath area was discreetly closed with a custom-made glass panel, while the floor was tiled with a linear drain integrated into the tiling. The result reads as a single, cohesive surface rather than a collection of separate modules, enhancing the sense of space and improving maintenance. The project demonstrates that with thoughtful planning, even modest bathrooms can offer generous feel and practical comfort.
Key planning steps for a European small bathroom
To embark on a successful small bathroom transformation, follow these practical steps to ensure coherence from concept through installation:
- Measure meticulously: Record wall dimensions, door swing, and the height of existing plumbing services. Identify where the drain currently sits and whether the pipe run allows for a level-floor design or requires a step-up threshold.
- Define the priorities: Decide whether you value a larger shower footprint, higher clearance in front of the door, or additional storage within the zone.
- Choose the base first: Select between a tiled tray, custom tile-in shower with a linear drain, or a compact acrylic tray. Each choice drives the rest of the layout and waterproofing strategy.
- Plan the enclosure: Glass panels, fixed screens, sliding doors, or curtains each have different implications for space usage, maintenance, and leakage risk. In narrow enclosures, sliding doors can be particularly efficient.
- Assess ventilation and moisture control: Adequate extraction is essential in a small bathroom to prevent mould. Consider a high-capacity extract fan, humidity sensors, and anti-mould grout products.
- Think about warmth and comfort: If possible, integrate underfloor heating or optimise tile finish and grout choices to minimise cold surfaces in winter.
- Budget realistically: Build in costs for professional waterproofing, tiling, and enclosure installation. In Europe, reputable tradespeople will provide warranty on their waterproofing and tile installations.
- Plan for access and maintenance: Ensure the shower is easy to clean and that seals, doors, and joints are accessible for routine maintenance.
Maintenance, finishes and durability: keeping a European bathroom pristine
Durability and ease of maintenance are paramount in European homes where humidity and variability in climate test bathrooms year-round. To keep finishes looking new and to reduce upkeep, consider:
- Low-porosity tiles and grouts with stain-resistant sealants, refreshed on a routine cycle.
- Epoxy or silicone sealants with mould inhibitors at all joints and transitions.
- Anti-stain or easy-clean tile finishes for floors in the shower and on adjacent wet zones.
- Ventilated installations and minimal utilitarian metal edges that oxidise or corrode in humid conditions.
- Regular checks of drainage lines to prevent standing water and reduce odour risks in compact spaces.
Lighting and ambience in a compact bathroom
In small spaces, lighting can transform the perception of scale. Plan layered lighting with bright, task-oriented illumination around the basin and shower, plus a softer ambient layer to balance the compactness of the room. Recessed LEDs or moisture-rated fittings integrated into shelving or above mirrors contribute to a calm, cohesive atmosphere and reduce shadow lines in the shower area.
Accessibility and safety considerations
For families and older residents, a shower that prioritises accessibility is now common in European homes. Options include:
- A shallow or level entry, with a low threshold or no threshold at all if feasible within structural constraints.
- Non-slip, durable flooring choices with a coherent colour palette to minimise trip hazards.
- Sealed, easy-to-clean surfaces to reduce cleaning complexity and risk of mould growth.
- Support rails and seating options integrated into the shower zone or nearby to assist mobility without compromising aesthetics.
Cost considerations and scheduling
Prices vary across Europe depending on the size of the bathroom, the choice of materials, and the complexity of the drainage and waterproofing system. A tiled tray with a comprehensive enclosure and professional waterproofing will generally require a larger upfront investment than a simple acrylic tray with a standard curtain. However, the long-term maintenance and potential resale value of a well-planned tiled, enclosure-dedicated shower can offset initial costs. When budgeting, account for:
- Material costs for tiles, waterproofing membranes, sealants, and installation materials.
- Labour costs for plumbing, tiling, and glazing, which can vary by region and project scale.
- Contingency for possible structural adjustments or building permissions where required.
- Maintenance and life-cycle costs, including sealant refreshment and potential tile replacements over time.
Final notes: achieving a timeless, functional shower in Europe
The best small-bathroom showers combine smart geometry, robust waterproofing, and a finish that harmonises with the rest of the home. The tiled tray approach offers exceptional flexibility, enabling bespoke shapes, custom tiling patterns, and the opportunity to install under-floor heating. For many European homes, a well-designed acrylic tray with a frameless glass enclosure provides a sleek, contemporary solution that is quicker to install and easier to maintain. Whatever path you choose, the key is to plan with anatomy - walls, floors, drain, and door - in mind, and to work with tradespeople who understand European building practices and local regulations. A carefully designed shower not only saves space but also elevates the whole bathroom into a calm, enduring space that is comfortable to use every day.
Further reading
- How to plan a small bathroom: a real-world example
- How to renovate a bathroom quickly: professional tips
- What to buy for a bathroom: 48 essential items
You may also like these articles
 Tips & How-To
Colourful Wardrobes: A Practical Guide to Painting for Space and Style
Turn a plain wardrobe into a colour feature that enlarges space.
Bathroom Design
Spa style bathrooms for 2026: natural tones, curved forms and tactile textures
Spa inspired bathrooms for 2026: natural tones, curves and hidden storage
Tips & How-To
Smart Wardrobe Solutions for Modern European Bedrooms
Smart wardrobe ideas to maximise European bedroom space.