
Explore interior trends, AI design insights, styling guides and real transformations
Five DIY Large Outdoor Christmas Ornaments for European Spaces
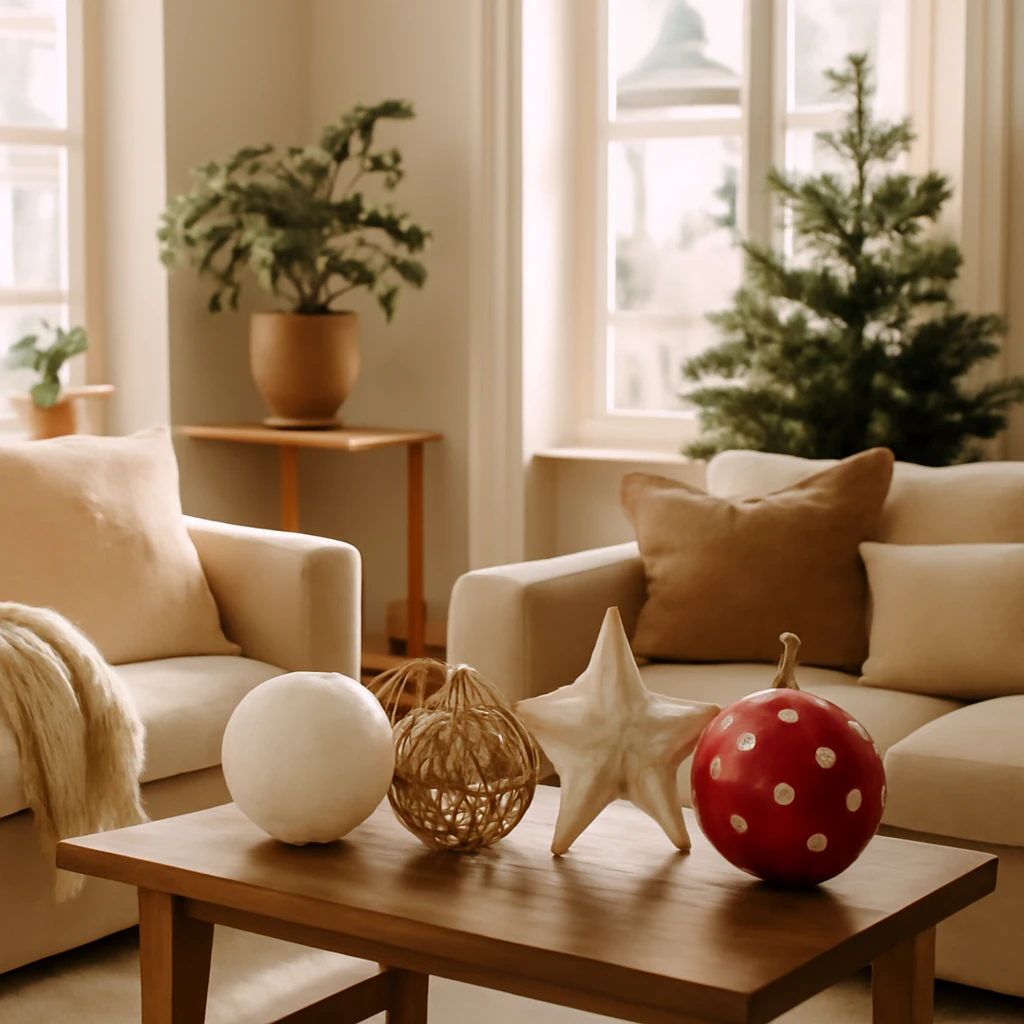
Five large outdoor Christmas ornaments you can make at home
As winter lights begin to shimmer across European streets and terraced homes, the demand for bold, weather-ready decorations grows. Large, handmade ornaments bring drama to city trees, private courtyards, and public spaces alike while offering a satisfying DIY experience. The projects below prioritise robust materials, safe construction, and practical finishing so that each piece remains intact through rain, frost and wind. From a fabric star to resin treasures, these five guides provide clear steps, materials lists and real-world tips to help you craft show-stopping outdoor décor without compromising on style or safety.
1. Fabric star ornament
The star is a timeless symbol of Christmas. For outdoor use, a fabric version offers warmth and texture while staying lightweight enough to manage on branches and metal anchors. A two‑tone or patchwork design amplifies colour, especially when hung against dark evergreen boughs or a white-washed wall. Choose fabrics with outdoor performance properties - marine-grade canvas or waterproof felt are particularly resilient to European winter weather.
What you'll need
- Weatherproof fabric in two coordinating colours or patterns
- Heavy-duty sewing machine
- UV-stable polyester thread
- Pattern for a six-point star (about 60 cm across)
- Chalk or fabric markers for tracing
- Scissors or rotary cutter
- Decorative buttons, rivets or embroidery (optional)
- Jute rope or thick twine for hanging
- polyester batting or quilt batting for stuffing
Instructions
- Print or lay out a two‑half pattern of a six-point star, then cut 12 rhombus-shaped pieces from the fabric for each half. Aim for pieces that will assemble into a symmetrical star roughly 60 cm in diameter.
- Pair the rhombuses into two evenly matched halves, using alternating fabric colours or prints to create visual depth. Sew the halves together along the long edges, leaving an opening for stuffing.
- Lightly stuff the star with batting to give it volume, then finish the seam with a neat stitch. Avoid overstuffing, which can warp the star’s shape when exposed to humidity or frost.
- Turn the star right side out and press the seams flat with a warm iron. This helps the star hold its shape during assembly and hanging.
- To create a three‑dimensional look, sew or glue small triangles of fabric to the inner side of each rhombus before closing the final seam. This creates subtle facets that catch light more vividly.
- With both halves complete, insert a loop of jute at the top as a mounting point. Sew carefully to reinforce the hanger, then knot the ends to form a small eye for attachment to a branch or wall anchor.
Tip: If you expect heavy moisture or wind, add a weatherproof sealant on the exterior fabric, focusing on stitching lines and any exposed seams. A quick, light brushing of outdoor varnish can increase longevity without altering the fabric’s texture.
2. Papie‑mâché ball in a weatherproof finish
Papie‑mâché presents a lightweight, luminous option for a classic ball shape. When finished with a clear outdoor seal or coloured UV‑stable paint, these spheres brighten balconies, courtyards or tree canopies. While plain papier‑mâché excels in sheltered spaces, weatherproof coatings extend its life in European climates.
What you'll need
- Large balloon (balloon diameter around 40–45 cm)
- PVA glue (water‑based) or outdoor‑grade glue
- Paper or newspaper strips
- Glitter, coloured powder or metallic pigments for decoration
- Outdoor varnish or UV‑stable exterior paint
- Clear sealer (water‑based) for weatherproofing
- String or twine for hanging
Instructions
- Inflate the balloon to the desired sphere size and securely tie the end. This will form the base shell for the ornament.
- Ragged, torn paper pieces hold better than cut strips. Tear newspaper or paper into small pieces and dip each piece into the glue, then apply to the balloon in layers. Build at least three to four coats, allowing each layer to dry fully before adding the next.
- Once the surface is even and opaque, sprinkle a light layer of glitter or decorative pigment to achieve a festive shimmer. Let the ball dry completely.
- Pop the balloon by deflating or puncturing a small hole near the base and remove it, leaving behind a hollow shell. Seal any holes with a thin layer of glued paper and a light coat of varnish.
- Paint the exterior with UV‑stable paint or seal with outdoor varnish to protect against rain and frost. Apply a second coat for durability.
- Attach a hanging loop using a sturdy string or twine threaded through a small reinforced hole or anchored loop at the top of the ball. Ensure the loop is firmly secured before installation.
Notes: Papier‑mâché is inherently porous. For long‑term outdoor use, consider constructing the sphere within a protective metal or wooden frame or combining with a lightweight outer shell that can shed water. Always check local weather forecasts and remove or secure decorations during severe storms.
3. Wooden ornament: durable cut‑outs
Wooden decorations offer natural warmth and tactile texture. For outdoor use in European settings, choose durable plywood or hardwood panels, treated with exterior primers and finishes. A shaped cut‑out - whether a star, snowflake, or abstract form - delivers a sculptural focal point for seasonal greenery and façades.
What you'll need
- Weatherproof plywood or solid timber suitable for exterior use
- Jigsaw or laser cutter (professional setting preferred)
- Coarse sanding paper and finishing sandpaper
- Acrylic paints or exterior wood stains
- Exterior primer and clear protective varnish
- Masking tape and stencils for precise designs
- Drill and natural fibre hanging cord or braided rope
Instructions
- Inspect the raw timber for splinters or rough spots. Sand thoroughly to achieve a smooth surface that will hold paint evenly and resist moisture penetration.
- Prime the wood with an exterior primer. Allow to dry completely, then sand lightly and wipe away dust.
- Transfer your chosen design onto the wood using a pencil and, if needed, masking tape to create clean edges. For intricate patterns, a stencil can help maintain symmetry.
- Paint the design with exterior acrylics or apply a stained finish. Apply multiple thin coats rather than a single thick coat to improve durability and colour depth.
- Seal the painted surface with a UV‑stable varnish or outdoor clear coat. This final layer protects against sun, rain and fluctuating temperatures common in European climates.
- Drill a small hole near the top edge for the hang‑tag or rope. Thread through a robust cord, knot securely, and let the ornament dry completely before installation.
Optional variation: carve or cut a hollowed version to reduce weight further and reduce wind load on tree limbs. If using natural timber, consider sourcing from sustainably managed forests and finishing with non‑toxic finishes for a healthier display around living spaces.
4. Epoxy resin ornament: luminous, weather‑proof sculpture
Epoxy resin offers a durable, translucent finish with exceptional light refraction, perfect for glow‑through decorations on frosty evenings. When prepared in silicone moulds and sealed with a weatherproof top coat, resin ornaments maintain their clarity and form across many seasons. Beginners can achieve professional results by following precise ratios and proper ventilation.
What you'll need
- Epoxy resin kit (resin and hardener)
- Silicone moulds in the desired shapes
- Digital scales for accurate measurement
- Mixing cups and stirring sticks
- Colorants specifically designed for resin (pigments or alcohol inks)
- Protective gloves, eye protection, and a well‑ventilated workspace
- Facial mask or respirator for vapours
- Fine decorative inclusions (glitter, dried botanicals, metallic flakes)
- UV‑stable sealant or exterior varnish
Instructions
- Read the resin manufacturer’s instructions carefully, then measure resin and hardener with precision. Mix slowly to minimise air bubbles until the mixture is completely clear and uniform.
- Prepare a second batch of resin with pigment if you wish to introduce colour. Keep each colour ready in separate containers for layering effects.
- Pour the clear resin into the silicone mould, then add coloured resin drops or a swirl of pigment for depth. Use a toothpick or silicone stick to distribute pigment, creating veining or celestial patterns.
- Introduce decorative elements - small pine needles, metallic flakes or glitter - within the mould for added texture. Ensure they are completely embedded and do not protrude beyond the mould’s rim.
- Allow the filled mould to cure fully as per the manufacturer’s recommended time. Move the cured piece to a safe surface to finish curing if the mould requires additional hours or days.
- Carefully demould the ornament. If the resin is slightly tacky, buff with a soft cloth and apply a final UV‑stable sealant to preserve colour and prevent yellowing from sunlight exposure.
- Drill a small hole near the top once the piece is fully cured to thread a hanging cord. Attach a robust rope or cord and test the strength before placing it outdoors.
Tips: Use UV‑stable resin designed for exterior use and place resin pieces in sheltered locations during extreme weather to prolong life. Epoxy resin is heavy, so plan for a secure mounting point and consider wind load when choosing positions on trees or façades.
5. Large foam‑core ball ornament
A large foam or foam‑covered sphere offers a scalable, lightweight option for expansive outdoor trees and town displays. Constructed with a core of closed‑cell foam or polyurethane foam and then clad with decorative surfaces, these spheres balance visual impact with practical handling. The final finish can be painted or covered with fabric or decorative paper for a sumptuous, almost archival look.
What you'll need
- Large foam sphere or foam blocks to assemble into a sphere (50–60 cm diameter)
- Construction or expanding foam to shape the outer shell (optional)
- Sturdy exterior paints or spray paints suitable for outdoor use
- Primer for foam to prevent paint from crumbling
- Gloss or matte exterior varnish for protection
- Decorative coverings (paper, fabric, or thin decorative panels)
- Kraft paper or textile scraps for surface texture
- Jute twine or rope for hanging
Instructions
- Begin with a foam sphere as your core. If you are building the sphere from blocks, join them with a suitable adhesive and shape roughly into a sphere using a hot nozzle tool or sanding, ensuring a smooth surface prior to finishing.
- Option A: Apply a light layer of expanding foam to the surface to create a thicker shell. Work in small increments and allow each layer to cure before adding more. Option B: Cover the base sphere with a decorative exterior panel or fabric using a strong adhesive, ensuring the edges meet neatly and the surface remains smooth.
- Prime the surface with a foam‑safe primer. Once dry, apply a base coat of exterior paint in your chosen colour. Use multiple thin coats for even coverage and to avoid drips.
- Texture the surface with a second layer using paper or fabric scraps to add depth. Press into the paint while still tacky for a stitched or quilted effect, then seal with a clear outdoor varnish.
- Attach a hanging loop by threading jute twine through a reinforced hole or from a small eyelet anchor. Ensure the loop is securely fixed and can bear the ornament’s weight in wind and rain.
- Let the ornament cure fully before installation. Store in a dry, sheltered area during the off‑season to preserve the surface treatment and avoid cracking or fading.
Safety and performance tips: Large foam spheres are exceptionally light and easy to mount, but wind can exert considerable force. Use reinforced fixings or a weighted base for stability in exposed locations. If you prefer a more natural finish, consider wrapping the sphere in natural fibre textiles or wooden slats for a rustic European village aesthetic.
How to install and care for large outdoor decorations
Outdoor installations require thoughtful planning to ensure both aesthetics and resilience. Here are practical guidelines applicable to all five projects above, tuned for European climates and urban settings.
- Choose materials with outdoor performance in mind. Weather resistance, fade resistance and durability are essential when the decoration will be exposed to rain, frost, sun and wind.
- Size and weight balance. Large pieces must be proportionate to the mounting point. Lightweight constructions are safer on branches and balcony railings, while heavier pieces require secure anchors and, if possible, a fixed base at ground level in urban displays.
- Mounting strategies. Use corrosion‑resistant fixings, such as stainless steel screws or hooks. If hanging from trees, distribute weight evenly and avoid overloading a single limb. For walls or façades, use brackets or anchors rated for exterior use and consider cable ties with protective sleeves.
- Weatherproof finishes. Apply exterior paints, sealants, and varnishes that are specifically designed for outdoor use. Reapply as needed to maintain colour and protection, especially in regions with heavy rainfall or freeze–thaw cycles.
- Maintenance and removal. Post‑season storage should be in a dry, clean space. Clean off dirt and salt residue before storing, and inspect attachments for wear. For city locations or street displays, plan a winter removal schedule to prevent damage from storms.
- Safety first. Ensure all decorations are well secured and do not protrude beyond safe clearances where people walk. Avoid sharp edges or protrusions that could snag clothing or injure passers‑by.
Design tips for a cohesive outdoor installation
To create a harmonious outdoor display across a courtyard, terrace, or street tree, consider a small family of ornaments that share a common colour palette, finish, or motif. A patchworked fabric star, a translucent resin form, a carved wooden piece, and a single foam ball in complementary hues can create a striking, curated narrative. Lighting is another powerful tool: warm white LEDs behind or within the resin sphere can reveal interior textures, while subtle uplighting can enhance the silhouette of a star against a dark winter sky.
Choosing the right space and season for outdoor decor
European winters vary between coastal, continental, and inland climates, each with unique challenges for outdoor décor. When selecting a location and design approach, assess exposure to wind, rain, and sunlight. For urban façades, consider how the ornament will read from street level and how it interacts with nearby lighting. In residential settings, balconies and entryways provide opportunities to showcase large pieces without exposing them to heavy traffic or vandalism. Always plan for harsh weather: heavier fabrics, stronger cores, and tougher sealants will be rewarded with longer life and fewer repairs.
Storage and care after the festive season
Proper storage dramatically extends the life of DIY outdoor decorations. Clean all pieces to remove salt, dirt and organic debris. Allow coatings to fully cure before stacking or storing. Where possible, store in labelled, breathable containers that keep mould and moisture out. For fabric pieces, consider a protective cover or breathable bag, for wooden items, ensure the surface is dry and reapply protective finishes if there are signs of wear. Resin and foam pieces should be stored in dry environments to prevent yellowing or warping.
Conclusion: bespoke, bold, weather‑wise décor
Crafting large outdoor ornaments for European spaces is a rewarding fusion of craft, architecture and seasonal celebration. By selecting materials designed for outdoor life, you can create impressive installations that stay vibrant and structurally sound through winter’s tests. Whether you prefer the tactile warmth of a fabric star, the lantern-like glow of a resin orb, or the sculptural presence of a carved wooden form, these five approaches offer scalable, repeatable methods for transforming streets, terraces and courtyards into festive environments that feel both contemporary and • timeless.
Further reading and practical considerations
For designers and homeowners alike, collaborating with local workshops and suppliers who specialise in exterior finishes can help tailor projects to your climate and architectural context. When ordering customised wooden pieces or moulded resin forms, request weather‑resistant coatings, UV protection, and certified low‑VOC finishes to ensure indoor air quality and outdoor durability. Always source materials from reputable suppliers who can provide data on longevity, warranty and maintenance requirements for your region.
You may also like these articles
 Small Spaces
Smart zoning for compact living: creating a cohesive bedroom–living area in small European homes
Smart layouts to transform one room into cosy sleep-and-live zones.
Colour & Materials
Painting Walls: 10 Practical Mistakes and How to Get It Right
Master the art of wall painting with ten expert pitfalls and fixes.
Colour & Materials
Mint Colour in Interiors: How to Use and Pair Effectively
Fresh, versatile mint tones for European homes—how to use and pair.