
Explore interior trends, AI design insights, styling guides and real transformations
Refreshing Your Kitchen Countertop: DIY Techniques for European Homes
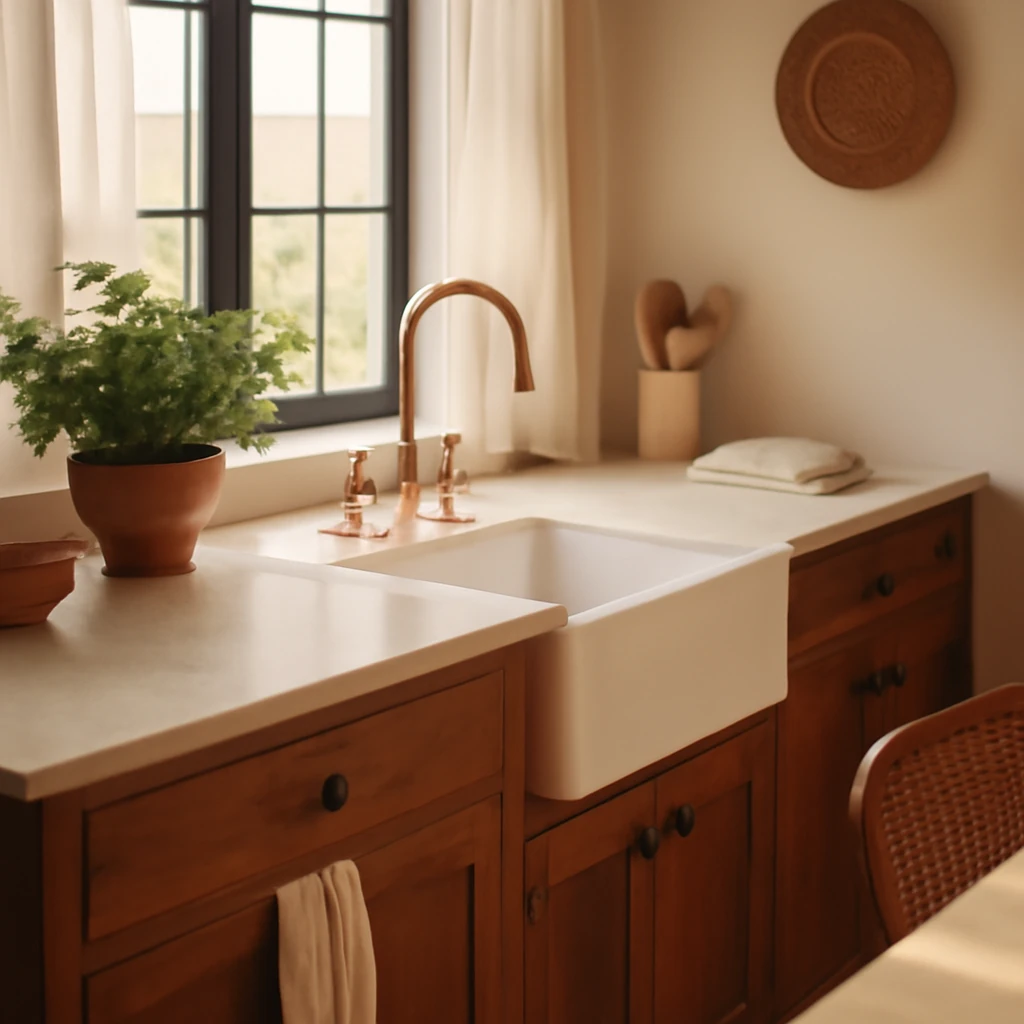
Introduction: Refreshing countertops in European homes
Countertops are a high-frequency surface in any kitchen. In many European homes, kitchens are compact and multi-functional, requiring clever, durable updates that don’t involve a full redesign. A refreshed countertop can transform the room, improve functionality and even boost property value. This guide explores four practical methods to update a kitchen countertop, with material considerations common to European households: laminate, engineered stone, solid timber, and composite surfaces. We cover preparation, techniques, materials, safety, and maintenance to help you achieve long-lasting results.
The four methods to refresh a countertop
We present four approaches, each with its own advantages, material compatibility, and limitations. Choose based on the current surface, budget, and how much disruption you can tolerate. All methods are adaptable to European kitchens and sustainability-minded households.
1. Painting
Painting remains one of the simplest ways to refresh a surface. It works on a wide range of substrates, including laminate, timber, composites and some solid-surface materials, provided the preparation is thorough.
Preparation is the key: remove existing coatings where possible, sand thoroughly, degrease, fill imperfections, and prime. Do not paint directly onto peeling coatings, you must prepare the surface for adhesion. A popular option is a marble-look finish, which has become a design staple for kitchens, splashbacks and furniture alike. Begin by removing old varnish or coatings, if timber, sand to a smooth, bare surface. Apply a bonding primer suitable for the base material, then build from a base colour toward the desired effect. For marble, create veins using a fine brush and layering different shades, or employ a ready-made marble-effect paint. Seal with a clear topcoat in gloss, satin or matt, depending on the desired sheen and ease of maintenance.
Stone-look finishes, concrete-look alternatives, and glass-look overlays can all be achieved with paint systems that include textured rollers, sponges and stencils. In European kitchens, water-based and low-VOC products are preferred for their lower odour and easier cleaning. When aiming for a durable, food-safe surface, ensure the chosen paints and topcoats are appropriate for worktops that may come into contact with food and heat.
Marble-look finish
To achieve a marble-veined appearance, start with a light base colour and apply darker or contrasting tones to create irregular veining. Use a fine brush, a stippling sponge or a sprayer with a specialised marble-effect nozzle. Build up layers gradually, allowing each coat to dry before applying the next. Finally, seal with a clear topcoat suitable for the material and usage, then cure fully according to the manufacturer’s guidelines. The result can be convincingly natural if care is taken with colour placement and edge treatment.
Stone-look and other mineral effects
Other natural stone looks can be achieved with pigments and textures that mimic granite, limestone or quartz. Some paints include mineral aggregates or can be mixed with fine silica to simulate texture. If textured finishes are used, ensure the surface remains smooth to the touch where food will be prepared. Follow manufacturer guidance for mixing ratios and cure times, particularly in rooms with high humidity or variable temperatures.
Concrete- or cement-look
A concrete or microcement appearance offers a cool, contemporary aesthetic. This look is popular in minimal and industrial-inspired kitchens. Microcement or cement-based paints can be applied over many substrates, including wood, MDF, and ceramic tiles, providing a seamless, matte finish. It’s essential to seal the surface thoroughly to protect against moisture and staining. Stencils or freehand drawing can introduce subtle patterns for visual interest.
O окрашивание со стеклом
In some European kitchens, glass overlays or glass-look finishes can be integrated to create a luxurious, reflective surface. A laminated glass shield or a tempered glass panel can be positioned atop the base surface for a clean, durable finish. When using glass, ensure edges are chamfered or radiused to avoid chipping and to maintain a safe work surface. If the glass is decorative rather than functional, it should be paired with a compatible adhesive and edge-banding for a cohesive look.
2. Epoxy resin pour
Epoxy resin pours create a seamless, durable surface with unlimited design possibilities. This approach delivers a high-end look and a robust, water-resistant finish. It is more technically demanding than painting and requires careful preparation, ventilation, and patience, but the results are well worth the effort for many European kitchens.
Materials: a reputable epoxy resin kit (resin plus hardener), pigments or mica powders, a UV stabiliser if the area receives sunlight, protective gloves and good ventilation, plastic sheeting, tools for mixing and levelling, and disposable PPE. Temperature and humidity can affect curing, so follow the manufacturer’s recommendations and consider performing the project in a well-ventilated room with consistent ambient conditions.
Safety: work in a well-ventilated space, avoid direct skin contact with resin and hardener, wear protective equipment, ensure that the work area is free of contaminants that could interfere with curing. The resin can emit strong odours during mixing and curing, use a mask if necessary and ensure good airflow.
Step-by-step plan
- Prepare the substrate: remove the old finish where necessary, then sand until the surface is smooth and free of dust or grease.
- Most epoxy kits include resin and hardener, carefully read the instructions and measure components accurately.
- Set up a clean, protected workspace, and cover nearby surfaces to prevent splashes and drips.
- If you want transparency with colour or pattern, you can tint the resin with pigments before mixing. For a stone-look, blend multiple colours to simulate veining or depth.
- Slowly combine the resin and hardener, stirring with a wooden stick for 5–6 minutes to ensure thorough mixing and to minimise bubbles.
- Let the mixture sit for a short period to release any large air pockets, then pour onto the prepared surface. Spread evenly using a long squeegee or a flat instrument, working from the centre outward and ensuring a level, self-levelling finish.
- Use a heat gun or a torch to remove surface bubbles, moving evenly to avoid overheating any single area. Allow the resin to cure completely, which can take 24–72 hours depending on the product and ambient conditions.
- Finish with an additional topcoat if required by the product, and protect during curing from dust and contact with other materials.
Design possibilities are extensive: a clear resin can highlight underlying colour, while pigments or metallic powders create dramatic veining and depth. Epoxy surfaces resist heat and staining when fully cured, and the level of gloss can be controlled from high-gloss to a soft satin finish. In European homes, consider food-safe formulations and low-VOC ingredients to maintain healthy indoor air quality.
3. Self-adhesive vinyl wrap
Self-adhesive vinyl wraps offer a fast, affordable update with a broad range of finishes, including marble, stone and wood textures. This option is popular for rental kitchens or as a temporary update while evaluating longer-term choices. The vinyl is generally water-resistant and suitable for light-duty kitchen use, though it may not be ideal for high-heat zones or heavy wear areas. Higher-quality, thicker films provide better durability and longevity than budget options.
Preparation: ensure the countertop surface is perfectly smooth, clean and free of oils. Any dust or residue will telegraph through the film, resulting in an uneven finish. Thorough cleaning with a degreasing solution and a final wipe with a clean cloth is essential.
Application: measure and cut the film, align precisely, and begin applying from one edge. Use a plastic squeegee or a roller to smooth the film, pushing out air bubbles gradually. Work slowly to prevent stretching the material. If the film is heat-tolerant, apply gentle heat near edges or curves to conform to the shape without tearing. In many cases, film adhesive is already on the backing, simply remove the protective layer as you apply, ensuring a snug, bubble-free finish.
Maintenance: clean with mild detergents, avoid abrasive cleaners or sharp objects that could scratch the surface, avoid placing hot pans directly on the film, and replace damaged sections when necessary. For higher traffic kitchens, opt for thicker, more durable vinyl and consider finishing with a sealant if the manufacturer recommends it.
4. Cosmetic refresh (sanding and finishing)
If the surface shows wear but remains sound, a cosmetic refresh can restore brightness and texture with minimal downtime. This approach focuses on sanding, polishing and sealing rather than full replacement. It is particularly effective for timber worktops and certain solid-surface materials, while engineered stone and quartz can also respond to a light resurfacing where feasible.
Wood surfaces respond well to sanding and a re-application of oil or varnish. An initial sanding with progressively finer grits removes scratches and creates a refined bonding surface for the finish. In European kitchens, many homeowners favour natural timber with a clear or tinted oil that enhances warmth while protecting the surface. For surfaces like engineered stone or composite materials, a light sanding followed by a compatible sealant can restore a uniform appearance and improve water resistance.
Tools and materials: orbital sander with grits 120, 180, 240, 320, 400 and 600, degreasing cleaner, rags, timber oil or wax-based finishes, polyurethane or resin-based sealants, and a soft buffer for a final shine.
Process
- Clean the surface thoroughly and allow it to dry completely.
- Sand with coarse grit to remove deeper scratches, then progressively move to finer grits until the surface is smooth to the touch.
- Wipe away all dust, apply the chosen finish as directed by the manufacturer. For timber, consider a penetrating oil or hard-wax oil to maintain the natural look, for stone, apply a compatible sealant to protect against moisture and stains.
- Allow adequate curing time between coats and after the final application. Light buffing can enhance the finish unless the product specifies not to.
Cosmetic refresh is a cost-efficient option when the substrate remains sound and the wear is primarily cosmetic. It can dramatically brighten a kitchen without the downtime or cost of a full replacement.
Choosing the right method for your countertop material
European kitchens employ a variety of materials, each with its own maintenance profile and upgrade possibilities. The main categories include laminate (often a budget-conscious option), engineered stone (quartz composites), natural stone (granite, marble, soapstone), timber and solid-surface materials. Each system responds differently to water, heat and daily wear. Selecting the most appropriate method depends on the substrate, usage patterns and long-term goals for the space.
Laminate and engineered stone: Laminate countertops are common in budget-conscious kitchens. They’re durable, easy to clean and can be updated with paint, film or a resin overlay. However, laminate edges can swell if exposed to moisture, epoxy resin can help create a seamless appearance if edges are sealed correctly. Engineered stone, particularly quartz, is highly durable and resistant to stains and heat, but painting or staining is not typically a viable long-term option. Any long-lasting customisation usually involves resurfacing or overlay work rather than full colour alteration.
Natural stone: Stone countertops offer timeless beauty and longevity. Marble and limestone have a soft, elegant appearance and may require sealing to resist moisture, high-traffic kitchens may benefit from periodic honing and sealing. Jewel-like depths can be enhanced with resin overlays for dramatic effect, but long-term maintenance must be considered, and pigments used should be compatible with the stone and food-contact requirements.
Solid timber: A solid timber worktop can be refreshed with sanding, oiling, and lacquering. If deeply scratched or warped, replacement may be necessary for a flawless finish. Timbers are warm and inviting but more susceptible to moisture, many European homeowners favour timber with a natural oil or wax finish that preserves warmth while offering practical protection. Painting timber is an option for bold, enduring colour schemes, but it hides the natural grain and may require more frequent maintenance.
Microcement and other cementitious overlays: For a contemporary look, microcement can be applied to multiple substrates including wood, MDF, concrete and tiles. It creates a seamless, matte finish that suits minimalist and industrial aesthetics. With proper sealing, microcement is highly moisture-resistant and durable, however, it requires professional installation and periodic maintenance to sustain the finish over time. It can be combined with patterns or stencilling for personalised surfaces.
Cost and planning: Price ranges vary widely based on material, project size and method. Painting or vinyl wraps offer affordable updates with quick turnaround, while epoxy pours and microcement overlays are more costly due to materials and labour. Full replacements with quartz or natural stone are the most expensive and usually require professional installation. When budgeting, consider the long-term lifespan of the finish and potential maintenance needs to determine overall value.
Preparation, safety and best practices
Before starting any project, assess the substrate for moisture damage, cracks or warping. Repair structural issues first, ignoring underlying problems will limit the lifespan of any update. Create a clean, well-ventilated workspace and protect nearby surfaces with drop cloths. Dust extraction and proper containment reduce cleanup time and risk to inhabitants.
Safety considerations:
- Wear protective gloves, safety glasses and a dust mask when sanding or handling chemical coatings.
- Ensure good ventilation when using solvent-based paints, resins or sealants.
- Always follow manufacturer instructions for mixing ratios, pot life and curing times.
- Test the finish on a small, inconspicuous area before applying to the entire countertop.
Maintenance and care after renewal
To prolong the life of a refreshed countertop, follow care guidelines appropriate to the chosen finish:
- Painted surfaces: use non-abrasive cleaners, avoid solvents that may soften the paint, wipe spills promptly to prevent staining, recoat when wear becomes visible.
- Epoxy surfaces: use non-abrasive cleaners, avoid cutting directly on the surface, use trivets and heat mats, inspect for chips and repair with compatible epoxy paste if needed.
- Vinyl wraps: avoid sharp objects and hot pans directly on the surface, clean with mild detergents, replace damaged sections as necessary.
- Cosmetic refresh: maintain timber oils with periodic re-oiling, for stone surfaces, re-seal as the surface shows signs of wear.
Practical timelines and budgeting tips
Painting or vinyl wrap updates can often be completed over a weekend, depending on room size and preparation. Epoxy pours require curing time and some downtime in the kitchen - typically 2–3 days. Microcement overlays or full replacements take longer and may require professional installation. For tight budgets, a well-executed vinyl wrap or a quality paint job can deliver a significant transformation at a fraction of the cost of a full replacement. Plan for contingencies such as edge repairs, unexpected moisture issues or colour mismatches, particularly when working with natural materials.
Sustainability and future-proofing
Sustainability is a key consideration in European interiors. Choose low-VOC products, water-based finishes and responsibly sourced materials whenever possible. Look for coatings and resins that meet local environmental standards and offer long durability to reduce waste and frequency of replacements. Where practical, select finishes that can be refreshed rather than discarded, enabling modular updates as design trends and functional needs evolve.
Conclusion
Updating a kitchen countertop is a practical, cost-conscious way to refresh the heart of the home. Whether you choose a painted finish, an epoxy pour, a vinyl wrap, or a cosmetic refresh, the right method depends on your substrate, budget and tolerance for downtime. With proper preparation, careful execution and ongoing maintenance, your refreshed countertop will endure the rigours of European kitchen life for years to come.
You may also like these articles
 Colour & Materials
Beige as a Foundation: Elegant Pairings for a Calm, Sophisticated Home
Beige as a versatile neutral: how to pair with colour and texture across rooms.
Tips & How-To
Four DIY Faux Fireplaces: Step-by-Step Ideas for European Interiors
Four practical DIY faux fireplace ideas for cosy European homes.
Bathroom Design
Four Square Metre Bathrooms: European Design Solutions for Small Homes
Ingenious design ideas to maximise a 4 m² European bathroom.