
Explore interior trends, AI design insights, styling guides and real transformations
From Open Shelves to Hidden Drawers: Building a European Shoe Cabinet
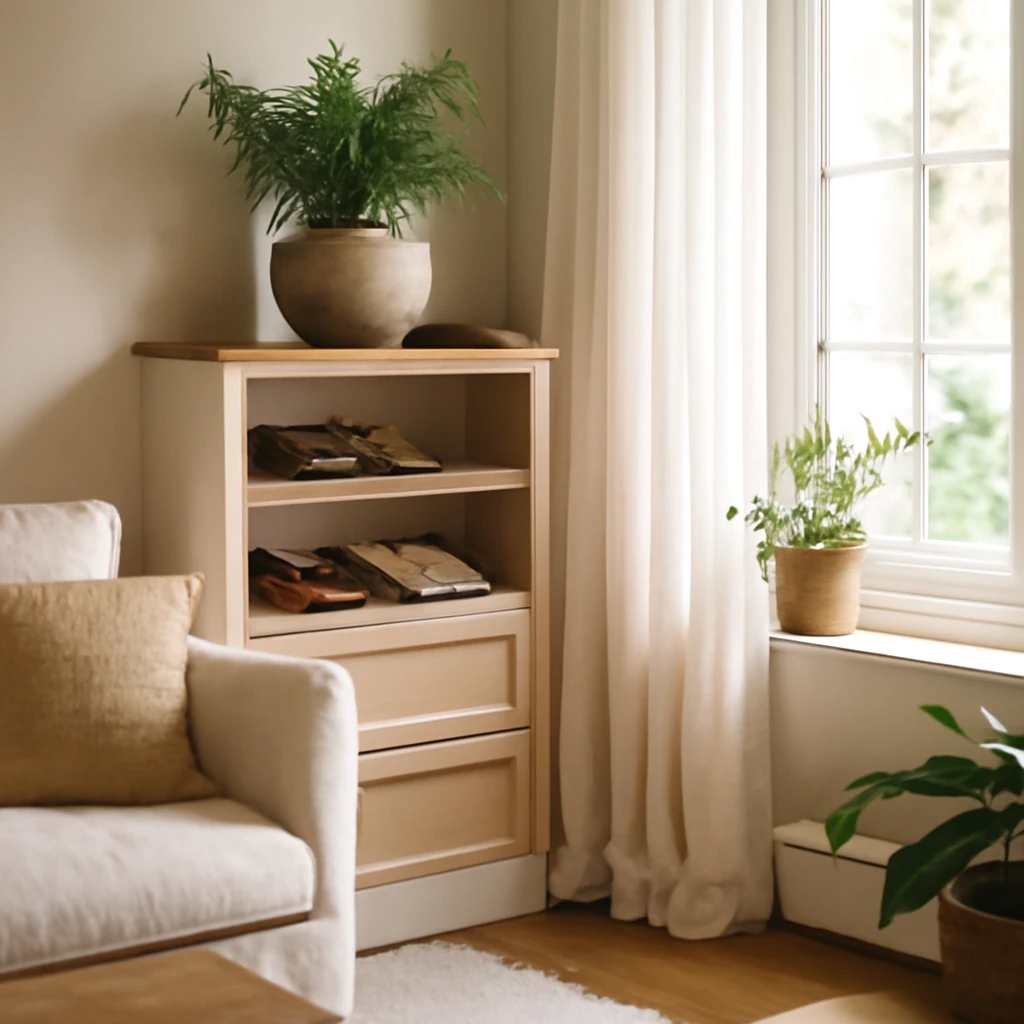
Designing a versatile shoe cabinet for compact European foyers
In European urban homes, entryways are frequently narrow and heavily trafficked. Yet they demand clever storage that keeps footwear organised without overwhelming the corridor. A well conceived shoe cabinet can act as the quiet workhorse of a hallway, combining storage with seating, a mirror, and even gentle lighting. This guide offers a fresh, original approach to building a durable and attractive shoe cabinet from timber or LDSP, tailored to European living patterns and moisture considerations.
Open versus closed constructions
Two fundamental approaches define most shoe storage projects: open constructions that prioritise accessibility and air flow, and closed systems that emphasise dust protection and a crisp silhouette. In practice, designers often blend both to suit the space, the amount of foot traffic, and the home’s character. Below are the core advantages and trade-offs.
Open structures
- Open shelving and frames that run on vertical supports with horizontal planks or mesh panels. These are common for a compact, adaptable look and straightforward fabrication.
- Benches with open sides that facilitate air circulation while offering a convenient place to sit and remove or put on footwear.
- Modular posts and frames that can be configured as a low display run, a tall divider, or a hybrid between storage and seating.
- Internal alignment with a console, a mirror, or a slim hanging rail to create a cohesive foyer wall.
Closed structures
Closed systems employ a cabinet, chest or panelled façade to conceal footwear. These designs can be tall or shallow, and often feature shelves, pull-out organisers, or shallow drawers. Closed storage offers a streamlined appearance, better protection from dust and moisture, and a surface that can be finished in bold colour or a sophisticated veneer.
When planning a closed unit, consider how you will fill the interior: fixed shelves, pull-out wire racks, slide-out trays, or drawers. The front may be solid doors, panels, or a combination of both. Door types commonly used include traditional hinged doors, sliding panels, folding doors, and lift-up variants. The right combination depends on space, daily routines, and the desired aesthetic.
Door mechanisms
- Hinged doors attached with standard European hinges
- Sliding doors that glide along rails to the side
- Folding doors that stack when opened
- Lift-up doors with integrated shoe holders, useful in compact footprints
In many projects, designers combine open and closed elements within a single framework to achieve a balanced, versatile unit that remains easy to live with in daily use.
Materials
Material selection defines durability, maintenance, and feel. In European interiors, a mix of panel-based systems and solid wood accents is common. Each material brings its own performance profile, particularly in corridors where humidity and temperature can change through the seasons.
- Laminate faced boards LDSP are frequently used for their stability under varying humidity and temperature. They resist moisture to a degree and are easy to clean, though edge integrity must be well sealed.
- Medium density fibreboard MDF offers high rigidity and smooth surfaces, though it’s more sensitive to moisture and should be sealed properly at all edges.
- Veneered boards provide the look of solid timber with more consistent dimensions and often lower cost. Acclimation and edge sealing remain important.
- Solid timber can deliver warmth and tactility, but in hallways it must be thoroughly dried, treated for humidity, and finished with moisture-resistant coatings.
- Plywood is a forgiving choice for carcasses and backs, offering strength with lighter weight.
- Metal accents and hardware add durability and a contemporary edge, especially on open frames or for reinforcing structural joints.
- Glass or translucent panels can lighten the look when used sparingly on doors, contributing to a brighter perception of space.
- Textiles and natural fibres can soften a scheme, though they require careful care and climate control in foyer environments.
Dimensioning and planning
Before cutting any material, map the available space with care. Hallways and foyers vary across Europe, from compact urban flats to longer entrance corridors in family homes. The goal is to fit the unit to the space, allow comfortable passage, and harmonise with adjacent furniture such as a console, a bench, or a wardrobe side panel.
- Width: consider 80 to 140 cm depending on corridor length and adjacent pieces of furniture.
- Depth: 28 to 32 cm is a typical footprint for a shoe cabinet, deeper units can accommodate a bench or integrated seating.
- Height: 90 to 140 cm for a compact console height, taller configurations up to 180 cm are possible for generous storage with drawers or doors.
- Internal spacing: allocate 12 to 18 cm per shelf for standard shoes, Boots and larger footwear may require deeper gaps or pull-out trays.
Draft a scaled plan of the foyer, noting power points, radiators, and baseboard profiles. A simple layout helps ensure a balanced composition and helps you anticipate the visual weight of the unit in relation to the door and ceiling height.
What you will need
Tools
- Measuring tape, steel ruler and pencil
- Hammer and soft mallet
- Drill with a selection of bits
- Hex driver for euro screws
- Drill guide or jig to ensure accurate, square holes
Fittings and fittings
High quality fixtures are worth investing in for a durable, smooth operation. Plan for the following:
- Screws and euro screws for strong joints
- Adjustable furniture legs or feet
- Metal angle brackets to reinforce corners
- Shelf supports and drawer runners
- Metal sides or front supports for extra rigidity
- Hinges, door catches or soft-close dampers
- Handles or touch latches for a clean, handle-free look
- Back panels such as hardboard or thin plywood to stiffen the carcass
Material choice is important when you are using reclaimed or offcuts. Inspect boards for mould, sap pockets or significant knots. LDSP is suitable when the edge is intact and the decorative foil is undamaged. Surfaces should be smooth and free of imperfections before finishing.
Making the blanks
Cut shelves, side panels, top and bottom panels from your chosen material. You do not need a perfectly continuous shell, internal horizontals can be created from multiple narrow boards with appropriate gaps for air circulation. Adequate ventilation is particularly important in long, enclosed corridors. If using solid timber, ensure it is kiln-dried and acclimatised to the room’s humidity to minimise warping. Treat raw timber with a suitable antiseptic before applying a moisture barrier finish. A wax or oil finish enhances feel and resilience in moist environments, while waterborne polyurethane offers a hard wearing, easy-to-clean surface.
Assembling the unit
Assemble against a prepared plan with exact measurements to prevent misalignment. The following sequence is typical for a closed cabinet with interior shelving and drawers:
- Join the side panels to the base using brackets and predrilled holes. Secure vertical elements to the base edges for additional rigidity.
- Attach the rear panel to the back edges with a narrow strip and install the drawer rails along the interior back edge for the drawers.
- Mark shelf positions from the bottom, fixed shelves require aligned holes to support the shelves. If using adjustable shelves, plan for multiple height options and ensure the shelf thickness complements the rail spacing.
- Attach the upper edge as you did the bottom, keeping corners square and aligned.
- Cover the rear with a backing board to stiffen the structure. Cut to size and fix with staples or small nails. Backing improves rigidity and prevents warping.
- Determine drawer dimensions based on the width and chosen drawer runners. The depth should be reduced to account for front and rear panels and rails. Use a robust bottom panel such as plywood or MDF for weight-bearing drawers.
- Mount the drawer guides on the interior sides and align the drawers carefully for smooth operation. Do the same for any doors, keeping hinges and tracks matched to panel thickness.
- Attach doors and handles after finishing the interior. For sliding doors, install upper and lower rails and test movement for clearance.
- Fit adjustable feet beneath the cabinet to ensure level placement. Consider a small plinth or toe kick to stop moisture from wicking into the furniture and to create a clean, finished line against the floor.
For a cohesive look, an integrated bench or a separate seating module can be a natural extension of the unit. Choose a finish and hardware that align with the rest of the hallway to maintain visual harmony.
Doors and drawers
Door and drawer components require careful alignment. Hinges should be adjusted so doors close softly, while sliding tracks must be level and parallel. If space allows, add soft-close dampers to reduce wear and noise. Where drawers are used, ensure the front panels align perfectly with the cabinet face and that the runners support the load expected from daily use.
Finishing touches
Finish schemes can range from a seamless, monochrome look to a warm, timber-rich appearance. A uniform veneer, painted finish, or tinted clear coat can unify the environment. Edge treatments are essential for longevity, particularly on exposed edges that encounter daily knocks. Rounded or chamfered edges reduce snags on clothing and bags, contributing to a user-friendly experience in a busy hallway.
Practical design ideas and styling
A well considered shoe cabinet should feel like a natural extension of the hallway, not an afterthought. Here are ideas to enhance usability and aesthetics:
- Include a seating area at a comfortable height for removing and putting on shoes. The seat can be part of the cabinet or a separate module that sits flush with the unit.
- Install a discreet mirror above the cabinet and ensure there is lighting that flatters the space and illuminates the footwear at the point of removal.
- Choose a contrasting colour or natural timber finish to create depth and interest while keeping the façade calm and refined.
- Integrate a narrow LED strip under the seating area to provide gentle illumination for night-time use.
- Incorporate a shallow drawer beneath the seating for daily essentials such as keys, gloves or dog leads.
- Combine closed storage with open shelving for quick access to frequently worn footwear while keeping bulkier items out of sight.
Maintenance and care
Regular maintenance extends the life of a shoe cabinet. Wipe surfaces with a soft, damp cloth and mild detergent as needed. Avoid standing water on timber or plywood edges. Refinish exposed timber surfaces every few years depending on wear, and ensure LDSP surfaces are cleaned with products designed for laminate foils to preserve the decorative layer. Periodically check hardware settings and tighten screws to maintain smooth operation.
Budgeting and procurement
Costs depend on material choice, size, and hardware quality. A modest LDSP cabinet will typically be more economical upfront than a solid timber alternative, but enduring value comes from well sealed edges, durable hardware, and a long-lasting finish. When planning, obtain all components from reputable suppliers and specify exact tolerances for panel thickness, back panels, and runner lengths. If reclaiming timber or reusing offcuts, anticipate extra preparation and sanding time to achieve a uniform result.
Case study and variations
Consider two common configurations that achieve a balanced look in European foyers:
- Open shelf module paired with a slim, tall closed cabinet. This combination allows daily footwear to be accessed quickly while keeping seasonal pairs neatly tucked away behind doors.
- A single, tall closed unit with integrated seating and a shallow top surface suitable for bags and keys. This design creates a uninterrupted vertical line that visually enlarges narrow hallways.
Final thoughts
With thoughtful planning, a shoe cabinet can be both highly functional and an attractive feature of a European entrance. By balancing open and closed elements, selecting moisture-friendly materials, and installing reliable hardware, you can craft a customised solution that stands up to daily use while enriching the hallway’s ambiance. Whether you opt for a restrained minimalist look or a warm timber aesthetic, the right shoe storage arrangement makes transitions from home to street smoother and more enjoyable.
You may also like these articles
 Tips & How-To
Handmade New Year Decor: Budget-Friendly Ideas and Tutorials for European Homes
Budget-friendly DIY festive decor ideas for European homes, with practical tutorials.
 Trends
Interior Trends 2024–2025: A European perspective on finishes, layouts and ambience
A comprehensive guide to 2024–2025 European interior trends
Lighting
Illuminating the European Kitchen: Practical Lighting for Every Zone
Layered kitchen lighting for European homes: zoning, fixtures and energy-saving tips.