
Explore interior trends, AI design insights, styling guides and real transformations
How to Plan and Draw the Wardrobe of Your Dreams
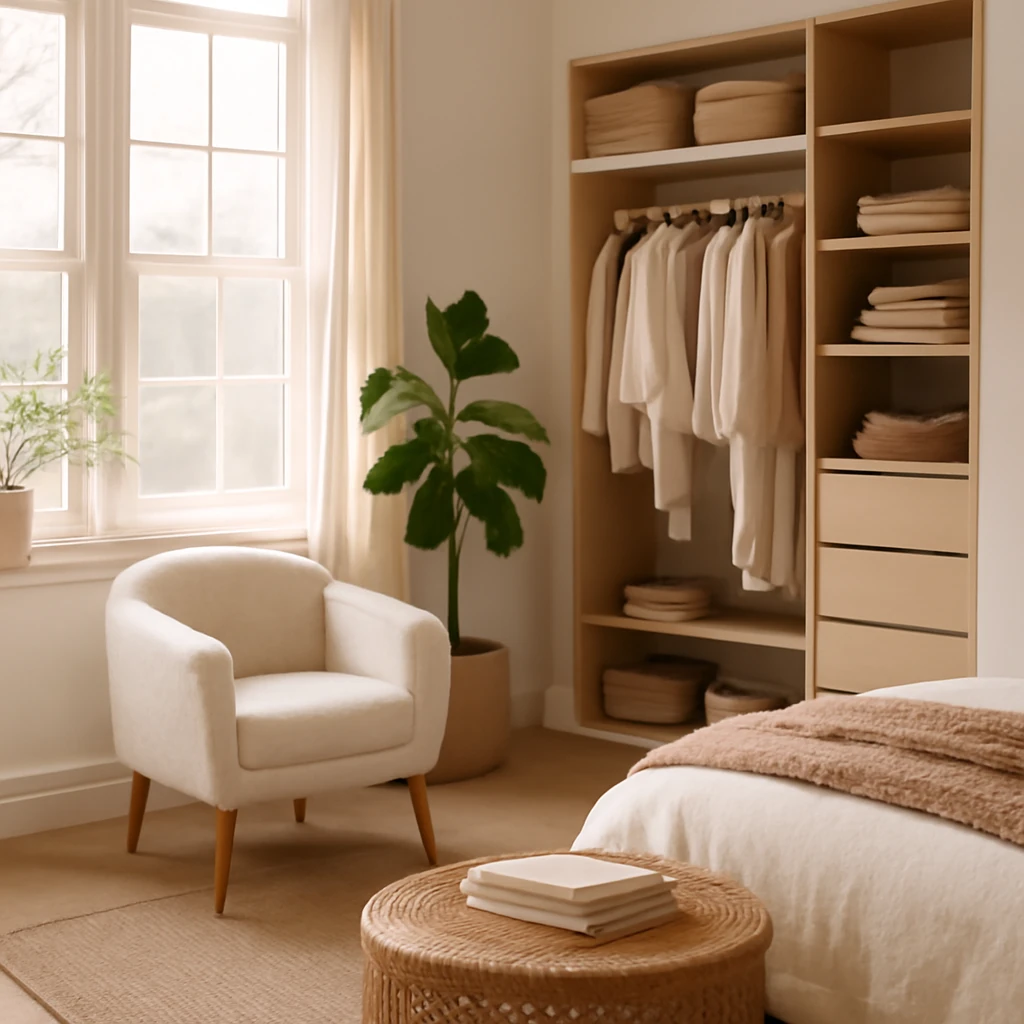
Storage is a perennial challenge in European homes. A well-planned wardrobe not only stores clothing neatly but also speeds up morning routines, reduces clutter and improves daily comfort. This guide translates professional wardrobe planning into practical steps you can apply at home, using standard European dimensions, materials and interfaces. From room layout to door types and interior organisation, these steps help you maximise space without compromising style.
Step 1: Decide where the wardrobe will sit
The placement of a wardrobe shapes its design. In compact flats, a shallow walk-in is less feasible than a tall, built‑in solution along a wall. In larger bedrooms or dressing rooms, you have more freedom to extend the wardrobe across an alcove or to wrap it around a corner. When choosing location, consider current traffic patterns, radiators, switches and electrical sockets, and how you typically get dressed: is the plan to have a dedicated dressing zone or a multi‑purpose storage wall?
Evaluate common European layouts and typical room types:
- Bedroom wardrobes with integrated mirrors and lighting for a personal space.
- Hallway or entrance wardrobes designed to store outerwear, shoes and accessories.
- Dressing-room or walk-in wardrobes that become the central hub for daily clothing management.
- Corner wardrobes that maximise awkward nooks and create a seamless wall finish.
Regardless of location, the objective is to align function with the room’s architecture while preserving a clean, breathable aesthetic. A well‑considered siting reduces the risk of overloading a single wall and helps laundries, radiators or doors operate freely.
Step 2: Decide on the size you actually need
Dreams are important, but interior dimensions govern reality. Start with an honest assessment of how much wardrobe space you require and then refine to viable dimensions. Measure the room’s length, width and height, and take note of floor tolerances, door swings and window clearances. If you are adapting an existing space, consider whether you will remove or reconfigure a non-essential piece of furniture to free wall space.
European homes often feature modular rooms with generous heights but limited depth. A practical rule is to start with standard module widths and then adjust. Common wardrobe modules in Europe are designed around 60 cm widths for single‑door sections, 90 cm for double sections, and 120 cm where more capacity is needed, with heights typically ranging from 180 cm to 240 cm. For deep, attic-like spaces or heritage rooms with sloping ceilings, you may require customised solutions with stepped shelves or mezzanines.
Also consider the overall footprint. A typical built‑in wardrobe with hinged doors may occupy a 60 cm to 70 cm depth, while sliding doors can extend the footprint by around 8–10 cm due to the track hardware. If you’re working with a compact corridor or small bedroom, a shallow, optimised 60 cm depth with thoughtful interior layout can feel surprisingly generous.
Step 3: Sort your clothing into storage zones
Organising by type makes a huge difference to how you will use your wardrobe. Think in terms of what is worn on hangers and what sits on shelves, rather than trying to fit everything into a single space. Start with a realistic inventory of items you actually wear, and then design zones that keep those items visible and accessible.
A practical approach is to create zones for:
- Coats and long outerwear
- Short jackets, shirts and blouses
- Suits and structured dresses
- Casual wear and knitwear
- Skirts and trousers on rails or drawers
- Accessories such as belts, scarves, hats, and ties
- Footwear with dedicated racks or shelves
- Seasonal items and bulky textiles (duvets, pillows)
To make this concrete, you could mirror a simple tally like: sweaters 5–8, casual tees 15–25, formal wear 10–15 pieces, dresses 15–25. Your own numbers will vary, but the principle remains: clear categorisation leads to efficient space use and easier daily routines.
Step 4: Decide on storage methods and features
Thoughtful storage is the secret to a happy wardrobe. Consider the following elements and how they align with your needs:
- Hanging space: allocate sections for long garments (dresses, coats) and shorter items (shirts, jackets).
- Shelving for folded items: adjustable shelves provide flexibility as your wardrobe changes.
- Drawers and pull-out baskets: ideal for underwear, socks, and accessories, consider shallow drawers (12–20 cm) for quick access.
- Shoe storage: dedicated shelves or racks that accommodate different footwear heights and volumes.
- Accessory organisers: tie and belt racks, scarf folds, and jewellery trays kept in pull-out drawers or organiser inserts.
- Overhead storage: shallow, high compartments for seasonal items or suitcases, ensure there is safe access (ladder or step stool if needed).
- Ventilation considerations: avoid airtight enclosures or use breathable fabrics to reduce odours and mould risk in damp climates.
In European interiors, modular systems offer elegant solutions: you can mix fixed elements with adjustable shelves, rail heights, and pull-out components to suit changing storage needs. When selecting finishes, consider materials that cope with humidity and temperature variation, particularly in coastal or continental climates.
Step 5: Plan compartment sizes with ergonomics in mind
Ergonomics determine how much you actually reach and use every day. A well-proportioned wardrobe minimises bending and stretching. A few practical guidelines help you design compartments that feel intuitive:
- Hang rails for dresses and coats at roughly 2 metres high, this leaves ample lower space for shorter items and helps avoid overreaching.
- Position frequently used items at mid-height (about 1.0–1.2 metres) for easy access without bending.
- Allow clear space above the rail to retrieve garments without knocking hangers.
- Ensure a comfortable aisle width in front of the wardrobe, 60–80 cm is a practical minimum in most bedrooms, with 90 cm offering more comfortable circulation in larger spaces.
- Set shelf heights to accommodate common items: 25–30 cm for folded tops, 30–40 cm for trousers and folded trousers, 17–20 cm for standard shoes on lower shelves, and up to 50 cm for tall boots.
Use this step as the foundation for your interior map. A miscalculation here can lead to a wardrobe that looks generous but feels cramped in daily use.
Step 6: Measure your clothes accurately
Precise measurement of your garments ensures you allocate sufficient vertical and horizontal space. Focus on the longest items (dresses, coats, ball gowns) and the average width of items on rails. A few practical measurements to collect:
- Longest garment length (from shoulder to hem) for rail planning
- Coat and dress rail heights, typically around 1.9–2.0 metres for long garments
- Width per item as worn on a rail (estimate 2–5 cm per item depending on garment type)
- Number of items by category (e.g., dresses, suits, knitwear, casual wear)
For example, if a wardrobe will hold ten dresses on a rail and each dress requires about 3–4 cm of rail, you’ll need 30–40 cm of rail length solely for long garments, plus extra for air gap and retrieval. Do not forget space for accessories and folded items in the same zone.
Step 7: Start drawing your plan
Now translate numbers into a drawing. A simple plan helps you visualise the interior and refine decisions before committing to a build. Use a scale drawing (for example, 1:50 on graph paper) or a digital layout tool to sketch wall lengths, door clearances, and internal divisions. Consider these standard references as you sketch:
- Standard wardrobe depth with hinged doors: about 60 cm.
- Wardrobe depth with sliding doors: approximately 60 cm, but hardware can add 8–10 cm footprint on the wall side.
- Space above the hanging rail: keep at least 5–6 cm for comfortable access of clothes on hangers.
- Low shoe shelf height: typically 17–20 cm if shoes sit flat, tall boots may require up to 50 cm clearance.
- Use multiple rails or a double-hang arrangement to double hanging capacity in the same height.
As you draft, test different configurations: one tall section for coats, a medium section for shirts and trousers, and a shallow top area for seasonal items. A small, documented plan helps you refine proportions before installation and may save time and costs later.
Step 8: Decide on the configuration and integration
European homes vary widely in architectural style, from contemporary to more traditional interiors. Wardrobes can be fully built‑in, semi‑built‑in, or freestanding with teamed panels. Consider these options:
- Built‑in wardrobes: integrate seamlessly into walls, often providing a continuous surface and clean lines. Ideal for rooms with limited depth or awkward corners and for achieving a flat ceiling line.
- Walk‑in wardrobes: offer maximum accessibility and visibility but require more space and careful air flow to prevent dampness and odour.
- Modular systems: flexible, adjustable and scalable. Great for evolving storage needs and for rental properties where renovations are restricted.
- Freestanding wardrobes: portable and adaptable, useful for temporary solutions or when you want to swap finishes easily.
Whichever configuration you pick, plan for future changes: a growing family, evolving fashion tastes or seasonal storage requirements. Properly engineered, a modular or built‑in system can be adapted without rebuilds.
Step 9: Doors, hardware and finishes
The choice of doors affects both aesthetics and usability. Consider:
- Hinged doors: traditional and often the most straightforward to install, require a wall clearance equal to the door width when opened.
- Sliding doors: save floor space and create a sleek, contemporary look, require uninterrupted wall length and precise track alignment.
- Soft‑close mechanisms to prevent slamming and to protect items on shelves.
- Integrated handles or flush surfaces for a clean silhouette.
- Internal hardware: tidy rails, pull-out baskets, and dividers that stay aligned and easy to use.
Finishes should respond to the room’s climate and use. Durable melamine or laminate boards are practical in busy homes, wood veneer or solid wood adds warmth. For damp environments or coastal climates, select moisture‑resistant substrates and low‑emission finishes to maintain air quality.
Step 10: Lighting and accessibility
Lighting inside the wardrobe dramatically improves usability and reduces the time spent searching for items. Consider:
- LED strip lighting along shelves or hidden profiles for even illumination, warm white light (2700–3000K) creates a flattering, cosy mood.
- Motion sensors that switch lights on as you approach, conserving energy.
- Consider a mirror panel or door with a reflective surface to visually expand the space, while ensuring the mirror is properly mounted and treated to avoid humidity damage.
For energy efficiency, pair LED lighting with motion sensors and timers, especially in smaller flats where every watt matters.
Step 11: Materials, finishes and sustainability
European interiors increasingly prioritise sustainability and low emissions. When selecting materials, consider:
- Durable, low‑cost options such as melamine faced boards or high‑quality plywood for structural parts.
- Real wood or wood veneer for warmth, balanced with a durable finish to resist wear.
- Moisture‑resistant boards in humid climates (e.g., coastal cities) to prevent warping and mould.
- Low‑emission adhesives and finishes (often labelled E0 or E1) to improve indoor air quality.
- Rot-proof hardware and hardware finishes that resist corrosion in humid environments.
Reasonably priced European suppliers offer a spectrum of finishes with varying levels of durability. Choose finishes that align with your lifestyle and maintenance capacity.
Step 12: Budgeting and procurement planning
Budgeting a wardrobe project requires forecasting both materials and labour. Key considerations:
- Define a priority list: essential built‑in storage first, with optional extras added later if budget allows.
- Opt for modular systems when possible, they can be expanded or reconfigured without major renovations.
- Include allowances for hardware (rails, runners, soft‑close mechanisms) and interior fittings (drawers, baskets, dividers).
- Account for installation labour, possible carpentry modifications, and delivery times. In many European cities, skilled fitters are well available for modular systems and custom builds.
- Contingency of 5–10% for unexpected adjustments during installation.
With careful budgeting, you can achieve a wardrobe that is both highly functional and aesthetically coherent with the rest of the room - without compromising other design goals.
Step 13: Implementation and timeline
A realistic timeline helps coordinate measurements, fabrication, and installation. A typical sequence might be:
- Detailed measurements and confirmation of the plan with the client or household.
- Finalised drawings and material selections approved by the client.
- Fabrication of components, often off‑site for efficiency and to reserve workshop space.
- Delivery to site and preparation of the installation area.
- On‑site installation of carcasses and doors, followed by interior fittings (rails, shelves, drawers, baskets).
- Fine adjustments: door alignment, rail heights, and soft‑close calibration.
- Final cleaning and handover, with a compact guide to maintenance and care.
Timeframes vary by project scope and workshop capacity, but allow for a few weeks from plan finalisation to completion for a high‑quality built‑in wardrobe in most European homes.
Step 14: Maintenance, adaptability and longevity
A wardrobe should age gracefully. Plan for adaptability as fashions and needs evolve. Practical maintenance tips include:
- Periodically re‑ evaluate the distribution of items, swap seasonal storage to keep the most-used pieces in the most accessible zones.
- Regularly check hinges, runners and soft‑close mechanisms, lubricate rails and tighten screws if doors become loose.
- Reorganise drawers and baskets to maintain order and visibility of contents.
- Ensure there is adequate ventilation behind built‑in wardrobes to prevent moisture build‑up, particularly in damp or humid interiors.
A flexible system with adjustable shelves and removable dividers will serve you well as life changes - whether you accumulate more formalwear or need to store larger suitcases and equipment.
Step 15: Quick design checklist
- Measure the room carefully, noting doors, radiators and light sources.
- Identify how many zones you need: hanging, folded, footwear, accessories, seasonal storage.
- Decide on a configuration: built‑in, walk‑in, modular, or freestanding.
- Choose door type (hinged or sliding) and hardware (soft close, integrated handles).
- Plan interior details: rails heights, shelf spacing, drawer depths, and pull‑out baskets.
- Estimate lighting requirements and add appropriate internal illumination.
- Select materials and finishes suited to climate, use and maintenance.
- Set a realistic budget with a phased approach if needed.
- Prepare a project timeline and involve qualified installers where necessary.
- Establish a maintenance plan to keep the wardrobe functional and tidy for years to come.
By following these steps, you can create a devoted wardrobe that is both practical and elegant, tailored to European living spaces, and capable of evolving with your needs. The most successful designs balance thoughtful proportions, clever internal organisation and high‑quality finishes that stand the test of time.
You may also like these articles
 Bathroom Design
Designing a Shower for Small European Bathrooms: Tiles or Trays?
Practical strategies for fitting a stylish, water-efficient shower in compact European bathrooms.
Interior Design
Baroque Interiors for Modern Europe: Luxury, Restraint and Statement Details
A refined guide to infusing Baroque drama into contemporary European homes.
Tips & How-To
Eight online planners to design a European home in 3D
Plan, visualise and budget your European home with eight accessible online planners.