
Explore interior trends, AI design insights, styling guides and real transformations
Crafting a Personal Christmas: 13 Handmade Ornaments for a European Tree
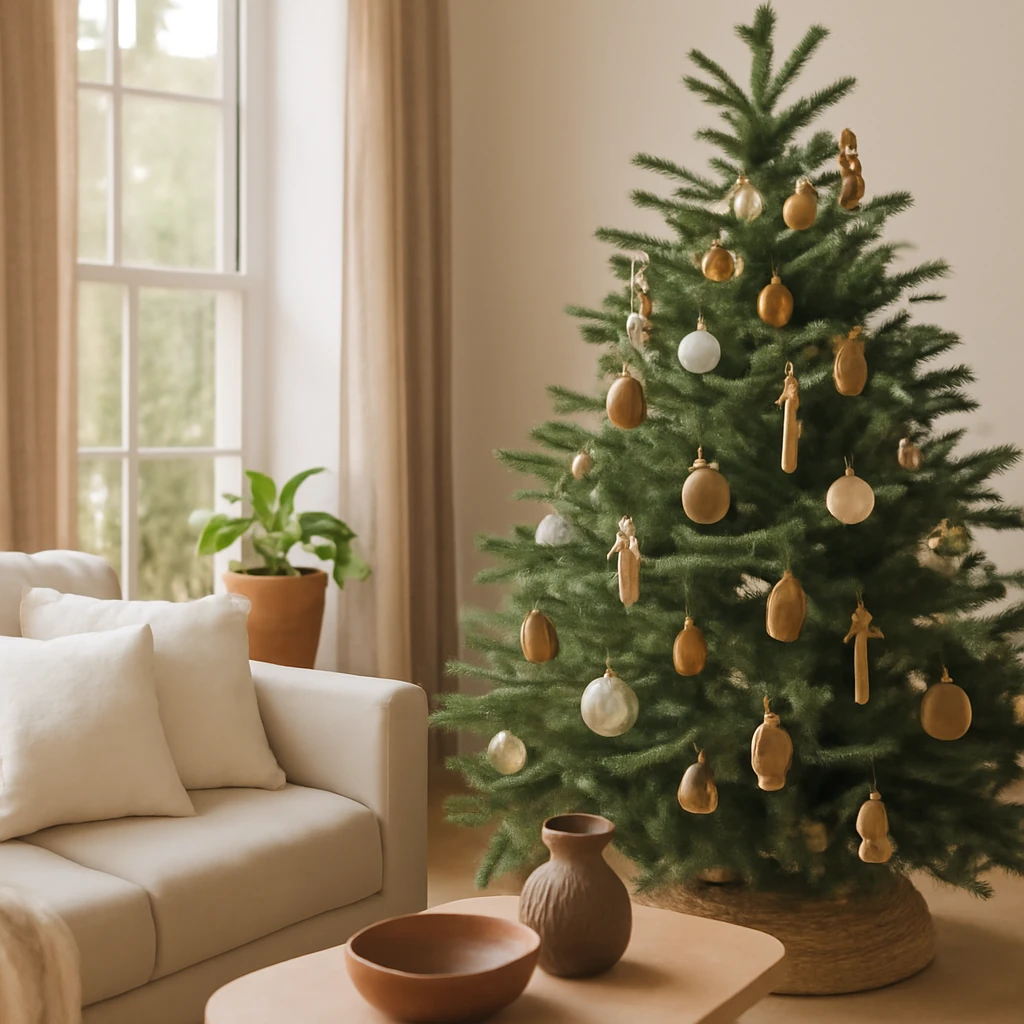
Introduction: handmade decorations for European homes
In many European households, the Christmas tree is the centre of festive life. Handmade decorations bring warmth, character and a sense of sustainable living that mass-produced trimmings often struggle to match. This guide presents 13 accessible ideas for crafting your own Christmas tree ornaments, drawing on materials you can find at home or from local suppliers. The aims are style, longevity and a touch of personalised charm that turns a tree into a narrative of family and home life.
Why make your own decorations?
Choosing handmade decorations is not merely a budget-friendly exercise. It is about memory, craft, and a slower pace during the hectic holiday season. When you create ornaments together with friends or family, the process becomes part of the festive ritual, and the results are inherently unique. Handmade pieces often showcase texture and finish in a way that store-bought items cannot, helping a European interior feel considered, warm and true to its space.
To ensure your decorations harmonise with a modern European interior, think in terms of palette, scale and finish. Neutral bases with small bursts of colour can work beautifully in minimalist, Nordic, or contemporary urban schemes, while natural textures - wood, wool, cork, paper - bring tactility and depth. The following ideas are designed to be practical, long-lasting and adaptable to a range of styles: from cottagecore nostalgia to contemporary, clean-lined homes.
13 ideas for handmade decorations
Each idea includes a practical approach, typical materials you might already have, and simple steps to realize a polished result. Where possible, measurements are given in centimetres to help with planning and scale.
1. From ready-made decorations (upcycling bases)
A straightforward way to create something individual is to start with a plain, solid-colour ornament and personalise it with additional materials. Use a simple hollow plastic or polystyrene ball as a base, then embellish with beads, sequins, feathers, glitter or decorative papers. If you enjoy drawing, add a delicate hand-painted motif or glue on small felt shapes to form an animal, gesture or seasonal figure. Once finished, seal with a clear lacquer or varnish and attach a loop of ribbon (about 6–8 cm) for hanging.
- Choose a plain bauble (diameter 4–6 cm is versatile for most trees).
- Arrange embellishments by colour and texture before gluing.
- Use a non-dulling adhesive suitable for the materials (hot glue or PVA depending on the base).
- Seal the surface and affix a hanging loop.
2. From buttons
Button crafts are ideal for bringing colour and whimsy to the tree. Create a conical ornament by stacking buttons of varying sizes onto a foam or wooden cone (about 6–8 cm tall). Plan the layout to avoid gaps, and arrange by colour gradients for a cohesive look. A tiny stitched or glued loop at the top makes hanging easy. Consider a small circular wreath made from buttons arranged by shade on a cardboard disc (about 8 cm in diameter) for a playful alternative.
- Base: foam ball or wooden cone (diameter/height about 6 cm).
- Glue buttons from largest to smallest, following a colour sequence.
- Finish with a clear sealant and a ribbon loop (6–7 cm).
3. From sequins
Sequins offer a refined, festive sparkle. Use a pre-made ornament or a round base (5–7 cm) and cover with sequins in a dense grid, or craft a silhouette - such as a star or animal - by outlining the shape and filling it with sequins. For a smoother finish, apply a thin layer of mod podge or clear glue beneath the sequins and let it dry completely. Finish with a small metal or ribbon hanger.
- Choose base shape and shape size (5–7 cm diameter ball works well).
- Plan sequin arrangement by colour or pattern.
- Adhere sequins with a flexible glue, seal once dry.
4. From paper
Paper is versatile and forgiving. Create folded or layered shapes such as stars, lanterns or baubles by wrapping or folding decorative paper around a light core. For a contemporary look, use kraft or coloured paper, for a festive feel, pair with metallics. You can even make tiny lanterns by crafting nested paper shapes and threading them with a fine ribbon.
- Cut decorative paper into circles or stars (diameter around 6–8 cm for a classic bauble).
- Adhere around a lightweight core or fold into a structural form.
- Attach a hanging loop and finish with a light spray of sealant if needed.
5. From cardboard
Cardboard is robust and readily available. Cut stars, hollow spheres or geometric shapes and join them by folding or gluing. Round edges and secure joints by using two mirrored pieces, then bond with clear glue. Finish with paint, coloured pencils or metallic lacquer. For a more tactile result, use a water-based varnish that enhances the cardboard’s natural texture.
- Cut shapes from sturdy cardboard (5–7 cm wide for baubles, larger for statement pieces).
- Fold or join two pieces back-to-back for a sturdy, dimensional ornament.
- Paint or decorate and add a thread for hanging.
6. From toilet or kitchen roll tubes (cardboard tubes)
Cardboard tubes can yield charming lanterns, windows, or miniature characters. For lanterns, cut the tube into discs, stack and glue into a sphere or tower, then decorate with paint, glitter, and fine beads. For figures, flatten and sculpt shapes from the tube pieces, then join with glue and embellish with felt and fabric scraps. A cute house or animal motif can be built from layers of tube sections with a small slot to insert a string hanger.
- Cut discs or shapes from a tube (about 5–8 cm wide).
- Stack, glue and decorate, allow to dry fully.
- Attach a ribbon or string for hanging.
7. From pine cones
Pine cones offer a natural, textured aesthetic that suits rustic and Nordic schemes. Clean gently, brush with white acrylic or soft metallic paint, or leave natural for a minimalist look. Add a thin ribbon or twine through the top and seal with a light varnish to preserve the finish. They can be grouped in threes or strung together for a natural garland.
- Choose cones around 5–9 cm in length.
- Decorate with a subtle wash of paint or glitter if desired.
- Attach a loop of twine at the top for hanging, finish with a clear sealant.
8. From wooden clothes pegs
Wooden pegs, stripped and repurposed, yield charming, sculptural ornaments. Paint them white or a favourite colour, then glue together in pairs or clusters to create stars, trees or mini animals. Their natural timber grain adds warmth, keep the finish subtle for a sophisticated look, or go bold with bright acrylics for a playful scene.
- Split pegs into components and paint as desired.
- Assemble into shapes with wood glue, clamp until set.
- Seal lightly and add a hanging loop.
9. From bottles
Repurposed bottles - glass or sturdy plastic - make striking ornaments when cut and decorated. For safety, use bottles with wide necks and long, slender forms for elegant silhouettes. Cut and sand edges as needed, then decorate with decorative paper, paint, and beads. Assemble small scenes such as animals or houses by combining bottle segments with cardboard cutouts and a supported base. Always use appropriate tools and protective gear when cutting plastics or glass.
- Choose a bottle with a stable base and a visible neck for hanging.
- Cut or shape the body into decorative forms, sand edges smooth.
- Paint, cover with paper or fabric and add a hanging loop.
10. From cotton wool
Cotton wool creates soft, cloud-like ornaments that offer a cosy, tactile feel. Build a structure from a lightweight core (such as papier-mâché or a small foam ball), then cover with small cotton clumps, shaping into animals, snowmen, or abstract spheres. When complete, paint details with water-based colours and seal with a clear finish to protect the fibres.
- Prepare a small core (about 4–6 cm in diameter).
- Apply cotton balls in layers to shape the ornament.
- Finish with paint details and a protective sealant.
11. From wooden or cork bottle caps
Bottle caps offer a compact, durable base for decorative miniatures. Clean and, if desired, glue two caps together to create a dimensional sphere or star, then cover with coloured papers, tissue, beads or tiny fabrics. A common approach is to paint the caps and glue tiny figural pieces to the surface, finishing with a small ribbon hash for hanging.
- Collect caps and prepare by washing and drying thoroughly.
- Decorate with paint, papers or beads, assemble as desired.
- Attach a string or ribbon to hang.
12. From threads and string
Thread-based ornaments create a delicate, airy aesthetic. Wind yarn or embroidery floss around a hollow glass bauble or inflate a small balloon to the desired size and wrap with thread, applying a generous coat of PVA glue to fix the threads. Once dry, deflate the balloon or remove the core to leave a netted skein that holds its shape. Paint or gild the thread for drama, and attach a hanger.
- Choose a bauble or create a hollow form with a balloon as a core.
- Wrap with thick thread or yarn, ensuring an even coverage.
- Allow to dry completely, remove the core and finish with a ribbon hanger.
13. From pasta
Unlikely as it may seem, dried pasta can yield sophisticated ornaments when assembled thoughtfully. Create star or snowflake shapes by gluing pieces to form a silhouette, then prime and paint in metallic tones for a chic look. Seal with a clear varnish to prevent discolouration, and thread with a fine ribbon for hanging.
- Choose pasta shapes that mimic star or snowflake silhouettes.
- Glue pieces into a pattern on a lightweight backing (cardboard works well).
- Paint and seal, add a hanging ribbon once dry.
Finishing touches for a cohesive European look
With 13 different ideas, there is a risk of the tree appearing busy. Here are strategies to achieve a cohesive, stylish result:
- Limit the colour palette. Choose two or three colours that complement your tree and room, and apply them consistently across all ornaments.
- Mix textures thoughtfully. Pair smooth glass or plastic with natural materials such as wood, wool, and paper for depth.
- Consider scale. Use a few larger pieces (8–12 cm) as focal points and fill gaps with smaller decorations (5–7 cm).
- Store with care. After the season, flatten or detain ornaments that are not rigid, and wrap fragile items in tissue to arrive ready for next year.
Sourcing and sustainability for European homes
DIY decorations thrive when sustainability is part of the design brief. Local workshops, craft markets and online communities across Europe offer a wealth of materials and inspiration. When planning projects, consider:
- Use reusable bases wherever possible, such as hollow plastic spheres or wooden forms that can be decorated year after year.
- Choose non-toxic paints and glues, especially for children or for homes with sensitive occupants.
- Repurpose packaging from gifts or household items - think cardboard tubes, paper scraps and fabric remnants - to minimise waste.
- Opt for natural finishes that age gracefully, such as beeswax, oil or water-based varnish, which also help preserve textures and colours.
Storage and care: keeping handmade decorations in good shape
Proper storage is essential to prolong the life of delicate pieces. Store ornaments in individual tissue-lined boxes or labelled compartments to avoid chipping and deformation. For fabric or wool pieces, keep them in a dry, cool place away from moisture. A simple tips sheet for family use can help keep the process enjoyable rather than a chore year after year.
Design directions for different tree styles
Whether you favour a minimal Nordic aesthetic, a warm cottage ambiance or a bold contemporary statement, handmade decorations can align with your chosen style:
- Nordic minimal: Pick natural textures, white and pale wood tones, limit colour to a single accent to maintain calm.
- Cottagecore: Embrace botanicals, soft florals, lace details and imperfect shapes that feel handmade and comforting.
- Contemporary eclectic: Combine geometric cardboard shapes with metallic accents and translucent papers for a futuristic-but-warm look.
In practice, plan the tree as a project in its own right. Sketch a rough palette and a few favourite shapes before you start cutting, printing or painting. This will help you stay focused and avoid over-cluttered results.
Conclusion: a season that shines with your own craft
DIY Christmas tree decorations offer more than cost savings or a decorative effect. They invite you to slow down, connect with others and add a piece of personal history to your home. The ideas above are deliberately adaptable to European homes of all sizes, from compact city apartments to larger houses, and across a range of interior styles. By combining simple techniques with mindful material choices, you can create a festive tree that truly reflects your taste and values - timeless, personal and wonderfully festive.
You may also like these articles
 Small Spaces
Welcoming Entrances: Designing a Practical and Stylish European Hallway
A guide to stylish, space-saving hallways across European homes.
Living room
How to style the wall behind your television: 13 fresh and practical solutions
13 practical ideas to style the wall behind your TV in European living rooms.
Tips & How-To
Minimalist Interiors: A Practical Guide to Calm, Functional European Homes
A practical guide to calm, functional minimalist homes across Europe.